Sunday, January 31, 2010

Baked Rigatoni with Eggplant and Chicken Sausage


I've been sitting on this recipe for a while.  When I was in Detroit for Thanksgiving, I went on a Food Network-watching binge.  Amidst all the recipes for stuffing and green bean casserole, Tyler Florence’s baked rigatoni with eggplant was a refreshing change of pace.  I am not exactly a huge fan of Florence’s show.  First of all, the title, “Tyler’s Ultimate,” is a little presumptuous.  Who can really claim to be the authority on the ultimate?  And the presumption doesn’t stop there: he introduces every recipe as the “ultimate [insert food here].”  My favorite is the episode where he makes the “ultimate barbecued ribs,” yet his recipe requires neither a grill, nor a smoker.  As far as I’m concerned, at least one of those cooking methods is requisite to “barbecue” ribs.  Also, someone should inform Tyler of the fact that he compulsively says, “boom” after every thing he does in the kitchen. 

Now that the Tyler-bashing is out of my system, I will admit that he does sometimes prepare some rather appealing recipes.  Perhaps I seem to be backpedaling, but please note that said I’m not a huge fan of the show.  The recipes may be a different story, and, for the right recipe, I can handle verbal ticks, and cocky attitudes.  This eggplant rigatoni is just such a recipe.  It consists of soft eggplant, homemade tomato sauce, chunks of chicken sausage, and rigatoni.  As if those luscious ingredients weren’t enough to make your eyes bulge, it’s all glued together by melty, stringy cubes of mozzarella cheese. And if you have never made your own tomato sauce, consider this your golden opportunity.  The ingredients for tomato sauce are inexpensive, the process is satisfying, and your heart will brim over with pride when you taste it.  This recipe will mess up a multiple pots and pans, but it’s worth it.  Don’t worry:  the time the pasta spends snuggling in the oven is more than enough to tackle those dishes.    
I’m sure you’re asking: “Why? Why would an alleged psycho cooker wait over two months to cook and post about something so wonderful?”  Well, the truth is I actually made it during finals, but I did not have the time to write it up.  Before you get any angrier with me, I must tell you there is an upside to my delayed posting: I have now made this twice.  While the first batch was lovely, the second batch was undoubtedly of a higher caliber.  The version below has the perfect ratio of sauce-to-pasta, and it’s heavy on the sausage and the eggplant, making it virtually a one-pot meal (of course, an extra green vegetable won’t hurt anyone). Eggplant rigatoni: make it; love it.
Eggplant Rigatoni  (adapted from Tyler Florence’s recipe)

Olive oil (plenty of it)
¾ of a pound of raw chicken sausage (about 3 links)
1 onion, diced
2 garlic cloves, minced
1-28 oz. can whole tomatoes including juices, squashed with your hands
2 bay leafs
½ teaspoon crushed red pepper flakes (optional)
Salt and pepper, to taste
¼ cup chopped parsley
1 large eggplant (about 1¼ to 1½ pound), one-inch dice
¾ pound rigatoni
½ pound mozzarella, small dice (10 minutes in the freezer will make chopping easier)
½ cup freshly grated Parmesan cheese

·      Put a large pot of water on to boil for the pasta, and preheat the oven to 400 degrees.
·      In another pan, heat a drizzle of olive oil in and heat over medium-high to high heat until the pan is very hot.  Add sausages and allow to brown on all sides, 4-5 minutes per side.  They do not have to be cooked through completely because they will finish cooking in the oven. 
·      Remove sausages and set aside.  Reduce heat to medium and add onions and garlic to the same pan (the moisture from the onion will pick up any brown bits from the sausage).  Season with salt, and pepper, and allow to cook for 8-10 minutes, until onion is soft and translucent.
·      Add tomatoes, bay leafs and hot pepper flakes.  Reduce heat to a simmer, and allow sauce to simmer for at least 15-20 minutes.
·      In a large wide pan, heat 3 or 4 tablespoons of olive oil over medium-high heat.  Add eggplant.  If it doesn’t fit in a single layer, cook it in batches.  Allow to brown for 7-8 minutes, but it doesn’t have to be completely cooked through because it will cook more in the oven.  Once it is browned, season with salt and pepper.
·      Meanwhile, cook rigatoni in boiling water, but take it out a couple of minutes before it is completely cooked through.  Reserve ½ - 1 cup cooking water before draining.
·      Chop sausages into chunks.  Then combine pasta, eggplant, sauce, sausage, parsley, and mozzarella.  Add pasta cooking water if the pasta looks dry, a couple tablespoons at a time until it reaches the desired consistency.  Transfer to a 9x13 inch baking dish, and top with Parmesan.  Bake for 25-30 minutes until bubbly and golden.

Monday, January 25, 2010

Chicken Tagine with Fennel and Olives


If you are a loyal reader (which, of course, you are), you may remember a slightly disastrous encounter with a recipe for chicken sausage with fennel and lentils.  The purpose of that recipe was to experiment with fennel, and the results were boring, and lacking asthetic appeal.  However, in January’s issue of Bon Appetit, I found the answer to my fennel prayers: a chicken tagine with fennel and olives (a tagine is essentially a North African style of braising.  For more information, see my glossary).  Honestly, the title alone had me weak in the knees, and further investigation validated my initial sentiments.  This recipe has some of my favorite ingredients, which happen to be a perfect counterpoint to the fragrant, sweet fennel. What could better balance its anise flavor than salty, briny, meaty, green olives?  The remaining ingredients only augmented my high expectations, and rightfully so: cumin, paprika, lemon, and cilantro.  And all of those delicious elements come together in a lush sauce that pairs perfectly with couscous.   

In addition to the enticing recipe, Bon Appetit provided me with an entire article on fennel, exposing me to all sorts of coveted fennel facts.  For example, fennel is currently in-season.  As if this perfect recipe isn’t enough of a reason to run out to your nearest fennel provider, the “in-season” factor should give you added incentive.  Fennel also happens to be a heavyweight when it comes to nutrition.  I found this surprising:  usually we associate brightly colored vegetables with high nutritional value.  But, apparently, the perfectly pale fennel bulb is packed with fiber, potassium, and vitamin C, amongst other anti-oxidants.  Additionally, anethole, the substance accountable for fennel’s distinctive licoricy flavor, has anti-inflammatory properties, and who couldn’t use that?
Chicken Tagine with Fennel and Olives (adapted from Bon Appetit’s recipe)

1 ½ pounds boneless, skinless chicken thighs
1 tablespoon olive oil
2 medium-sized fennel bulbs, halved, cored, and cut into thin slices
2 teaspoons cumin
½ teaspoon paprika
½ teaspoon hot pepper flakes
Kosher salt and freshly ground pepper to taste
Juice of one lemon, divided
2 cup reduced sodium chicken stock
Salt and pepper, to taste
½ cup coarsely chopped green olives, packed in brine
½ cup chopped cilantro, plus extra for garnish

§  Heat olive oil over medium-high to high heat for 2-3 minutes, or until very hot.  Place chicken thighs in pan.  If the pan is hot enough, this should be very noisy.  Leave undisturbed for about 5 minutes, or until nicely brown.  Flip and cook on other side for 2-3 minutes.
§  Remove chicken from pan and set aside.  Remove excess fat from pan, leaving about 2 tablespoons (this can be done carefully with a paper towel)
§  Add fennel to the pan, allow to cook for about 5 minutes, or until it starts to brown.
§  Add chicken back to the pan.  Add stock, half of lemon juice, spices, and salt/pepper.  Stir to combine.
§  Bring mixture to a boil, and then reduce to a simmer, and cover.  Cook for 15-20 minutes, or until chicken in cooked through.
§  Add olives, and increase heat to allow sauce to reduce for about 5 minutes.
§  Add remaining lemon juice and cilantro.  Serve chicken, fennel, and sauce over couscous and garnish with extra cilantro.
Comments:  I had dangerously high expectations for this recipe, and it somehow managed to exceed them.  The above recipe includes a few minor revisions, compared to the original, and I wouldn’t alter this preparation for anything.  This dish is perfectly balanced.  For those of you who are weary of fennel’s strong anise flair, braising it in this fashion manages to mellow, but not drown out, the flavors.  The cumin lends a touch of smokiness; the hot pepper flakes add a little kick; the lemon brings its usual bright acidity; and the cilantro is an appropriate accompaniment, and not the least bit overpowering, as it sometimes can be.  The original recipe actually calls for a full cup of it, but I added only a half-cup, and it was still enough to make a difference in the flavor, but not so much that it becomes the only flavor.  Even after eating for multiple days in a row, I was mournful over the final serving.  If you are looking for something delicious, but a little unexpected for dinner, chicken tagine with fennel and olives will cure you of this craving.   

Tuesday, January 19, 2010

Shrimp Scampi


Shrimp scampi is quite deceptive.  It sounds decadent, luxurious, and potentially difficult to make. You can serve this meal to anyone, and they will most likely be impressed, and feel sort of spoiled.  In truth, shrimp scampi is what I like to call an “affordable luxury.”  It is actually entirely affordable, and can be ready in less than thirty minutes.  When I was in college, I referred to shrimp scampi as “my go-to meal.”  By this I mean that, with a little thought, I generally had all of the necessary ingredients, so even when I was super busy, I could whip it up after a long day, and be perfectly content.  While my definition of “super busy” has certainly changed since my college days, this meal will satisfy, regardless.  Unfortunately, I forgot about this gem of a recipe until a couple of weeks ago.  Apparently, I missed it thoroughly, because I have made it three times since the shrimp graced my freezer.  

Frozen, raw shrimp are the key to the convenience and ease of my shrimp scampi recipe.  They usually come in one-pound bags, which is perfect for four portions.  Not only is this an easy item to stash in the freezer, but it is the most expensive ingredient, and it will cost you less than 10 dollars (i.e. less than $2.50 a plate).  In addition to the shrimp, you need pasta, garlic, a lemon, and some parsley.  Despite my warped perspective on parsley, I can say with confidence that it is mandatory in this dish.  Without it, you are eating a big plate of blonde.  Besides the crucial color element, parsley is used as an ingredient, not as a garnish.  It’s freshness and brightness round out the flavor of the whole dish.  Plus, where I shop, a bunch of flat leaf parsley costs fifty cents, so you have no excuse not to use it.  And the flavor of this dish is truly perfect.  Granted, shrimp scampi basically consists of all of my favorite ingredients on one plate, but I am yet to meet someone who doesn’t love it.  Lemon and garlic were practically made for each other, and the flavor of the shrimp infuses the whole sauce.  Even if you were feeling very generous and gave all of your shrimp to your friend, and only ate the pasta, you would still notice a distinct difference in flavor between this and lemon-garlic-parsley pasta, which, of course, I have nothing against.  However, the presence of the shrimp elevates it to entirely different place.

The following recipe is for one portion, and it can be easily doubled, tripled, etc.  Also, it must be noted that this recipe is fairly spicy, and lemony, and depending on your tastes, you may want to tone it down.
Shrimp Scampi

¼ lb. of frozen, raw shrimp
2 tablespoons of extra virgin olive oil  
1 garlic clove, minced
½ teaspoon hot pepper flakes
Zest and juice of half a lemon
Kosher salt and freshly ground black pepper to taste
¼ pound of linguine pasta (of course the type of pasta is up to you, but I ALWAYS use linguine here.  But it also happens to be my favorite long pasta)
¼ cup chopped fresh flat leaf parsley
Freshly grated Parmesan cheese (optional and controversial)

§  Allow frozen shrimp to sit in a large bowl of cold, but not frigid, water, for 5-10 minutes, or until thawed.  Remove shells and tails, and devein, if necessary.  Pat dry.  Meanwhile, put a pot of water on to boil for the pasta.
§  Preheat olive oil in a large skillet over medium-high heat for 2-3 minutes, or until hot.  Add pasta to boiling water.
§  When the skillet is hot, add garlic and hot pepper flakes, and sauté for 30 seconds or until garlic is fragrant.
§  Add the shrimp to the pan.  Season liberally with salt and pepper.  Sprinkle with lemon zest (it’s easiest just to zest the lemon directly into the pan).  When they start to curl and look pink on the bottom edges (about 3 minutes), flip the shrimp, and allow them to continue to cook.
§  The shrimp are done when they are pink and the sides look opaque, not translucent (underdone shrimp are just as bad as overdone).
§  When the pasta and shrimp are done, add the lemon juice to the pan, and then the pasta.  Reserve ½ to 1 cup pasta cooking water.  Toss the pasta with the shrimp and parsley.  Taste for seasoning, and add salt and pepper if necessary.  If the pasta seems dry, add pasta water (a couple tablespoons at a time) until you reach the desired consistency.  An extra drizzle of olive oil is also nice. 
§  Plate the pasta and shrimp, top with Parmesan, if desired, and enjoy!

§  Note: at high altitudes, the shrimp and the pasta will take about the same amount of time to cook.  At sea level, the shrimp will usually be done faster, but it all depends on how high your heat is.  If the shrimp are done before the pasta, remove the pan from the heat until the pasta is ready.  If the pasta is done, and the shrimp are mostly cooked, add the pasta to the pan, and kept the heat on low.  The heat of the pasta will help them finish cooking. 
Comments:  I think it’s fairly clear that I love this, and you will, too.  I also love to shower it in feathery shavings of Parmesan cheese.  This is fairly controversial:  Italian cooking lore states that cheese and seafood do not pair well.  I disagree.  This does not mean that I will be melting cheddar on Chilean sea bass; however, I feel that hard cheeses, like Parmesan and pecorino, are appropriate in certain seafood situations.  I love it on shrimp scampi, but each chef must make this decision for him or herself.
Now that the great cheese debate it settled, I will present you with another option for this dish.  If you’re pockets are feeling flush, you may want to add some white wine to your scampi.  To do so, start to cook the shrimp before you add the pasta to the boiling water.  When they are just shy of done, remove them from the pan, and set them aside.  Add about ½ cup of dry white wine to the pan.  Increase the heat, allow it to reduce by about half (2-3 minutes).  When the pasta is just shy of al dente, add the shrimp back to the pan, and the lemon juice, then the pasta.  Do everything else the same.  This really provides some lovely additional flavors, but for broke grad students like myself, the other way is cheaper and still perfectly delicious.  It’s just too bad for me that white wine and vodka aren’t interchangeable in the culinary sphere.  Oh, well.  Even if it doesn’t work well with shrimp scampi, it still pairs perfectly with ice.    

Wednesday, January 13, 2010

Mexican Lasagna


Mexican lasagna: while this phrase is rather contradictory, the idea also sort of genius.  It’s socially acceptable to make such a statement without sounding utterly egotistical because the idea does not belong to me.  This concept is the spawn of the person everyone loves to hate: Rachael Ray.  (I actually don’t feel that way, but I’m trying to maintain some street cred.)  Before you click me out of your web browser and into oblivion, you must know that I took her recipe, and proceeded to coax it towards its full potential.  Ultimately, what could be displeasing about layers of tortillas, cheese, and a saucy chicken-vegetable mixture, mingling together in a hot oven?  This was Ms. Ray’s basic idea.  I saw her Mexican lasagna, and raised her extra vegetables, and some heat (hot pepper flakes, my favorite).  Being unaware of the game I decided she was playing, Rachael folded, and I’m pretty sure I came out of the game with the better hand.  I also added some class with canned tomato sauce between the layers.  Okay, maybe that doesn’t add class, but it provides some much needed moisture.  Between her magazine, cookware line, and infinite TV shows, Rachael must have been distracted, and the necessary sauce-factor simply slipped her mind. 

Mexican Lasagna (adapted from Rachael Ray’s recipe)
  
2 tablespoons extra-virgin olive oil
1 lb. ground chicken breast
2 tablespoons chili powder
1 tablespoon ground cumin
1 teaspoon hot pepper flakes
1/2 onion, chopped
1 red bell pepper, chopped
1 15-ounce can black beans, drained and rinsed
1 14-ounce can diced tomatoes (not drained)
1 cup frozen corn kernels
Kosher salt and freshly ground black pepper
1 8-ounce can tomato sauce
8 (8 inch) whole wheat flour tortillas, cut in half.
2 cups shredded mild white cheddar

§  Preheat the oven to 450 degrees (425 at sea level), and spray a 9x13 inch baking dish with canola oil spray or grease with olive oil (the spray makes for easier clean up).
§  Preheat 2 tablespoons olive oil in a large skillet over medium-high heat for 2-3 minutes, or until hot. 
§  Add ground chicken breast, chili powder, cumin, hot pepper flakes, onion, and bell pepper.  Season with salt and pepper to taste.
§  As the mixture cooks, break up the meat with a wooden spoon, and stir to distribute spices.  Allow chicken to brown and cook through (8-10 minutes).
§  Then add tomatoes, black beans, and corn kernels.  Stir to combine.  Allow mixture to heat through, and taste for seasonings.
§  Using four pieces of the halved tortillas, cover the bottom of the baking dish.  The will overlap slightly (see photos below).
§  Then distribute a quarter of the tomato sauce over the tortillas (a quarter of a cup).
§  Cover the tomato sauce with a ½ cup of the shredded cheese, and then a third of the chicken and vegetable mixture.
§  Repeat this layering process twice more.  Then cover the top with the remaining tortillas, then tomato sauce, and cheese.
§  Bake in the oven for 20-25 minutes, or until the cheese on top is browned and the dish is bubbling.
Comments:  I love this so-called Mexican lasagna, but I wish I could come up with a better name.  However, my creativity is apparently tapped out by a hectic start to the semester.  I will say that it has kept me happily fed through my first week, and it reheats nicely in the microwave, despite the cutesy name.  I was able to cut eight large pieces from this recipe, which is a pretty decent turnout.  I’m not entirely sure what Rachael was thinking because her recipe claims to feed four, and she used twice the chicken that I did.  
     
This dish could easily be made vegetarian by swapping out the chicken for an extra can of black beans.  The mix of ingredients made for a nice balance, with a lot of different textures and flavors, coming together as a heterogeneous, yet unified whole.  It’s especially lovely as a leftover because, when you cut the cold lasagna, the profile of your piece yields a view of all the ingredients, including the lovely interior of any black beans that happened to be straddling the border of two pieces (see photo below).  Despite the deliciousness, this recipe screams for something green.  Fresh cilantro would be great, as would an additional bell pepper of the green variety; including both simultaneously would be sublime.  It primarily needs the color, but the additional flavors would do no harm.  Overall, this dish is a winner.  Feel free to ignore that fact that Rachael Ray played a role in this; I really don’t think it should be the end of the world.  And you certainly shouldn’t let it deter you from cooking and eating something so delicious.    

Tuesday, January 5, 2010

Chicken and Rice Casserole


Sunday was a dreary day in Boulder.  This is rare.  Bright, sunny days are common.  Snowy days are common, too, but fluffy, fluttering snowflakes aren’t exactly dreary.  Sunday was dreary: gray and wet, with patchy clouds over the mountains.  I was experiencing an insatiable hunger that I personally feel is the responsibility of a newly implemented exercise program.  I spent most of the day with my cousin.  And at some point, between the insatiable hunger, which I spoke of incessantly, and the dreariness, my cousin stated, “I feel like something casserole-ish.”  With the word, “casserole-ish,” my heart soared, and I knew I had a culinary date with destiny. 
So, I embraced my inner-Paul Dean, and began to brainstorm.  Chicken was mandatory, as well as a token carbohydrate to soak up the creamy goodness of canned soup.  I decided to be a traditionalist with plain, old, long grain, white rice.  Condensed canned soup is, of course, an unavoidable component of a bona fide casserole.  Luckily for the sake of my arteries, Campbell’s Healthy Request Soups are an excellent reduced fat item.  In fact, this product graces my mother’s green bean casserole at Thanksgiving, and no one complains.  I went with cream of mushroom.  I really loved the flavors of my chicken/vegetable/couscous concoction (see previous post), thus red pepper, onion, garlic, and broccoli made a repeat performance.  But, just to prevent myself from being a total bore, I threw in some button mushrooms to echo the delicate flavor of the cream of mushroom soup [note the sarcasm]. 
And in case you ever had a shadow of a doubt regarding the appearance of a truly fresh mushroom, please see the above photo.  Note the milky-brown color of the inner curvature, and the tightly attached gills.  I rue the man that attempts to state that such a mushroom isn’t a complete and utter vision of loveliness.  This is not to say that mushrooms in less than perfect condition are not of use; we lowly civilians have little control of the powers that be when it comes to the market.  However, when you do come across such a perfect specimen, it would be sin not to make the purchase.  That final, editorial comment will serve to conclude my mushroom tirade, and we will now return to the regularly scheduled program. 

Chicken and Mushroom Casserole

2 ½ cups of cooked white rice
1 can condensed cream of mushroom soup (try Campbell’s Healthy Request)
½ cup reduced-sodium chicken stock
2 tablespoons of olive oil
1 half chicken breast (at least ½ pound)
2 cloves garlic, minced
½ small onion, thinly sliced
½ red bell pepper, diced
1 medium broccoli crown, chopped into florets (I also included some of the stalk, thinly sliced)
6 large or 8 small button mushrooms, sliced
¼ cup chopped flat leaf parsley
Kosher salt and freshly ground pepper, to taste
1 ½ cups shredded Colby-jack cheese (or other luscious cheese that melts like a dream)

·      Preheat oven to 425 degrees.
·      In the absence of left over rice, put 2 cups of water, 1 cup of rice, and a pinch of salt in a pot over high heat.  When it comes to a boil, cover, reduce heat, and allow to simmer until just shy of cooked through (it will finish in the oven).  Up in the mountains, it took about 20 minutes.  Then set aside 2 ½ cups of cooked rice, or use it all.  I doubt that extra rice would hurt the final product. 
·      Preheat a large skillet and 1 tablespoon of olive oil over medium-high heat.  Meanwhile, season the chicken breast with kosher salt and freshly ground pepper.  Add seasoned chicken to the skillet and allow to cook through, about 8-10 minutes on each side.  Flip as few times as possible for proper browning (Tip:  I actually set timers to make sure I leave things alone so they can brown, but also to prevent burning).
·      When the chicken is cooked through, set aside.  Add another tablespoon of olive oil, bell pepper, and onion to the pan. Season with salt and pepper. 
·      Allow to cook until vegetables begin to soften, about 3-5 minutes.  Then add garlic and mushrooms.  Re-season, and allow to cook until mushrooms start to give off liquid. 
·      Par-cook broccoli for 1 minute in the microwave.  [Note:  I am including this step because I did it, but I would skip it next time.  The broccoli has plenty of time to cook in the oven.]
·      Whisk together condensed soup and chicken broth; chop chicken into chunks. 
·      Add rice, chicken, soup mixture, chopped parsley, and broccoli to the pan of vegetables.  Stir to combine, and transfer to an 8x8 inch baking dish.
·      Top with shredded cheese, and bake for 25-30 minutes, or until bubbling and beautiful. 

Comments:  Delicious!  In all seriousness, unless you are a total food snob (which you are entitled to be, if you wish), this is a pretty likeable potion.  Next time, I would not par-cook the broccoli.  It was perfectly edible, but a little crispness would have been nice, especially for reheating purposes.  Also, while I was dreaming this meal up, I toyed with the idea of brown rice, over white.  Ultimately, I felt that it would be too “healthy” tasting, and chose white rice.  Clearly, I had temporarily lost my mind when making this decision because I love brown rice, and, in hindsight, I feel the added texture would have only boosted the dish to a new level.  Despite these minor criticisms, I would make and eat this again.  And in fact, I did eat it again, for a few post-workout lunches, and miraculously, it seems to be a viable cure for my exercise-induced insatiable hunger.   

Monday, January 4, 2010

A well balanced meal is in order...


New Years was a great time, and an exercise in decadence.  Shrimp cocktail, stuffed mushrooms, vodka on the rocks, crab dip, homemade pizza, deviled eggs, more vodka, artichoke dip, baby hotdogs wrapped in pastry, a shot of vodka…  And repeat.  It was a lot of fun, and because I slept at my cousin’s place, we proceeded to have crab dip and artichoke dip for breakfast, cold.  And, yes, I’m a little embarrassed about this; it was quite a way to ring in 2010.  After all that rich food, on New Year’s Day, I was craving something simple and wholesome.  I wanted vegetables, lean protein, and starch in appropriate proportions; something cooked in a limited amount of mono-unsaturated fat, but not without flavor.  For some inexplicable reason, I was craving couscous.  I know, this is not exactly a food that seems crave-worthy, but I had couscous on the brain, and I could not be deterred.  After a brisk walk to Whole Foods for chicken, and Sunflower Market for vegetables, my appetite was in full effect, and I whipped up the following concoction.

Chicken and Vegetables over Lemon-Herb Couscous
1 tablespoon olive oil
¼ cup thinly sliced onion
¼ cup thinly sliced red bell pepper
1 far garlic clove, minced
1 medium broccoli crown, chopped into florets
½ pound chicken breast, thinly sliced
Kosher salt and freshly ground black pepper to taste
Zest from half of a lemon, zested (optional)
¾ cup couscous
1 cup reduced sodium chicken stock
Juice from half of a lemon
2 tablespoons chopped flat leaf parsley
2 teaspoons extra virgin olive oil

·      Add 1 tablespoon of olive oil to a large pan.  Pre-heat over medium-high heat until hot.
·      Add onion and bell pepper to pan, give a quick stir, and then add chicken in an even layer.  Season with salt and pepper and then allow chicken to cook for a couple of minutes undisturbed (to allow the chicken to brown).
·      Add garlic and stir.  Continue cooking until chicken is cooked through.     
·      Meanwhile, steam the broccoli.  I use the following method:  place broccoli in a microwave safe bowl, and cover with vented wax paper or plastic wrap.  Microwave for 2 ½ to 3 minutes, and voila!  Perfectly steamed broccoli awaits.
·      Put one cup of chicken stock on the stove over high heat.  Bring to a boil.  Remove from heat, and add couscous.  Stir, cover, and allow to sit for five minutes.
·      When chicken is just cooked through, add steamed broccoli and lemon zest (if using).  Stir to combine.
·      When couscous is done, fluff with a fork and stir in lemon juice and parsley.
·      Serve chicken and vegetables over couscous and enjoy.

Comments:  This was just what the doctor ordered: a healthful and flavorful meal.  This quantity could feed two hungry people.  I think the secret to the high flavor quotient is cooking the vegetable and the chicken together.  The garlic doesn’t hurt either.  This was pretty garlicky, but I figured that since I already smelled like vodka, I might as well add a little garlic to the mix.  The lemon zest is totally optional, but I just couldn’t help myself.  It makes everything better.  Pretty soon, someone is going to have to drag me to a Lemon Zest Anonymous meeting, but until then, I will zest on.  While we are on the subject of my addictions, I may or may not have topped everything off some freshly grated Tillamook medium cheddar I found on a ridiculous sale.  When you find high quality cheese at bargain prices, you have a moral obligation to buy said cheese.  And once that cheese sets up camp in your refrigerator, you must uphold that obligation by using the wonderful cheese when possible.  You wouldn’t want me to let those golden strands go bad, would you?  I didn’t think so.     

Friday, January 1, 2010

New Year's Eve: Appetizers Galore


I personally feel that New Year’s Eve is a slightly overrated holiday.  If you enjoy paying a cover charge to go to a crowded bar, where you have to fight to get the bartender’s attention, the more power to you.  It’s just not for me.  I do, however, enjoy any occasion where it is socially acceptable to eat excessively and decadently.  So for that, New Year’s Eve, I tip my proverbial hat to you.  I spent the holiday with my food-loving cousin, Shell, and her food-loving fiancé, Micah.  We decided we would each make 2 appetizers, and watch bad TV.  Shell has a penchant for referring to things by their initials, thus the event has been dubbed “N.Y.E.” 

My aunt Debbie has a NYE motto:  no New Year’s is complete without shrimp.  Being an obedient niece, I abide by this motto, and made shrimp cocktail.  This is a simple, yet delicate culinary feat.  I think the quality of this shrimp is crucial, and your best bet is to buy frozen, raw shrimp.  Unless you live a stone’s throw from the ocean, “fresh” shrimp are truly frozen shrimp that have been thawed for who knows how long.  Defrost the shrimp yourself just prior to cooking by running cold water over them for a few minutes, or letting them sit in a bowl of cold water for those who are environmentally-minded.  I heard through the family grape vine that my aunt made a dangerously delicious cocktail sauce.  It ends up being a fairly traditionally recipe with the addition of a wild card ingredient:  butter!  As fate would have it, the recipe is the brain baby of one of my favorite food writers, Mark Bittman.  It sounds bizarre, it sort of smells bizarre while it cooks, but it tastes divine.  It makes the sauce silky and rich.  And let’s be serious: butter doesn’t exactly have a reputation for hindering flavor.  In the words of Micah, I want to dip my life in that sauce.    
Shrimp and Cocktail Sauce (adapted from Mark “the man” Bittman’s recipe)
1 pound of shrimp, peeled, deveined, tails left on
1 small onion, quartered
1 carrot, chopped in thirds
3 cloves garlic, whole and peeled
20 peppercorns
3 bay leaves
2 tablespoons kosher salt
About 2 ½ to 3 quarts of water (this approximate: I used a 6 quart pot and filled it about half way with water)

·      Add onion, carrot, garlic, peppercorns, bay leaves, and water to a large pot.  Bring to a boil and add salt.  [Note: a halved lemon would be lovely here, but I forgot to add it.]
·      Allow the mixture to boil gently for 20-30 minutes so the flavors infuse the water.
·      Add all of the shrimp, remove the pot from heat, and cover.  Allow the shrimp to steep in the hot water for 4-5 minutes.  (I used medium-sized shrimp [26/30 per pound] and it took 4 minutes).
·      Drain mixture in a colander.  Remove shrimp and place on a plate, preferably in one layer.  Pay dry with paper towels, and allow to chill in the refrigerator for at least one hour.
Delicious Cocktail Sauce
1 cup ketchup
1 tablespoon red wine vinegar
3 tablespoons butter
2 tablespoons (or to taste) prepared horseradish

·      Combine ketchup, vinegar, and butter in a small saucepan over medium-low heat.
·      Stir frequently and take off heat once butter has melted.
·      Add horseradish, and chill.

My second food contribution was stuffed mushrooms.  Please don’t judge me, but I adapted the recipe from one of Rachael Ray’s creations.  I have mixed feelings about Ms. Ray: I understand why people are critical of her, but I kind of like watching her show.  Yes, her “cutesy-isms” are pretty tired, as are her stories about her husband and her in-laws, and she has a vicious hyper-functional voice disorder.  Nonetheless, sometimes she makes some pretty tasty food.  Artichoke and cheese stuffed mushrooms?  Yes, please!  I have changed the recipe a bit, but I would never have dreamed up this combination if Rachael Ray had not planted the seed in my head.

Artichoke and Cheese Stuffed Mushroom Caps (adapted from Rachael Ray’s recipe)
1 lb. button mushrooms (20-24 mushrooms)
2-3 tablespoons of olive oil
1 can artichoke hearts, drained and patted dry with paper towels, and chopped
1 ½ cup shredded Monterey jack cheese (Any mild white cheese will do.  I’ve used Gouda [not smoked] in the past, and it’s great)
2 tablespoons chopped parsley
1 garlic clove, minced
¼ cup seasoned breadcrumbs
Freshly ground pepper to taste

·      Preheat oven to 400 degrees.
·      Wipe mushrooms clean, and remove stems.
·      Place mushrooms in a 9x13 inch baking dish.  Drizzle with 2-3 tablespoons of olive oil and toss to coat.
·      Arrange mushrooms so the rounded side is facing up.  Bake for 10-12 minutes, or until they are starting to soften and give off some liquid
·      Remove mushrooms from oven.  (Optional, but recommended:  Remove mushrooms from baking dish to a plate lined with a few sheets of paper towel.  Wipe remaining liquid from baking dish.  This will prevent your final product from being too wet.)
·      Mix artichoke hearts, breadcrumbs, cheese, parsley, garlic, and pepper (about 15 grinds).  No salt is necessary: between the artichokes, the breadcrumbs, and cheese, you’re covered. 
·      Mound filling into the hollow portion of the mushroom cap (a rounded tablespoon should do).  Don’t be afraid to pack it in there with your (clean) fingers. 
·      Place mushrooms in baking dish.  Bake for 10-15 more minutes, or until cheese is melted and filling is heated through.

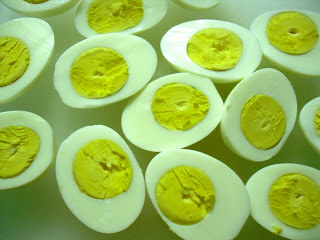
Last, as an act of complete compulsion, I decided to make deviled eggs.  I love deviled eggs.  They are like miniature boats of egg salad.  Seeing as there are only so many egg yolks a person should eat with a clean conscience, I refrain from making them often.  But I felt that NYE’s inherent decadence was a perfect excuse.  If you search "deviled eggs" on epicurious.com, you will find the craziest ingredients: chipotles, pickapeppa mayo, salmon roe, etc.  Come on, people!  I know that in European countries they can get a little frilly, but here in America, deviled eggs are picnic food for Midwesterners and Southerners alike, not exactly a froufrou ordeal.  I kept mine simple, but I could not resist adding a touch of lemon zest and a pretty garnish.  Please forgive my hypocrisy. 

Deviled Eggs
8 large eggs, hard-boiled
2 tablespoons mayonnaise
1 ½ teaspoons Dijon mustard
1 teaspoon lemon zest
1 tablespoon finely chopped parsley
Kosher salt and freshly ground pepper to taste
16 small whole parsley leaves for garnish (optional)

·      Peel eggs and remove all shell fragments.  Cut eggs in half, and compile yolks in a bowl.  Set aside hollow egg whites. 
·      Mash together yolks, mayonnaise, Dijon, lemon zest, parsley, salt, and pepper.  Mix until smooth.
·      Distribute yolk mixture between egg white halves, and garnish with parsley if desired. 

Post Script:  As an amateur food blogger, my New Year's resolution is to post more pictures, hence the great increase on this post.  Thoughts?