Showing posts with label bacon. Show all posts

Wednesday, March 20, 2013

Spinach and Artichoke Mac and Cheese with Bacon

 
I do not find mac and cheese boring.  Not at all.  I love cheese, and I love pasta, and I love the comforting, creamy, and ultimately benign flavor and texture profile of mac and cheese.  But some people might find it boring, bite after creamy bite.  If you happen to be one of these people, but you still enjoy cheese and pasta, this is the recipe for you.  I think the title essentially speaks for itself: Spinach and Artichoke Mac and Cheese with Bacon.  Despite the fact that it is loaded with spinach, I am not going to try to sell you on it being healthy.  It is most certainly not.  It is loaded with cheese, and peppered with bacon.  However, I will say that I think this recipe would be a great candidate for whole wheat pasta; however that still won’t make it healthy.  So, if you are counting calories, either stop that nonsense, or close your web browser.
This is a pretty basic mac and cheese recipe (roux-based bĂ©chamel sauce, melted cheese, pasta), but the flavor gets elevated by shallots and a little garlic, as well as some nutmeg, the meatiness of bacon, and the heft of the spinach and artichokes.  This recipe is very user friendly: it calls for frozen spinach and canned artichokes.  No blanching, chopping, and scrapping out furry chokes required.  I will say that you should not under any circumstances rush while you are draining the spinach.  Squeeze it, squeeze it, then squeeze it some more.  Nothing is worse than watery frozen spinach (is anyone else gagging, or is that just me?).  The cheese selection in this recipe is a perfectly balanced combination of Monterey jack and parmesan.  Jack is creamy and mild, and melts languidly into the sauce; the parmesan adds a lip-smacking savory quality.  And the best part is that they are used in equal amounts.  Parmesan cheese is a common addition to mac and cheese, but not usually in this quantity, which allows it to really assert its presence.  The other great thing about this recipe is that is it broiled, rather than baked.  Personally, I think baking macaroni and cheese is playing with fire.  First you slave over your cheese sauce, coming up with the perfect consistency, and then you let it mingle in a hot oven for 45 minutes, which completely changes the texture, often to a more grainy consistency, rather than its original unctuous luxuriousness.  So, my suggestion, is to generously top that sucker with shredded cheese, and throw it under the broil (observing with a hawk’s watchfulness so it doesn’t burn, and possibly rotating it every minute or so), which will allow for a golden, melted top, while maintaining the creamy, saucy interior.      
Spinach and Artichoke Mac and Cheese with Bacon (adapted from Taste and Tell):

Yields 6-8 servings

1 pound penne pasta
4-5 slices bacon, chopped
1 tablespoon olive oil
4 shallots, diced
3 cloves garlic, minced
2 tablespoons all-purpose flour
3/4 cup chicken broth
3 cups milk
1 (10-ounce) package frozen chopped spinach, defrosted and drained thoroughly
1 (14-ounce) can artichoke hearts, chopped
¼ teaspoon ground nutmeg
¼ teaspoon hot chile flakes
Kosher salt and freshly ground black pepper, to taste
1 1/2 cups shredded Monterey jack, divided
1 1/2 cups grated Parmesan, divided


-          Preheat the broiler. Coat 9x13 baking dish with nonstick spray.

-          In a large pot of boiling salted water, cook pasta about 2 minutes less than the package directions call for; drain well.

-          Heat a large skillet over medium high heat. Add the bacon and cook until brown and crispy, about 6-8 minutes. Reserve 1 tablespoon of bacon drippings.  Transfer to a paper towel-lined plate; set aside.

-          Heat olive oil and bacon drippings in a medium pot over medium low heat. Add the shallot; season with a pinch of salt, freshly ground pepper, and chile flakes.  Cook until it has softened and is translucent (about 4-5 minutes).  Add garlic and cook for one minute.

-          Whisk in the flour until lightly browned, about 1-2 minutes. Gradually whisk in the chicken broth and cook, whisking constantly, until incorporated, about 1-2 minutes. Stir in the milk and nutmeg and, while whisking, bring to a simmer. Add the spinach and artichokes, and stir until the sauce has thickened and the vegetables are heated through, about 2-3 minutes; season with salt and pepper, to taste. Stir in 1 cup Monterey jack and 1 cup Parmesan until smooth, about 1-2 minutes.

-          Stir in the penne and bacon.  Turn on a low flame if necessary to get all of the ingredients heated through.

-          Spread the penne mixture into the prepared baking dish. Sprinkle with remaining pepper jack and Parmesan.

-          Place into oven and broil for 3-4 minutes, or until golden brown.  Serve immediately.


Saturday, April 14, 2012

Waffle Grilled Cheese and Bacon


When was the last time you had an Eggo Waffle?  Until last weekend, I think it had been a couple decades for me.  Despite the lapsed time, Eggo Waffles played a fairly significant role in my childhood.  From what I remember, they were a Saturday morning treat.  However, when I was little, those buttery waffles could be problematic.  My parents were often on morning walks when I woke up and I wasn’t allowed to engage in independent toaster use.  They used to put milk in a small pitcher for me in the refrigerator so I could have cereal (it’s amazing that a person can be so little that they can’t be trusted to pour milk from a gallon container), but sometimes that would not do.  I would then need to get my brothers involved in order to indulge in some Eggos.  They were usually trying to sleep in, and thus less than thrilled to be of assistance.
Eggo waffles had practically become a forgotten food to me, until I was recently flipping through Food Network Magazine.  Every month, this magazine includes a pullout book with 50 variations of specific food.  Last month, it was grilled cheese, and, I came across a new use for these rich treats.  It’s such a simple idea: sandwich crisp bacon and cheese between 2 lightly toasted Eggo Waffles, then grill the sandwich in butter in a hot skillet.  I put the butter directly in the pan, instead of attempting to tackle to the daunting task of evenly buttering the waffle itself.  Just like any grilled cheese, you want to do the grilling low and slow so that the waffle doesn’t brown prior to the cheese melting.  This is a seriously delicious combination.  Eggo waffles are only slightly sweet, but dense and so buttery that they make a perfectly indulgent vehicle for grilled cheese. 
The article suggested serving the golden sandwich with maple syrup, but instead I decided on an over-easy egg.  I am generally more compelled by savory flavors, and the warm, drippy egg yolk certainly added another layer of decadence to this meal.  This is perhaps not something that should be consumed on regular basis.  I can’t say that I plan on purchasing more Eggo Waffles any time soon, but I enjoyed it while it lasted.

Sunday, April 8, 2012

Bacon and Tomato Pasta


Sometimes I like to put bacon on my pasta.  I think most people would find that at least slightly appealing.  The idea for the recipe just came through me; it was so organic (name that movie reference).  But seriously, the other night it was snowing after a solid month of 70-degree weather, and I felt obligated to make something comforting and to take the opportunity to enjoy the heat of my stove.  A slow-simmered tomato sauce was the answer.  It had a healthy dose of white wine in it, lots of tomatoes, and as promised, bacon.
The key to success here is making the sauce extra bacony.  This is not necessarily achieved by adding copious amounts of bacon.  Rather, this is done by both starting and ending with bacon.  You start by crisping up some chopped bacon in a saucepan.  When it is browned and beautiful, and it has relinquished plenty of fat into the pan, you remove about two-thirds of the bacon.  This will go on top of the pasta at the end.  The rest of the bacon remains in the pan along with the bacon grease, and the browned up bacon fond, and thus bacon permeates the sauce.  There is also about a cup of white wine in this sauce.  This may be a little extreme for some tastes, but I absolutely love the tangy, acidic flavor.  This sauce is also heavy on tomato.  It is present in two forms: canned, chopped tomatoes, and tomato paste.  Overall, the theme here is BIG FLAVOR. 
Bacon and Tomato Pasta (2 generous portions)

4 slices thick cut bacon, chopped
1 tablespoon olive oil
1/2 red onion, diced
2 garlic cloves, thinly sliced
2 tablespoons tomato paste
1 cup dry white wine
1-14 oz. can chopped tomatoes
1/2 cup water
Kosher salt and pepper
1/2 teaspoon hot pepper flakes
2-3 tablespoons chopped flat leaf parsley
1/2 pound long thin pasta (I used spaghetti rigati)
Freshly grated parmesan cheese

-       Add bacon to a medium saucepan and cook over medium heat.  Cook for about 10 minutes, stirring frequently, until the bacon is crisp. 
-       Remove about 2/3 of the bacon to a plate lined with paper towel to drain.  Reserve for later use.
-       Pour off all but about a tablespoon (or two) of the bacon grease.  Add 1 tablespoon of olive oil and the chopped onion.  Season with salt, pepper, and hot pepper flakes.  SautĂ© for 10 minutes, until onion is soft.
-       Add garlic and tomato paste.  Cook for 1-2 minutes.
-       Add white wine, bring to a boil, then reduce to a simmer.  Cook, stirring frequently, for 10-15 minutes, until mixture has reduced by half.
-       Add chopped tomatoes, 1/2 cup water, salt and pepper.  Simmer for 20-25 minutes.
-       Meanwhile, bring a large pot of water to a boil and cook pasta according to package directions.  Reserve about a cup of cooking water before draining pasta.
-       Toss pasta, sauce, and parsley together.  Add cooking water as needed to keep sauce moist and unctuous. 
-       Serve pasta with a sprinkle of bacon and lots of cheese.

Tuesday, July 26, 2011

Mayonnaise: The Real Deal

Mayonnaise is a strange food.  It is the crux of many delicious recipes, but very few people yearn to crack open a jar of Hellman’s a dig in with a spoon.  Traditional mayonnaise is simply an emulsion of egg yolks, oil, and lemon juice, but commercial production sometimes renders into something seemingly more offensive.  Few have been spared the visual trauma of a vessel of mayonnaise that has been exposed to open air, out of refrigeration, translucent and gelatinous at the edges.  Despite this burdensome image, I truly enjoy mayonnaise on sandwiches, as a base for sauces and dips, and as a binder for various recipes.  Some of the most delicious (and unhealthy) foods hinge on mayo: spinach-artichoke dip, blue cheese dressing, the creamy sauce on a spicy tuna roll.  I can nearly guarantee that even the most vehement mayonnaise haters have unwittingly enjoyed it on a few occasions.
I actually had to be tricked into it myself.  When I was in elementary school, my brother became devoted to making turkey sandwiches one summer.  As part of this project, he made it a personal mission to convince me of the merits of mayo in such a context.  He handled this issue with exceptional finesse.  Catapulting off my deep-rooted love of butter, my brother told me that mayonnaise was “sandwich butter,” like butter but designed especially for sandwiches.  As he crafted my lunch, he would spread mayo on challah bread, and present it to me for approval, creating a thin, without the slightest hint of oozing or glopping.  Soon, I was regularly devouring his carefully constructed turkey sandwiches adorned with “sandwich butter.” 
I never really understood why my brother was so devoted to his cause, until I began sharing meals with someone who expresses a deep disdain for mayonnaise.  This person, also known as my co-chef (see “Fish Tacos”) will eat foods with mayonnaise in them, but only when thoroughly disguised.  This leaves me irrationally distressed, not only because it limits the food we can share, but also because I want him to experience the joy of a turkey sandwich or a BLT with mayonnaise, or other mayonnaise-enhanced foods (such as a corned beef sandwich with swiss, Russian dressing, and cole slaw). 
I have embarked upon my own mission, championing the merits of mayonnaise.  Similar to the “sandwich butter method,” I am trying to be gentle and non-threatening.  My subject is a willing participant, but the idea of mayonnaise makes his stomach turn.  As a first step, I chose to make him something simple with high quality ingredients, and a flavorful homemade mayonnaise.  And because I wanted him to truly enjoy what he ate, bacon seemed like an appropriate avenue.  Only one food could fulfill such exacting specifications: a BLT sandwich with basil mayonnaise.  I even added a little avocado to make it as palatable as possible, with sourdough bread, summer tomatoes, red leaf lettuce, and plenty of bacon (see two examples directly below).
For the mayonnaise, I used extra virgin olive oil and lots of fresh basil to make it minimally offensive and maximally flavorful.  I actually think that I overly-softened the blow by making it so flavorful.  It was rich and delicious, and it made for great sandwiches.  However, it was not a true introduction to mayo.  I was trying to be gentle, but I think I played it a little too safe, and my co-chef agreed.  In particular, the extra virgin olive oil resulted in quite a strong flavor.  For the next installment of our experiment, I intend to omit the basil and use half extra virgin olive oil and half canola or vegetable oil to impart a more bonafide mayo effect.  However, if you are looking for something delectable to put on a sandwich, I would include the basil, or any combination of fresh herbs.   
(photography courtesy of my co-chef)

Basil Mayonnaise (based on Marc Bittman’s basic mayonnaise recipe)

1 large egg yolk (this would be a good time for really high quality eggs)
1 tsp. Dijon mustard
2 tablespoons freshly squeezed lemon juice
Dash of cayenne pepper
½ teaspoon each of freshly ground pepper and kosher salt
¼ cup of fresh basil, torn (I used a combination of opal basil and regular basil because it was what I had)
½ cup extra virgin olive oil, divided
-       Mix together all ingredients besides the oil in the canister that accompanies an immersion blender or a regular blender.
-       Add a couple of tablespoons of oil, and then run the motor.
-       While the motor is running slowly drizzle in the remaining oil until a creamy, uniform emulsion results.

Friday, August 6, 2010

Bacon and Vegetable Fried Rice


Fried rice is a delectable treat, usually reserved for otherwise-boring leftover rice.  However, seeing that rice takes a mere 15-20 minutes on the stove, I have no problem whipping some up when the mood for its fried variation attacks.  Besides, there is plenty of chopping and sautĂ©ing to do in the meantime.


Fried rice is a vehicle for practically any lingering vegetable you may have in your refrigerator.  The recipe below is merely a guideline.  Carrots, celery, scallions, spinach, watercress, corn (fresh or frozen), cauliflower, and zucchini would all be welcome additions.  The version below may also be grossly simplified with satisfying results:  I’ve made fried rice with just garlic, soy sauce, egg, and frozen peas as add-ins.  Despite my excessive detail, my point is that fried rice is versatile, and may be easily adjusted to both your tastes and the contents of your refrigerator.  However, I do feel the following ingredients are mandatory in addition to rice: garlic, soy sauce, egg, and some sort of vegetable.  This combination provides crucial elements in the domains of both flavor and texture.  The tender egg is particularly delightful, and it provides substance. 
Protein in addition to the egg is purely optional, but fried rice can breathe new life into less-than-thrilling leftover chicken, beef, etc.  The sky’s the limit in this regard.  I usually use leftover chicken, but last night, I had a hankering for bacon.  While bacon is by no means obligatory, I feel the need to sing its praises as key player in this dish.  The chewy, salty, smoky pieces dispersed throughout the rice were a pure joy.  But then again, when is bacon not a joy?  If you want to make the recipe below, and you happen to suffer from pork aversion or vegetarianism, skip the first step, and sautĂ© your vegetables in light colored oil, instead of bacon grease.  Also, if you feel so inclined, a tablespoon of grated fresh ginger would be lovely added with the garlic.  A drizzle of toasted sesame oil wouldn’t hurt at the end.  About a half teaspoon would be a nice touch, without overpowering the other delicious flavors (like bacon!)  I may be providing far too many options and modifications, but this is the reality of fried rice.  My advice to you:  be decisive, go forth and fry some up. 
Bacon (and Vegetable) Fried Rice

3 slices of bacon (about ¼ lb.)
½ onion, diced
½ red bell pepper, diced
6 mushrooms, sliced
2 cloves garlic, minced
Medium head of broccoli, chopped into small florets
½ cup frozen peas (no need to thaw)
3 cups cooked rice (white or brown)
2 large eggs, scrambled
Soy sauce (probably about 2 tablespoons)
Oyster sauce (probably about 2 teaspoons)
Black pepper
Sriracha hot sauce, to taste (optional)

-       Preheat a large non-stick pan over medium heat.  Add bacon to the hot pan, and sautĂ© until crisp.  Remove from the pan to a plate lined with paper towel.  When cool, coarsely chop the bacon.
-       Carefully remove all but 2-3 tablespoons of the remaining bacon grease (when in doubt, go with less; you can always add some oil later if need be).  Add the onion and bell pepper.  Season with about 2 teaspoons of soy sauce and black pepper.  SautĂ© until the vegetables begin to soften, about 5 minutes.
-       Add mushrooms.  Allow to cook until they start to give off liquid and begin to brown (about 5 minutes).  Add garlic.
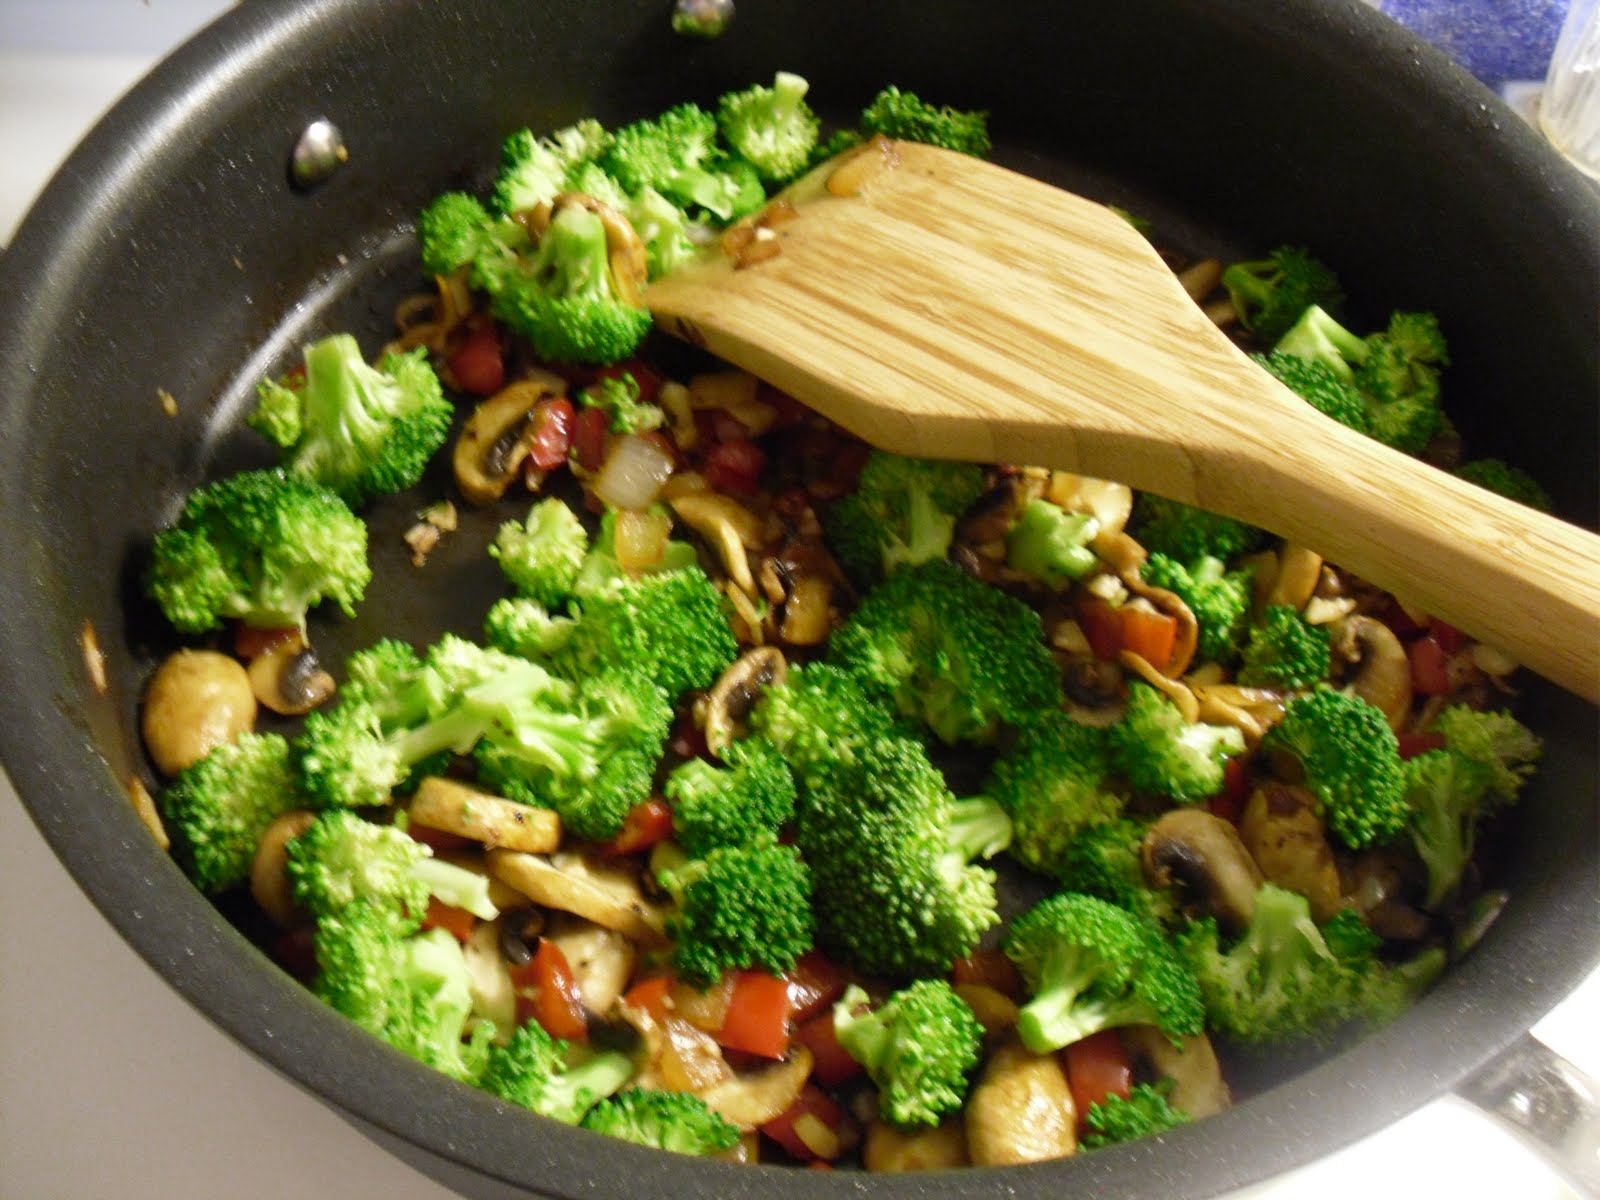
-       Meanwhile, par-cook the broccoli: place the chopped broccoli in a microwave safe bowl.  Cover with plastic wrap, leaving one side vented.  Microwave on high for a minute and a half.
-       Add the broccoli to the pan.  Stir to combine and season with about 2 teaspoons of soy sauce and more black pepper.  Allow to cook for about 2 minutes.
-       Add rice, peas, and bacon to the pan.  Season with more soy sauce, oyster sauce, and Sriracha (if using).  Stir fry everything together for 3-5 minutes, or until everything is heated through.
-       Move rice mixture to one side of the pan, and add the eggs.  Allow to set for a minute, then scramble them until cooked through.  (See pictures above).  Mix the eggs into the fried rice.
-       Taste for seasoning and add more soy sauce and Sriracha if needed. 

Monday, May 10, 2010

Linguine with Cauliflower and Bacon


This is a new twist on an old favorite:  linguine with cauliflower and bacon.  In the fall, I wrote a post about pasta with cauliflower, green olives, and almonds.  It was a lovely dish, with a perfect balance of savory flavors and textures.  This recipe is similar:  pasta with beautifully caramelized cauliflower, swathed in garlic and hot pepper flakes.  However, instead of saltiness from green olives, and crunch from toasted almonds, bacon takes over, boasting both salt and crunch. 
I will not try to be coy about it: this is not a low fat dish.  I started this by rendering chopped bacon in a pan.  When it was crisp, I set it aside, and proceeded to cook the cauliflower in some of the remaining bacon grease.  However, the cauliflower wasn’t caramelizing to my specifications, so I proceeded to add some butter to the pan.  Later, while tossing the pasta with the cauliflower, it seemed dry, and I added a drizzle of olive oil.  And, of course, the pasta is finished with the crispy bacon and feathery ribbons of parmesan. I’m sure you won’t be surprised to hear that this was absolutely delicious. When I concocted this idea in my food-obsessed brain, I was most excited about the flavor the bacon grease would impart upon the cauliflower.  However, this did not fully live up to my expectations.  I made it a second time a week later, and cooked the cauliflower in olive oil, thus saving my arteries from unnecessary saturated fats, and difference was minimal.  Nonetheless, there is no substitute for the crispy bacon garnish.  Despite all the olive oil, and butter, (and potentially, bacon grease), if you follow the measurements below, this dish is loaded with cauliflower.  Cauliflower, in turn, is loaded with vitamin C and fiber, thus negating some concerns you may have regarding the bacon.  Personally, I think those crispy, salty, meaty morsels are worth their weight in gold.    
Linguine with Cauliflower and Bacon (makes 2 large servings)

1/3 pound bacon, chopped
1 ½ pounds cauliflower, chopped
1/3-1/2 pound pasta
2 cloves garlic, minced
½ hot pepper flakes
pepper
salt
¼ cup parsley, chopped
½ tablespoon butter (optional)
olive oil
2 tablespoons of water

·      Preheat a large non-stick skillet over medium heat, cook the bacon for about 8-10 minutes, stirring often, and until browned and crisp.
·      Remove crisped bacon from the pan and drain on a plate lined with paper towel.  Set aside (and try not to eat too much of it).
·      For the high fate version: using paper towels, carefully mop up all but 2-3 tablespoons of bacon grease.  For the lower fate version, wipe up all of the bacon grease and add 2-3 tablespoons of olive oil to the pan. 
·      Increase the heat to medium high, and add the cauliflower.  Stir to even goat with the olive oil or bacon grease.  Allow to cook, for about 20 minutes total.  Stir every 5-7 minutes, leaving it undisturbed when possible so it will caramelize.  If it isn’t browning well, add about ½ tablespoon of butter (it has a lower smoke point than olive oil/bacon grease, thus it assists with browning).
·      In the last 5 or so minutes of cooking, add minced garlic, hot pepper flakes, salt and pepper.
·      Meanwhile, cook linguine in a pot of boiling water according to package directions.  Drain linguine when it’s ready, reserving some of the pasta cooking water.  Or you can use tongs and pull the linguine directly from the pot and add to the pan of cauliflower.
·      Toss the linguine with the cauliflower and parsley.  Add a few tablespoons of pasta cooking water and/or a drizzle of olive oil if the pasta is dry.
·      Plate pasta and garnish with reserved bacon and parmesan cheese.

Wednesday, October 7, 2009

Baked Chicken Meatballs with Peperonta


Bob Dylan called it in 1964: the times they are a changin’.  Earlier this week, Conde Nast announced that Gourmet magazine would no longer be published after almost 69 years of exceptional food writing*.  This is truly the end of an era in the world of food, and journalism as well.  The recipes of Gourmet have been a little highfalutin for my kitchen, however it has sets the pace in the culinary world for at-home cooks, even if it is indirect.  It is a magazine I actually subscribe to, and I have spent many hours leafing through its glossy pages.  In honor of Gourmet and its departure, I made a recipe from the August 2009 issue: Baked Chicken Meatballs with Peperonata**.

This recipe epitomizes the appeal of Gourmet.  The dish employs a classic concept and refreshes it in a manner I would have never dreamed of myself.  Italian meatballs are generally prepared one way: in a red sauce served over pasta.  I would never have dared to alter such a dish because it is so lusciously perfect in its classic preparation.  However, Gourmet found a way to alter the classic that is different to the point where you won’t miss the original, yet its fundamental nature hits your palate and your soul in the same way.  The few changes I made are in italics.

Baked Chicken Meatballs with Peperonata**

For peperonata:
                        3 red bell peppers, cut into strips
                        1 1/2 tablespoons extra-virgin olive oil, divided
                        1 1/2 tablespoons drained capers
                        1 teaspoon red-wine vinegar
                        1/8 teaspoon hot red pepper flakes (or up to a half teaspoon)

For meatballs:
                        3 slices Italian bread, torn into pieces (1 cup)
                        1/3 cup milk
                        3 ounces sliced pancetta, finely chopped
                        1 small onion, finely chopped
                        1 small garlic clove, minced
                        2 tablespoons extra-virgin olive oil, divided
                        1 large egg
                        1 pound ground chicken
                        1 ounce finely grated parmesan
                        3 tablespoons finely chopped flat-leaf parsley
                        1 tablespoon tomato paste


Make peperonata: 
Preheat oven to 400°F with racks in upper and lower thirds.
Toss bell peppers with 1 tablespoon oil, then roast in a 4-sided sheet pan in lower third of oven, stirring occasionally, until tender and browned, about 35 minutes.

Stir together capers, vinegar, red pepper flakes, and remaining 1/2 tablespoon oil in a medium bowl and set aside.

Make meatballs while peppers roast: 
Soak bread in milk in a small bowl until softened, about 4 minutes.

Cook pancetta, onion, and garlic in 1 tablespoon oil with 1/2 teaspoon each of salt and pepper in a 10-inch skillet over medium heat until onion is softened, about 6 minutes.  Cool slightly.

Squeeze bread to remove excess milk, then discard milk. Lightly beat egg in a large bowl, then combine with chicken, pancetta mixture, another generous sprinkle of salt, parmesan, bread, and parsley. Form 12 meatballs and arrange in another 4-sided sheet pan.

Stir together tomato paste and remaining tablespoon oil and brush over meatballs, then bake in upper third of oven until meatballs are just cooked through, 15 to 20 minutes.

Toss bell peppers with caper mixture. Serve meatballs with peperonata.

Comments:  The meatballs practically rendered me speechless.  They are a savory delight, without being too heavy.  The tomato paste-olive oil glaze colors them beautifully and adds a palatable tang.  No need for a brush; I simply dabbed it on with a fork.  I think the cheese is a nice addition, but I am unconditionally biased in favor of cheese.  Next time, I will prepare a double batch of these meatballs.  The leftovers were divine in every capacity (reheated in the microwave, on a sandwich, or cold out of the fridge).  Actually, this recipe would make fabulous meatloaf.  The peperonata was tangy, smoky, and salty.  In fact, I may prepare the peperonta simply to have on hand as a condiment.  Some chopped olives and a conservative amount of garlic would be an appropriate supplement; it could turn an everyday turkey sandwich into a pseudo-muffaletta***. 

This may be one of the simpler recipes of Gourmet, but it exemplifies its breadth.  Thank you, Gourmet, for making such an immeasurable contribution to foodies everywhere. 

*Hear the story on the Takeaway of Public Radio International and WNYC
**See the original recipe at Epicurious.com
***See Glossary for definitions