Thursday, October 14, 2010

Cream of Mushroom Soup

I suppose there will be an ebb and flow of emotions with anything you love, and I have been experiencing low tide regarding both my creativity and enthusiasm for cooking.  Unfortunately, my stove has been as barren as my blog; however, I am hoping that dropping temperatures and decreasing daylight will reignite my interest, as my favorite comfort foods become increasingly appropriate (there should be something positive to glean out from these first glimpses of winter).
Soup is a universally loved cold-weather comfort food, and this soup is a mushroomy masterpiece.  If this mushroom soup had a motto, it would be “go big or go home.”  It has two pounds of fresh mushrooms, plus dried porcinis, which are added to sautéed onions and garlic.  This may sound a bit excessive, and when you first add them to the pot, you may think you have done something seriously wrong, as your aromatics become overwrought by sliced shrooms.  Do not fear: mushrooms contain a lot of liquid, and they will shrink significantly as they sauté.  They will also lead to unparalleled mushroom flavor, accented by fresh rosemary.  The original recipe called for both fresh sage and fresh rosemary.  In an effort to streamline and save myself a couple of bucks, I chose to add rosemary alone.  After all, mushrooms and rosemary play so nicely together that I figured the single herb should suffice.  The meaty savoriness of mushrooms stands up assertively to rosemary’s piney, earthy warmth.  Essentially, the onion, garlic, rosemary, and mushrooms are simmered together with some stock, and finished with heavy cream.  It’s just half a cup, so don’t do something lame, like replace it with skim milk.  Before I added the cream, I snuck a little sample of soup, and it was so meaty and savory that I questioned adding it for about a millisecond.  But I forged on, heavy cream in hand, and the difference it made was completely invaluable.  There is something about saturated fat that simply brings out the best in things.  As with most cream of mushroom soups, this one is inevitably blended, but please do so with caution, and leave some chunks of mushrooms.  After all of that time cleaning and slicing, it would be a crime to pulverize them.  
Cream of Mushroom Soup (adapted from Smitten Kitchen)

3 tablespoons olive oil
1 large onion, chopped
3 garlic cloves, minced
2 sprigs fresh rosemary
Kosher salt
Fresh ground pepper
½ oz. dried porcini mushrooms
1 cup very warm water
1 lb. white button mushrooms, sliced
1 lb. cremini mushrooms, sliced
2-14 oz. cans reduced sodium chicken broth
1-14 oz. can beef broth
½ cup heavy cream

-       Steep dried mushrooms in 8 ounces of very warm water for 20-30 minutes.  When mushrooms are plump, lift them from the water (leaving as much grit behind as possible), and coarsely chop them.  Strain soaking liquid through a coffee filter to remove grit (I actually lined a fine mesh sieve with a paper towel, and that worked fine, and so far I’m still alive).  Set aside mushrooms and soaking liquid. 
-       In a large soup pot, head olive oil over medium heat.  Add chopped onions, garlic, rosemary sprigs, 1 teaspoon of salt, and lots of pepper.
-       Sauté for 10 minutes, or until soft and translucent, stirring frequently.
-       Increase heat to high and add all of the sliced mushrooms.  Stirring frequently, sauté for 10 minutes, until mushrooms give off liquid and reduce significantly in volume.  Stir frequently, especially when you first add them to prevent burning.  (You may want to lower the heat initially until the mushrooms begin to release liquid).
-       Add chicken stock, beef stock, reserved mushroom soaking liquid, and porcinis.
-       Allow the soup to simmer (over about medium heat) for 30 minutes.  Remove rosemary sprigs, add cream, and blend with immersion blender until it is the desired consistency.  This could also be done in a blender, but be sure to do it in batches, with the blender about half full and vented.
-       Keep soup at a bare simmer (to prevent cream from curdling), and serve soup with good bread and extra virgin olive oil.  

Sunday, September 5, 2010

Marinara Sauce with Fresh Tomatoes

It’s no secret that psycho cooker is psycho for pasta.  It is just so tasty and versatile, not to mention affordable.  Of all the ways to cook pasta, there are few that are as pure and classic as marinara.  I have no qualms about using canned tomatoes, or even cracking open a good jarred brand.  However, making it from scratch with fresh tomatoes elevates this simple pleasure to a new elegance, and there is no better time to tackle such an endeavor than late summer, when tomatoes achieve their deepest color and flavor.


Fresh marinara is not a quick feat, and while it is not difficult, there are a lot of steps, and it requires some organization.  The recipe requires that Roma tomatoes be blanched, peeled, and seeded, which is less difficult than it sounds, but takes a good half hour to forty-five minutes.  What does this mean exactly?  Score all the tomatoes, by using a paring knife and making an X in the bottom of each one.  Then drop them into boiling water for about 20 seconds.  The tomatoes go promptly from the boiling water to a bowl of ice water for about a minute to cool down (this is called “shocking” the tomatoes, and I imagine that, as a Roma tomato, it would indeed by quite shocking).  After removing them from the ice water, the skins of the tomatoes will easily slip off with a gentle tug.  You can then remove the majority of the seeds by slicing each tomato in half and gently squeezing the halves in the palm of your hand.  This process may sound like nuisance; I personally find it incredibly comforting.  To each him own, but if you find yourself siding with the prior statement, the recipe could also be made with a large can of whole peeled plum tomatoes, and a significantly decreased cooking time. 
Marinara requires diced aromatic vegetables as its flavor base.  I recommend chopping the aromatics (onion, carrot, celery, and garlic) first, while a BIG pot of water comes to a boil for blanching the tomatoes (the water can be used again later to boil the pasta).  Chopping these vegetables in advance and setting them aside will make the whole process smoother, and it will only require a few extra minutes (we can all come up with 10 extra minutes, right?)  You could skip the carrot and celery, but I think they add a nice dimension, and balance the tomatoes’ acidity.
Did I mention how delicious this sauce is?  I let it cook for about 50 minutes, of course tasting it along the way.  It retained the flavor of raw tomatoes for so long that I was getting a little concerned, but something magical happened in the last 10 or minutes of cooking; all the flavors came together to yield a rich, deep, slow-simmered tomatoey flavor.  I gave mine a blitz with my immersion blender to make it smooth and silky.  This is not necessary, especially if you like a chunky sauce, but it also helps create the creamy color.  Despite the color, there is actually no cream in this recipe.  That is just the natural pigment of the fresh tomatoes, and I can practically guarantee that your sauce will have the same lush color.  In a world with so much chaos, it is certainly a comfort to know that simple, raw ingredients can be transformed into something so much greater than the sum of their parts with a little thought and organization, and of course, heat.  You can always rely on good, old chemical reactions.     
This recipe yields about 5 cups of sauce.  What to do with the leftovers?  Freezing it is a good option, but I have a more delicious idea.  Stay tuned (hint: it involves crispy, breaded chicken and melted cheese).   

Fresh Tomato Marinara (yields about 5 cups)

¼ cup extra virgin olive oil
3 lbs. ripe Roma tomatoes
1 medium onion, diced
1 carrot, peeled and diced
1 stalk celery, diced
4 cloves garlic, minced
2 tablespoons tomato paste
1 teaspoons dried oregano
Hot pepper flakes, to taste (optional)
1 teaspoon sugar
Kosher salt and freshly ground black pepper
½ -1 cup chicken stock, vegetable stock, water, white wine (optional)

Serving suggestion:
Freshly cooked pasta, Parmesan cheese, chopped parsley or basil

-       Dice the onion, carrot, celery, and garlic set aside. 
-       Put a large pot of water over high heat to come to a boil.  You want it to be large enough to boil your pasta.
-       While the water heats up, rinse the tomatoes, and score them on the bottom, making an X.  Use a paring knife to do this and try not to cut too deep into the tomato.  Also, set up a large bowl of ice water.
-       When the water is boiling, add about 3 tomatoes at a time with a slotted spoon, and let them boil for 20 seconds.  Remove from the boiling water, and add to the ice water.  Allow the tomatoes to sit in the ice water for one minute, and then set aside.  Repeat until all tomatoes have been blanched and chilled.
-       In a three-quart sauté pan (or larger – definitely not smaller), heat the olive oil over medium heat.  Add chopped vegetables and garlic.  Season with a big pinch of salt (about a teaspoon), pepper, and add the oregano and hot pepper flakes (if using).  Sauté until soft, stirring frequently, about 12-15 minutes total.
-       While the vegetables cook, pull the skins off the blanched tomatoes, and cut each one in half.  Place a tomato half in the palm of your hand, cut side up.  Gently the tomato gently into a fine strainer, lining a large bowl.  Squeeze each tomato half until the majority of the seeds come out, and set the tomatoes aside.  When you are done with all the tomatoes, push the pulp through the strainer with the back of a large spoon. 
-       Coarsely chop the peeled and seeded tomatoes, removing any large white cores.
-       When the vegetables have softened, add the tomato paste, and stir to combine (some chunks of tomato paste are okay), and then add all of the tomatoes and any strained juice from the seeding process.
-       Add more salt and pepper, a teaspoon of sugar, and stir to combine.  Increase heat so the sauce is gently bubbling.  Put a lid on the pot, but keep it vented.  Stir occasionally, and allow the sauce to simmer for 45 minutes to an hour.
-       If you’re sauce looks like it has reduced a lot, but it still has a raw tomato flavor (e.g it’s not done), and requires more cooking, add some liquid (½ to 1 cup).  I used chicken stock, but water, wine, or vegetable stock would work too.
-       When your sauce tastes and smells delicious (taste it for seasoning), you may want to give it a blitz with an immersion blender, but don’t obliterate it.  You could also do this with a standing blender.  I would recommend only blending about half the sauce so you maintain some texture, and make sure you don’t fill your blender more than half way, and vent it, to prevent explosions.
-       Toss your sauce with freshly cooked pasta and lots of delicious Parmesan, and maybe a little parsley.  Be sure to set aside some pasta cooking liquid before draining your pasta to help bind everything together.  A little extra virgin olive oil at the end is also delicious.  (By the way, unless you're cooking for a really big crowd, be sure to set a couple of cups of sauce aside for other applications.  Always better to set aside too much than too little.  It goes back into the pasta a lot easier than it comes out.)      

Friday, August 6, 2010

Bacon and Vegetable Fried Rice


Fried rice is a delectable treat, usually reserved for otherwise-boring leftover rice.  However, seeing that rice takes a mere 15-20 minutes on the stove, I have no problem whipping some up when the mood for its fried variation attacks.  Besides, there is plenty of chopping and sautéing to do in the meantime.


Fried rice is a vehicle for practically any lingering vegetable you may have in your refrigerator.  The recipe below is merely a guideline.  Carrots, celery, scallions, spinach, watercress, corn (fresh or frozen), cauliflower, and zucchini would all be welcome additions.  The version below may also be grossly simplified with satisfying results:  I’ve made fried rice with just garlic, soy sauce, egg, and frozen peas as add-ins.  Despite my excessive detail, my point is that fried rice is versatile, and may be easily adjusted to both your tastes and the contents of your refrigerator.  However, I do feel the following ingredients are mandatory in addition to rice: garlic, soy sauce, egg, and some sort of vegetable.  This combination provides crucial elements in the domains of both flavor and texture.  The tender egg is particularly delightful, and it provides substance. 
Protein in addition to the egg is purely optional, but fried rice can breathe new life into less-than-thrilling leftover chicken, beef, etc.  The sky’s the limit in this regard.  I usually use leftover chicken, but last night, I had a hankering for bacon.  While bacon is by no means obligatory, I feel the need to sing its praises as key player in this dish.  The chewy, salty, smoky pieces dispersed throughout the rice were a pure joy.  But then again, when is bacon not a joy?  If you want to make the recipe below, and you happen to suffer from pork aversion or vegetarianism, skip the first step, and sauté your vegetables in light colored oil, instead of bacon grease.  Also, if you feel so inclined, a tablespoon of grated fresh ginger would be lovely added with the garlic.  A drizzle of toasted sesame oil wouldn’t hurt at the end.  About a half teaspoon would be a nice touch, without overpowering the other delicious flavors (like bacon!)  I may be providing far too many options and modifications, but this is the reality of fried rice.  My advice to you:  be decisive, go forth and fry some up. 
Bacon (and Vegetable) Fried Rice

3 slices of bacon (about ¼ lb.)
½ onion, diced
½ red bell pepper, diced
6 mushrooms, sliced
2 cloves garlic, minced
Medium head of broccoli, chopped into small florets
½ cup frozen peas (no need to thaw)
3 cups cooked rice (white or brown)
2 large eggs, scrambled
Soy sauce (probably about 2 tablespoons)
Oyster sauce (probably about 2 teaspoons)
Black pepper
Sriracha hot sauce, to taste (optional)

-       Preheat a large non-stick pan over medium heat.  Add bacon to the hot pan, and sauté until crisp.  Remove from the pan to a plate lined with paper towel.  When cool, coarsely chop the bacon.
-       Carefully remove all but 2-3 tablespoons of the remaining bacon grease (when in doubt, go with less; you can always add some oil later if need be).  Add the onion and bell pepper.  Season with about 2 teaspoons of soy sauce and black pepper.  Sauté until the vegetables begin to soften, about 5 minutes.
-       Add mushrooms.  Allow to cook until they start to give off liquid and begin to brown (about 5 minutes).  Add garlic.
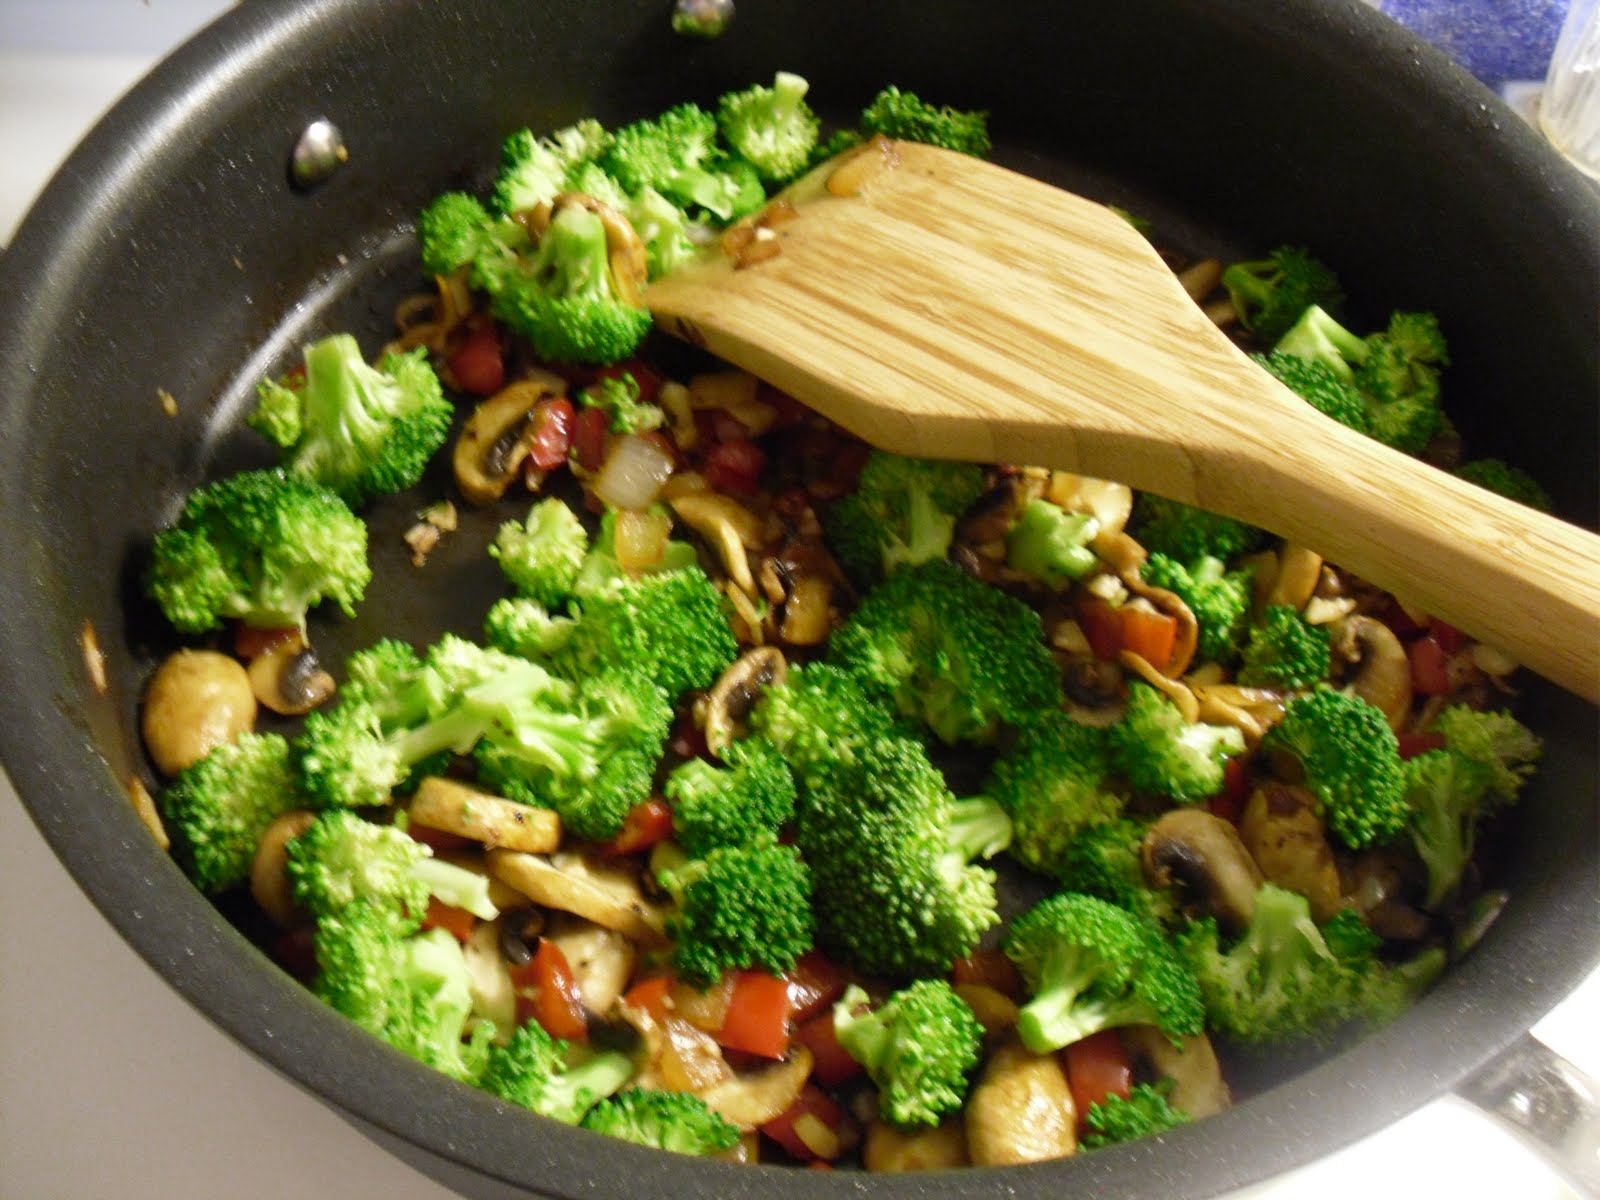
-       Meanwhile, par-cook the broccoli: place the chopped broccoli in a microwave safe bowl.  Cover with plastic wrap, leaving one side vented.  Microwave on high for a minute and a half.
-       Add the broccoli to the pan.  Stir to combine and season with about 2 teaspoons of soy sauce and more black pepper.  Allow to cook for about 2 minutes.
-       Add rice, peas, and bacon to the pan.  Season with more soy sauce, oyster sauce, and Sriracha (if using).  Stir fry everything together for 3-5 minutes, or until everything is heated through.
-       Move rice mixture to one side of the pan, and add the eggs.  Allow to set for a minute, then scramble them until cooked through.  (See pictures above).  Mix the eggs into the fried rice.
-       Taste for seasoning and add more soy sauce and Sriracha if needed. 

Monday, July 26, 2010

White Wine Braised Chicken


I’ve been craving roast chicken.  Bone-in, skin-on, luscious chicken.  It is far too hot to turn on my ancient oven in my tiny, non-air-conditioned apartment; however, I thought I might be able to get away with braising, without suffering the consequences of a sleepless night, as heat seeps from the oven for hours.  Plus, braising has some added benefits that roasting lacks.  A braise, by definition, requires a notable amount of liquid.  Wine just happens to be a liquid, and cooking something in wine always makes food better.  And thus, white wine braised chicken was born. 
It was a fairly simple process, which yielded very delicious results.  First, I seasoned some chicken legs with salt and pepper, and sprinkled them with flour (you could embark in a full-on dredging process if you wanted thicker sauce, but I enjoyed the gently viscous sauce that this process produced).  Then I seared the chicken until it was deeply browned, but not cooked through, and set it aside.
I sautéed sliced onions and cremini mushrooms in the remaining chicken-y goodness, followed by some minced garlic and dried thyme.  Next I added a healthy squirt of tomato paste for richness and color, as well as some diced Roma tomatoes (in the middle of July, it would be a sin to use canned tomatoes).  Then I dumped in half a mere half bottle of white wine, and nestled the seared chicken into this lovely concoction.  The whole mixture bubbled away for about a half hour, and the result was tender, moist chicken bathed in a lush sauce.  I served it on a bed of lemon-herb orzo, and I had no complaints.
What’s lemon-herb orzo, you ask?  Simply toss some freshly cooked orzo pasta with fresh lemon juice/zest, extra virgin olive oil, chopped parsley, salt and pepper, and you can see for yourself.  
White Wine Braised Chicken

4 chicken legs, split (bone in, skin on!)
1-2 tablespoons flour
1 teaspoon olive oil
½ onion, thinly sliced
6-8 oz. of cremini mushrooms, sliced
2 fat cloves garlic, minced
3 Roma tomatoes, chopped
½ teaspoon dried thyme
1 tablespoon tomato paste
1 dried bay leaf
½ bottle of dry white wine
kosher salt and freshly ground black pepper
¼ cup chopped fresh parsley

-       Preheat a large, heavy non-stick skillet over high heat* with about teaspoon of olive oil (you want it hot!)  In the meantime, liberally season chicken with kosher salt and pepper, and sprinkle with the flour.  When the olive oil is rippling and starting to smoke, add the chicken, skin side down, in a single layer.  Leave undisturbed for at least 5 minutes (it will splatter, be careful).  Flip and allow to brown on the other side, and then set aside on a plate.
-       Reduce heat to medium.  Carefully remove all but about 2 tablespoons of grease from the pan (I use wadded up paper towels).  Add sliced onions, season lightly with S &P, and sauté until they start to soften, about 5 minutes.
-       Add mushrooms, with a little more S & P, and cook until they start to brown and release their liquid, about 5 minutes.
-       Add garlic and thyme.  Cook for about a minute, and add tomato paste.  Stir, and cook for about 1 minute.
-       Add tomatoes, and little more S & P.  Cook for 2-3 minutes, until they start to soften.
-       Dump in half a bottle of dry white wine and a bay leaf; stir to combine.
-       Add the chicken back to pan.  Cover the pot with a lid, slightly vented.  Cook for 20-30 minutes (depending on how big the pieces are, and your fear of salmonella), turning chicken occasionally.
-       Add parsley and enjoy. 

*I actually switched between high and medium-high heat during this process, but my stove is awful.  Medium high would probably suffice for a decent stove.

Tuesday, June 15, 2010

The Easiest Mac and Cheese Made Easier

Last weekend was the first I spent without Warren since my return to Boulder.  We spent the majority of our time together on the weekends, and I knew the first one here without him would be particularly difficult.  Thus, I preemptively made plans to surround myself with good people and to do some cooking, as cooking is one of the few things that provide me unconditional solace right now.  Good friends help, too.  It happened to be a cold weekend, and between the weather and the circumstances, it was a perfect opportunity to delve into my favorite culinary realm: comfort food.  Between me and a friend, we plotted to prepare a veritable feast:  baked mac and cheese, roasted meatballs with a bell pepper and caper relish, oatmeal chocolate chip cookies, and a tender mixed green salad with a lemon-caper vinaigrette, julienned carrots and zucchini, chopped egg, and parmesan. 

Unfortunately, this meal never came to fruition.  I began cooking by attempting to julienne my vegetables for the salad, and this first step became my downfall.  I had just purchased a new (and evil) mandoline slicer earlier that day, and what the slicer called “julienne” was closer to the thickness of a French fry.  While I was busy hating my new mandoline, the zucchini slipped, and I sliced my thumb instead, in three places, perfectly spaced apart.  With a single look at my wound, I knew stitches were probably the best solution.  Luckily, after my burned-hand-incident, I already knew the emergency room drill.  Two hours and seven stitches later, I emerged from the ER, having survived yet another kitchen casualty.  I spent the first half of my ER visit cursing my existence (because I had no one else to blame but myself), and the second half laughing, and I’ve been trying to laugh about it ever since.  How could I make two culinary-related trips to the ER in such a short period of time?  There is only one answer:  I am ridiculous.  It just made me miss Warren so much.  He would have been sweet about it, and helped with tasks that require 2 hands (i.e. dishes), but mostly, we would have laughed about it together. 

The delicious dinner was thwarted by the trip to the ER, and instead we dined on Wendy’s.  After being flooded with adrenaline and having my thumb sewn together, nothing could have been tastier.  Although, I must admit, I will sing the praises of a Wendy’s baked potato any day.  Nonetheless, the following evening, I felt the need to cook, despite my physical limitations.  I made a modified version of my mac and cheese with tomatoes, which eliminated the need for chopping.  It was the most delicious, and easiest thing I could fathom at that point in time.  It’s sort of like pizza mac.  Plus, Warren loved this version of mac and cheese; he literally groaned with his first bite when I made it for him.  Wherever he is, maybe he can still smell it.  More importantly, if he has any inkling of what’s going on in my life, I hope he had a good laugh at me and my bum thumb.

Mac & Cheese with Tomatoes for Idiots:

Cook one pound of penne a few minutes shy of al dente.  Drain quickly (a little pasta water is good).  Return to pot.
Add one 28 oz. can of diced tomatoes (I used petite diced).
Add one pound shredded cheese (I used a combination of sharp cheddar and a mild cheddar/jack blend).  
Stir to combine; season with salt and pepper to taste; transfer to a greased 9x13 baking dish; cover allow to sit for at least 2 hours or up to overnight in the refrigerator.
Bake at 350 degrees for 40-50 minutes (perhaps with a little extra cheese on top), or until bubbling and browned.  Carefully (I don’t need a burn on top of stitches) remove from the oven.  Allow to sit for 10 minutes or so and enjoy.