Thursday, July 5, 2012

3-Cheese Grilled Cheese with Basil

I am currently in Detroit at my parents’ home, whose well-stocked refrigerator and pantry allows me to dabble to my heart’s content.  Today’s experiment: a truffle scented grilled cheese sandwich with fresh basil on olive bread.  The truffle aspect probably makes my parents sound a little snootier than they are in reality; however, they are very passionate about food (they prefer both quantity and quality).  My mom and I were in the grocery store the other day, and she pointed out a small package of truffle butter as we were walking through the dairy isle.  She said “we have some of that at home; dad and I like to put it on popcorn sometimes, like Ina Garten.”  My mom likes to buy different varietals of popcorn at the Detroit farmer’s market, and she pops it on the stove.  My dad hovers near by, watching her in awe, and then scoops popcorn into his mouth by the handful, eating happily and peppering the floor with the evidence.  In a nutshell, they love food, and obviously the apple doesn’t fall far from the tree.
So I took advantage of their beautiful kitchen and food supply one lazy afternoon during my trip home.  I started by splicing shards of cheese off a large block of Jarlberg that was loitering in the fridge.  I crumbled some feta, and gathered a small pile of shredded Parmesan on a plate.  I set all the cheese aside to allow it to come to room temperature for a deluxe grilled cheese sandwich.  I then removed a clump of basil from the bushy plant on my parents’ front porch, and buttered both sides of two pieces of bread studded with Greek olives.  Why butter both sides? Because the outside required butter for browning, and the inside received a delicate layer of truffle butter for flavor.  I let all of my ingredients come to room temperature before layering them together to compose my beautiful sandwich.  While I waited for my ingredients to lose their chill, I had the perfect pocket of time to cut up this beautiful watermelon.
I finally cooked my sandwich in a small sauté pan over a very low heat.  When it reached the ideal state of golden brown, with cheese beginning to bulge from the sides, I let it rest on the rack of the toaster over (no heat).  This allowed the molten cheese to settle (and to protect your mouth from burns), without the bread getting soggy on one side.  In a few minutes it was ready for a swift diagonal cut in half, which was the final step before my mom and I devoured it.  It was delicious and ridiculously decadent.  The flavor of the truffle butter may have gotten lost in the richness; however, the basil makes a huge difference, waking up the whole sandwich and cutting through any excess richness and saltiness. 

Sunday, July 1, 2012

American Fare Remix


I spend copious amounts of time perusing recipes on the Internet.  Perhaps I should say I spend copious amounts of times “cruising” recipes on the web because there is a certain lustfulness to it.  The indefiniteness of web-based recipes… it makes my heart race a little.  I can never get bored of it.  And my own relentlessness combined with the infinite abyss of the Internet lead me to the Juicy Lucy.
The Juicy Lucy is a burger stuffed with cheese.  As I am in the midst of romancing my new grill, the Juicy Lucy was an obvious next step in our courtship.  It’s actually rather simple:  two very wide, thin burger patties are joined together with a core of sliced cheese, and grilled.  Brilliant.  If you are very lucky, rivulets of cheese will peak through the patty as it is being cooked, hinting at the molten cheese just beneath the surface.  Use American cheese, a good quality, deli-sliced American cheese.  It’s excellent on burgers, and it melts and oozes beautifully.
The Juicy Lucy was fabulous.  As you can see, I had a minor problem with the meat sticking to the grill.  However, problems are relative; once I saw the molten cheese peaking out of the edges, my dismay melted away.
I was also, oddly, craving potato salad.  And thus, I whipped some up in 98-degree heat.  I felt the need to boil a huge pot of potatoes in my AC-absent apartment.  It had better be good.  What I produced, I am calling “dressed-up American potato salad.”  It contains mayonnaise for the requisite American richness, as well as coarsely chopped hardboiled eggs, but its flavor and texture are augmented by vinaigrette-like ingredients: fresh lemon juice, white wine vinegar, extra virgin olive oil, fresh herbs.  Delicious.  Capers would also be excellent in this.
The potato salad, the burger, and a random avocado lingering in my refrigerator apparently had a meeting with destiny.  On my burger, you will notice a green, creamy substance on the bottom bun.  Smashed avocado?  Yes, but it’s even better.  It’s smashed avocado spritzed with lemon juice and mixed with about a tablespoon of the dressing for the potato salad: mayonnaise, olive oil, Dijon, lemon, white wine vinegar, and copious amounts of salt and pepper.  I’d call that a perfect storm, and it made my burger compliment the potato salad oh-so-nicely.  The Juicy Lucy would also be fabulous simply adorned with pickles.
Juicy Lucy (based on the recipe from chow.com

For each burger:
1/4-1/3 lb. ground beef (85% lean)
1 sliced American cheese
Lawry’s seasoned salt
Sesame seed hamburger bun
Sliced pickles or avocado spread for garnish

-       Break the slice of cheese into 4 equal pieces by folding it in half, then folding it in half again.  Set aside
-       For each burger, divide the meat in half.  Use a broad plate (lightly oiled, if desired) to carefully press the meat into two flat, wide circles, approximately one inch in diameter wider than your hamburger bun.
-       Place cheese in the middle of one patty and carefully lay the other one on top.  Mold the edges together, and roll the edge of the jumbo, cheese stuffed patty against the palm of your hand to help to come together and have a circular shape.
-       Preheat a grill to medium and cook on each side for 3-4 minutes, flipping once.  Allow burgers to rest for 5 minutes to all juices and cheese to evenly distribute; add desired toppings and enjoy.

Potato Salad

For the dressing:

2-3 tablespoons white wine vinegar
Juice from half a lemon
2 tablespoons Dijon mustard
1/4-1/3 cup mayonnaise (I like the kind made with olive oil)
1/4-1/3 cup extra virgin olive oil
Kosher salt and freshly ground pepper

-       Whisk together all ingredients to taste.  You should have about 1 cup of dressing when you’re done.  I made it in a large measuring cup to make my life easier.

For the Salad: 

3 scallions, minced
2-3 tablespoons chopped fresh parsley
1 tablespoon chopped fresh thyme
3 rib of celery, diced finely
2 hard boiled eggs, coarsely chopped
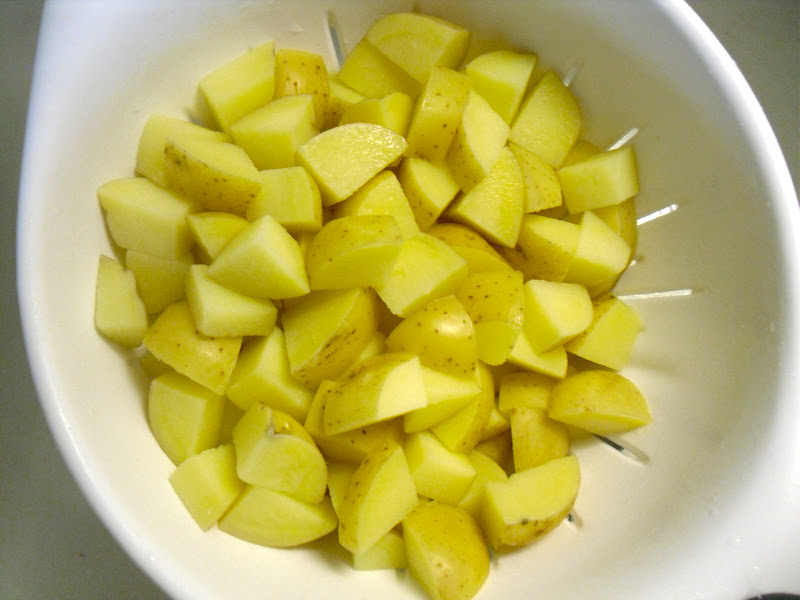
2 1/2 lbs. Yukon gold potatoes, skin left on, chopped in 11/2 inch chunks.
Kosher salt and pepper

-       Add potatoes to a large pot and cover with cold water.
-       Place on high heat and add 1-2 tablespoons of salt to the water.
-       Bring to a boil, stirring occasionally, then reduce heat to a simmer.  Simmer for 15-20 minutes until potatoes are fork tender but not mushy.
-       Drain in a large colander, and then cover with a clean dish towel for 10 minutes to allow potatoes to finish cooking in their own steam.  This will allow for even cooking without over cooking.
-       Transfer potatoes to a large bowl and add dressing and other ingredients until you achieve your desired consistency.  Eat warm or refrigerate.  Reserve any leftover dressing because the consistency/seasoning may be different once the potato salad is cold.

Tuesday, June 19, 2012

Grilled Chicken Tacos

As predicted, my grill is my new best friend.  Everything tastes better grilled, plus being outside around dusk is rather lovely in and of itself.  I used to cook so that I could eat outside in the summer; now I get to cook outside and eat outside.  These grilled chicken tacos were simple and fun to make: marinated chicken thighs, appropriate condiments, wrapped up in a flour tortilla.  The marinade was delicious: cumin, chili powder, a little cayenne, and limejuice, mixed with olive oil.  I could have eaten the chicken plain.  I suppose it was more of a glaze than a marinade, viscous and deeply colored.  I think it would have tasted great even if the chicken had just taken a quick dip in it, rather than the 30-minute soak I allowed for.
I topped the tacos with salsa, cheese, sour cream, and red cabbage.  I like the “Santa Barbara” Brand salsa.  It’s refrigerated and very fresh tasting.  My favorite is their hot salsa, but I haven’t had one that I didn’t like.  The red cabbage was both hearty and refreshing.  I was a little concerned that it was going to be too strong of a flavor, but it worked beautifully, and it’s definitely healthier and more interesting than head lettuce.  However, the red cabbage prompted me to add the sour cream.  I thought it would mix well with the cabbage and salsa, and allow the whole thing to mellow out.  I actually made an additional trip to the store once I got home because I felt it was that important.  I’m sure the tacos would have been perfectly edible without it, but it was worth the trip.  Next time, I might want to finely shred my cheese though, and possibly change the order of my layers.  Still, this was overall a delightful summer dinner.  
Grilled Chicken Tacos (makes about 6-8 tacos, loosely based on this recipe)

1 lb. boneless skinless chicken thighs
4 tablespoons fresh lime juice
4 tablespoons olive oil
1 teaspoon cumin
1 teaspoon chile powder
1/8 teaspoon cayenne pepper
1/2 teaspoon Lawry’s seasoned salt
For taco assembly:
Small flour tortillas
Thinly sliced red cabbage
Shredded Monterey jack cheese
Sour cream
Salsa

-       In a medium bowl (big enough to hold all of the chicken), whisk together all of the spices, and lime juice.  Slowly drizzle in olive oil, whisking as you go.
-       Add chicken and evenly distribute in marinade.  Set aside for 20-30 minutes.
-       Meanwhile prepare all taco condiments, and preheat a gas grill at medium heat for 10-15 minutes.
-       When hot, lay chicken on the grill, smooth side down, for 5-6 minutes a side.
-       When chicken is cooked through, slice it thinly for tacos.  Assemble tacos and enjoy.

Sunday, June 10, 2012

White Bean and Feta Dip


This is a tasty to morsel to share with friends, and requires no heat to make (a big bonus in these summer months).  It is sort of like an Italian hummus: smooth, creamy bean dip flavored with garlic and lemon.  Unlike hummus, it is made with white beans, as opposed to chickpeas, and it does not contain tahini (a sesame seed paste that all legitimate hummus contains).  It also has some fresh herbs in it.  I would recommend putting them in at the very end of the blending process, as my herbs became a little overly-pulverized for my tastes.  It was still delicious. 
I made a big mess
It is based on a recipe by Giada de Laurentiis, but made infinitely better by the addition of feta cheese.  She recommends serving it with pita chips, but I prefer sliced hothouse cucumber.  It’s much more refreshing.  I used an immersion blender to make this.  The recipe is easier with a traditional blender, but still manageable with an immersion blender.  You may have to dislodge some beans from the blade intermittently, and occasionally do a little hand mixing for even distribution of ingredients.  Or at least that’s what happened to me.  But it was well worth that minimal extra effort for a creamy, garlicky, crowd-pleasing appetizer. 
White Bean and Feta Dip (adapted from Giada de Laurentiis)

1-14 oz. can cannellini beans or great northern beans, drained and rinsed
1 clove of garlic, grated on a microplane
Juice of 1 lemon
1 tablespoon water
1 tablespoon chopped fresh thyme
2 tablespoons chopped fresh parsley
1/4 cup extra virgin olive oil (you may not need all of it)
1/4 cup crumbled feta cheese
1/2 teaspoon kosher salt
1/2 teaspoon freshly ground black pepper
Hot house/seedless cucumber, sliced
Extra feta, herbs, and olive oil for garnish

-       Place beans, lemon juice, water, and grated garlic in the base of a blender or the canister of an immersion blender.  Pulse a few times to begin to combine the ingredients.
-       Add olive oil slowly (if using a traditional blender, use a slow steady stream; if using an immersion blender, add a tablespoon or two at a time, blend, hand stir, and repeat until you achieve your desired consistency).
-       Add herbs, feta, and salt/pepper.  Blend again.  Check for seasoning.  Garnish with an extra drizzle of olive oil, sprinkle of herbs and feta, if desired.  Serve with cucumber slices, crackers, or tortilla chips, etc.

Thursday, June 7, 2012

Roasted Red Pepper Salad

I have spent the last month cooking hamburgers on my grill, striving towards the perfectly cooked, medium burger.  Grilling is a delicate dance between timing and heat.  It takes just the right balance to achieve a moderate char on the outside and a juicy, pink inside.  No one wants a blue burger, or a hockey puck, and no one wants a burger with a gray exterior, no matter how perfectly pink it may be in the middle.  Apparently, I have a few more burgers to screw up before I manage to avoid all of these undesirable traits. 
Roasted red peppers seemed like an appropriate antidote to alleviate my grilling frustrations.  Roasting peppers is fairly foolproof, although it is definitely a labor of love.  It takes time and patience, but yields something delectable.  Store-bought roasted red peppers are perfectly fine, especially when used as an augmentative ingredient in pasta or a green salad.  However, when the peppers are headlining the event, it makes a notable difference to roast them yourself.  They are smoky, meaty, and sweet, with a soft, buttery texture.  If you have the time, it is actually fun, and largely uninvolved.  You simply put whole peppers on the grill until they are charred.  Then they steam together for a bit, and last they must be lovingly peeled.  Then they are ready for you to chow down.  If you are going to do it, do it with at least 4 peppers so that it is worth your while.
The salad I made was comprised of the smoky peppers, cut into strips, as well as every herb I have growing on my patio, with capers, kalamata olives, and a kiss of garlic.  I am particularly proud of my thriving herb pot because I attempted this last year, and it was a disaster.  My herbs were infested with earwigs, and then I refused to water them, and eventually I had a pot of dead herbs camped out on my patio.  My full, green plants are a sight for sore eyes.
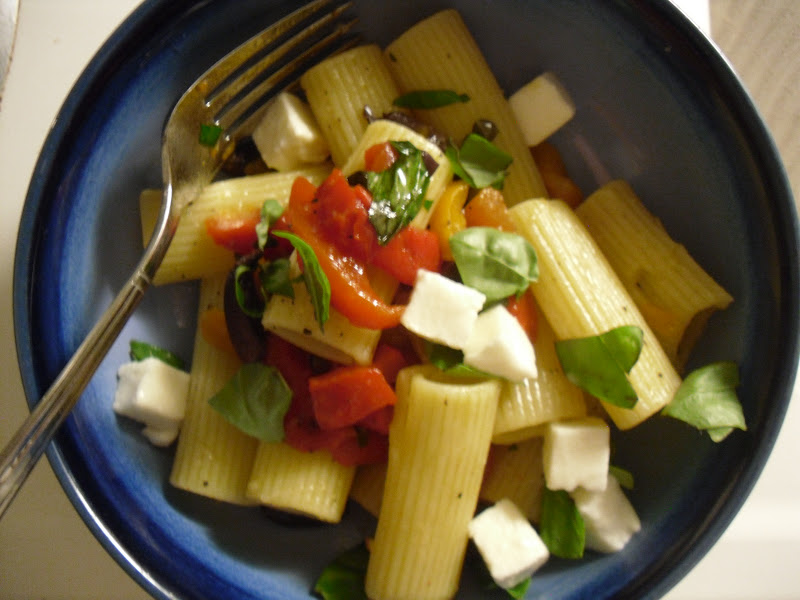
Essentially, this salad is all things good in the world mixed in a bowl.  And if you were concerned that a few were missing, you could follow my example and serve a caprese salad and some bread along side.  I love a dinner like this on a hot summer night: cold, and vegetable-laden, yet still rich and satisfying.  With the leftovers, I chopped the salad roughly, and tossed it with hot rigatoni, extra basil, and fresh mozzarella.  Delicious.

Roasted Red Pepper Salad (based on Giada de Laurentiis’s recipe)

2 red bell peppers
1 orange bell pepper
1 yellow bell pepper
1 teaspoon chopped fresh thyme
2 tablespoons chopped fresh parsley
12 basil leaves, torn
1/3 cup kalamata olives, pitted and quartered
2 tablespoons capers
1/2 garlic clove, grated on a microplane
2-3 tablespoons extra virgin olive oil
1 teaspoon red wine vinegar
Kosher salt and freshly ground black pepper to taste

-       Preheat a grill to medium high for about 10 minutes
-       Place the peppers on the grill, and cook for 20-25 minutes.  Rotate every 5 minutes so that the skin of the pepper becomes evenly charred, and the whole pepper softens.
-       When charred, remove peppers from the grill and place in a large bowl.  Cover with plastic wrap and let sit for 10-15 minutes.
-       Next place peppers on a plate or cutting board to cool for an additional 10 minutes, or however long it takes for you to be able to handle the peppers.
-       Tear peppers open, remove stem and seeds and peel off all the skin.  It should be easy to remove.  If it is difficult to remove seeds, rinse the peppers gently.  Only do this when necessary and use water sparingly as it will rinse off the smoky flavor of the grill.
-       Cut the peppers into strips, and add all of the remaining ingredients, seasoning to taste.  Eat the salad as is, or with chicken, a caprese salad, bread, or however you’d like.  It’s also great as a condiment on a sandwich.