Sunday, February 20, 2011

Chicken Chili

Sometimes I can’t quite get this blog together.  I do the cooking, I take the pictures, I write up the recipe, but then sometimes the words simply don’t flow.  Or the words do flow, but rather than flowing like a delicate creek, they flow like muddy water, bursting out of a sewer drain. 

I’m not sure where this blog post falls in that spectrum; however, I can tell you that the recipe was rather tasty.  This chili is definitely not the most beautiful food to come out of my tiny kitchen, but it certainly went down easy.  I have been pondering the concept of chicken chili for a while.  There are so many options: white chicken chili, green chicken chili, chicken chili with beans, tomatoes, etc.  It was a tough decision.  I knew I wanted a chili with some body to it; I personally don’t like chili that has lots heft in terms of the ingredients, but it all swims around in a thin, non-descript liquid.  I also knew that I wanted chunks of identifiable chicken breast, rather than mysterious ground poultry.

Additionally, I decided against white chicken chili in favor of something with more vegetables so that the chili could more or less be a complete meal.  Green chili was tempting, but I ultimately could not deal with shucking all the necessary tomatillos, nor did I want the responsibility of finding respectable tomatillos.  Nothing is more disappointing than having your heart set on a particular ingredient and all you can find at the market turns browned, bruised and undesirable.  I felt this was a realistic concern with tomatillos, and therefore eliminated them from my list of potential ingredients.

Essentially, I organized chili attributes according to what I did and did not want, and my hearty chicken chili grew from there.  It turned out to be loaded with green peppers, spiced with jalapeno, sweetened with tomatoes and corn, thickened with a touch of flour, and made hearty with chunks of chicken and white beans. 
Sounds good, doesn’t it?  Well, it was.  To avoid the wateriness I was previously griping about, I lightly dusted chopped chicken breasts with flour before sautéing it in olive oil.  At this point, don’t worry about the chicken sticking a bit to the pan or being completely cooked through.  Plenty of liquid will be added later that will pick up those browned bits.  It’s more important to let the chicken brown and form a bit of a crust.  Once the chicken has browned, aromatic vegetables were added along with a jalapeno and dried spices.  The medley was then simmered with some chicken stock, canned tomatoes, beans, and sweet corn kernels.  After bubbling for a bit, it was topped off with some shredded cheese.  What could be bad?  I think the key to this dish was that little bit of flour.  You would never know it was there, but this chili had very pleasing texture.  A generous amount of shredded Monterey jack doesn’t hurt the chili, either. 
A note on chopping jalapenos: be careful and wash your hands.  Once, I put in my contacts after chopping a jalapeno.  My family can confirm I actually shrieked from the pain.  So, be sure the wash your hands carefully and/or wear gloves.  The heat from fresh peppers is a little uneven, and I found that it mellowed out in this recipe after the chili sat for a day or two.  If you are concerned about the chili being too spicy, you can remove all or part of the seeds and ribs to reduce the heat.     

Chicken Chili

1 ½ pounds boneless, skinless chicken breast
2-3 tablespoons of flour
2 tablespoons olive oil
Salt, pepper
1 onion, chopped
2 green peppers, chopped
4 cloves garlic, minced
1 jalapeno, minced (remove all or part of seeds/ribs to reduce heat)
1 tablespoon chili powder
1 tablespoon ground cumin
½ teaspoon dried oregano
½ teaspoon dried basil
Garlic salt, Lawry's seasoned salt to taste
1-14 oz. can petite diced tomatoes
1-14 oz. can small white beans, drained and rinsed
1 cup frozen corn kernels (no need to thaw)
2-3 cups chicken stock
Accompaniments:  Shredded jack cheese, hot sauce

-       Chop chicken breast and toss with 2 tablespoons of flour.
-       Add to soup pot, preheated over medium heat with 2 tablespoons of olive oil.
-       Season the chicken generously with salt and pepper.
-       Brown for 5-10 minutes
-       Add chopped onion, bell peppers, garlic, and jalapeno.
-       Add cumin, chili powder, oregano, salt, pepper, and other seasonings (like Lawry’s seasoning salt, my favorite) if desired.
-       Stir occasionally, and cook for 5-10 minutes.
-       Add diced tomatoes, beans, frozen corn, chicken stock*.  Simmer for 30 minutes, stirring occasionally
-       Top with desired garnishes.

*Start with 2 cups of stock, adding more if your chili looks too thick.  You can always add more when reheating, as well.

Saturday, February 5, 2011

Snow Day Part 2

Sometimes, Wednesday morning can feel like Sunday morning.  I’m sure you’re scratching your head, wondering: how is this impossible feat accomplished?  I will tell you.  It’s due to a rare and wonderful circumstance: the second of two snow days consecutive snow days due to sub zero wind chills!  Doesn’t it sound wonderful?  Let me tell you, it is.  I had a weekend in the middle of my week, and I enjoyed every minute of it.

When I woke up on this “Sunday” morning, I felt that I needed to prepare some sort of luxurious breakfast, as opposed to my usual English muffin and hard-boiled egg in a hurry.  The day before, I had purchased some mushrooms.  I was shopping for my roasted chicken dinner (see previous post), but I added the mushrooms to my cart so I could make a mushroom omelet the following morning, based on the unlikely chance that school would be cancelled again.  I was concerned that my presumptuousness about a second snow day would certainly jinx this possibility, but I was wrong.  And in this type of circumstance, I love being wrong.

When I woke up that morning, I decided against an omelet for my leisurely breakfast, and started toying with the idea of a breakfast sandwich.  Vegetarians frequently praise mushrooms as a meat substitute because of their hearty texture and flavor.  I would say there is a distinct possibility that the first veggie burger was actually a grilled portobello mushroom cap on buns.  In light of this, I thought it might work out well to add sautéed mushrooms to a breakfast sandwich with some cheese and an egg.  This is exactly what I did, and I was pleased by the results:  meaty, savory, and satisfying.
First, I sliced up about 5 button mushrooms, and added them to a hot pan with some olive oil.  I know the pictured pan looks a little big for that amount of mushrooms, but they brown much better if they have a little breathing room.  Plus, the bigger pan will allow you to cook your egg in the same pan, and cut back on dirty dishes.  Also, refrain from salting mushrooms until they have browned.  Salt draws out water, so if mushrooms are salted in the beginning, it will bring out extra water, and it will take the mushrooms longer to brown.  (Conversely, it always good to salt onions immediately when you just want to cook them, but not brown them, for the same reason.  When you’re making a soup or sauce, you just want them softened, and salting them immediately will bring out their liquid and prevent them from browning).  When the mushrooms were done, I added a little fresh dill along with the salt and pepper.  The dill is completely optional; I just happened to have it in the fridge, but it could be left out of substituted with another herb. 
Then, I pushed the mushrooms to one side of the pan, added a touch more olive oil and one egg to the pan.  I made my egg over medium (maybe even over medium-well).  For breakfast sandwiches, I don’t like the yoke to be too runny because I want to be able to pick it up and not mess about with a fork and knife.  However, of course cook your egg in whatever way you see fit. 
While the egg was cooking, I toasted one big piece of sour dough, and put a slice of cheese on it while it was still hot.  I used Swiss cheese, but any cheese would do.  I then topped the cheese with the shrooms, then the egg, and last one more slice of cheese, and sprinkled the whole concoction with a little more dill and pepper.  Maybe it sounds like sort of an odd combination, but I thought it was one great big yum, and would encourage anyone with time and mushrooms on their hands to pursue this as a delicious breakfast option.

Wednesday, February 2, 2011

Snow Day

Although my student status technically remains, as I am not yet gainfully employed or anything normal like that, I no longer function as a student in the classic sense of going to class, writing papers, and taking tests.  No, no, I am now done with that.  Now I am essentially “playing house” as a speech pathologist, tagging along with a real speech path in a public school, working with students, dabbling in the paper work, and trying to soak up every last bit of knowledge I can before I am expected to fend for myself (and get a pay check).  Unfortunately, I am essentially paying tuition to work 40 hours a week, but there are some bonuses that come with it.  Like free time at night and on the weekends.  That is huge.  And even better: snow days!

On Monday afternoon, I received the information that school was cancelled for Tuesday.  Imagine my elation of having a surprise mid-week mini break, when the bona fide weekend had ended not even 24 hours earlier.  School was cancelled due to extreme cold temperatures, basically because children can’t be expected to wait for the bus with a wind chill of 35 below zero.  Some criticize this decision, but I have no complaints.  I prefer children to be safe (and time off). 

That evening, I went out for a drink to celebrate, but I immediately started plotting and scheming the perfect menu for frigid temperatures.  It had to involve the oven blaring at high temperatures for a few hours.  My apartment is poorly insulated, and thus quite cold (I am currently wearing wool socks, two pairs of pants, 2 shirts, and a scarf).  Not surprisingly, my ancient oven is also poorly insulated, and it not only cooks food, but it belches heat out into the apartment.  It’s great for winter, not so great for summer, but summer is not of great concern right now.   

Alas, I decided to make lemon-dill roasted drumsticks, which I find so comforting.  My love of chicken on the bone runs so deep that it is slightly disturbing.  In hindsight, brisket would have been a good choice since it takes at least 4 hours in the oven, not including preheating time, but I spent too much time out of the house to pull it off.  So, after fighting through the wind and cold to Whole Foods to get my chicken (8 drumsticks), I whipped up a marinade, consisting of loads of fresh lemon zest and juice (2 lemons to be exact), about 3 tablespoons of finely chopped fresh dill, 2 tablespoons Dijon mustard, a heaping teaspoon of honey, about 3 tablespoons of olive oil, a generous shake of Lawry’s seasoned salt, and freshly ground fresh pepper.  I whisked the ingredients together, and put the mixture and the chicken into a large Ziploc bag to marinate for an hour or so.  (See picture below, and try not to be too grossed out by the raw chicken). 
In the meantime, the oven was preheating, and heating my apartment, set to about 400 degrees (375 would probably do on a functional oven).  After they marinated, the drumsticks went into a foil-lined pan with an extra dusting of Lawry’s and pepper, and into the oven for about 45-50 minutes.  I like to rotate the pan occasional for even cooking. 
While the chicken became browned and blistered in the oven, I proceeded to make one of the coziest side dishes known to man: risotto-style orzo pasta.  It consists of orzo, delicate, rice-shaped pasta, cooked slowly in chicken stock so that it releases its starches to make the end product creamy and luxurious.  The chicken stock makes it so flavorful, and onions sautéed in butter at the start of the dish don’t hurt the flavor factor either.

First, sauté a half of an onion, diced, in 2 tablespoons of butter over medium heat for about 10 minutes, until the onion is soft, but not browned.  Season the onions liberally with salt and pepper at the start of cooking, and stir frequently. 
Then add 1 cup uncooked orzo pasta, stirring for about one minute until it is evenly coated with the butter, and starting to toast a bit. 
Then add two cups of chicken stock (I buy one 14 oz. can of stock and make up the difference with water).  Bring the mixture to a low simmer, then cover, and allow it to cook for 20-25 minutes, stirring occasionally.  You can always add more water if it starts to look dry or too thick (just a tablespoon or two at a time).  When it’s done, douse it with freshly grated Parmesan (about ½ cup) and ¼ cup of chopped flat leaf parsley.  Frozen peas are also a nice touch, especially if you don’t have parsley on hand, but it definitely needs something green at the end.
I served my chicken and orzo with a simple baby arugula salad, drizzled with extra virgin olive oil, a spritz of fresh lemon juice, parmesan cheese, and just because I had it on hand, some fresh dill.  And as if this meal wasn’t delicious enough, I received some news as I was about to start cooking that made it taste even better: I had another snow day the following day!  Please curb your jealousy.  You can simply make this delicious meal, and live vicariously through me. 

Monday, January 17, 2011

Tortilla Soup

My friend, Molly, inspired this simple, lovely recipe.  She is a great cook, and I was lucky enough to eat her tortilla soup recently.  I know I just posted a soup recipe, but January is National Soup Month, and I’ve wanted to make this recipe for a while.  I’m not sure who exactly the qualified authority figure is that delegates these food holidays, but I think it’s a good excuse to inundate my blog with soup recipes.  Plus, avocados make a perfect garnish for tortilla soup, and they just happened to be on an irresistible sale. 

My tortilla soup is very similar to Molly’s soup, the source of its inspiration.  It is made with canned chicken stock, flavored with cumin, onion, bell pepper, and tomatoes.  The soup does not have any meat in it.  Instead, heartiness is added by the creamy texture of black beans and the sweet pop of corn kernels.  Unlike Molly’s recipe, my soup is thickened with white corn tortillas during the cooking process, while she served it with tortilla chips.  Although my method isn’t seen in most recipes, it’s fairly traditional.  The tortillas practically dissolve into the soup, adding body and flavor to the soup.  Once the tortillas hit the hot soup, you can immediately smell the difference, as the corn tortillas heat through and distribute through the pot.  After cooking, some small pieces of tortilla remain, but most disappear into the soup and simply thicken and flavor the soup.
Not only is the soup delicious, but its preparation is very easy.  It only requires some sautéing of vegetables followed by dumping of various ingredients to the pot.  It was a stress-free and relaxing meal to make.  The flavor base is onion, bell pepper, and garlic (I wanted to add a jalapeno, but forgot it in my grocery basket).  After sautéing the vegetables, the majority of the remaining ingredients are essentially dropped into the pot, and the whole thing simmers for a half hour.  This gives you plenty of time to clean up, and prepare the toppings. 
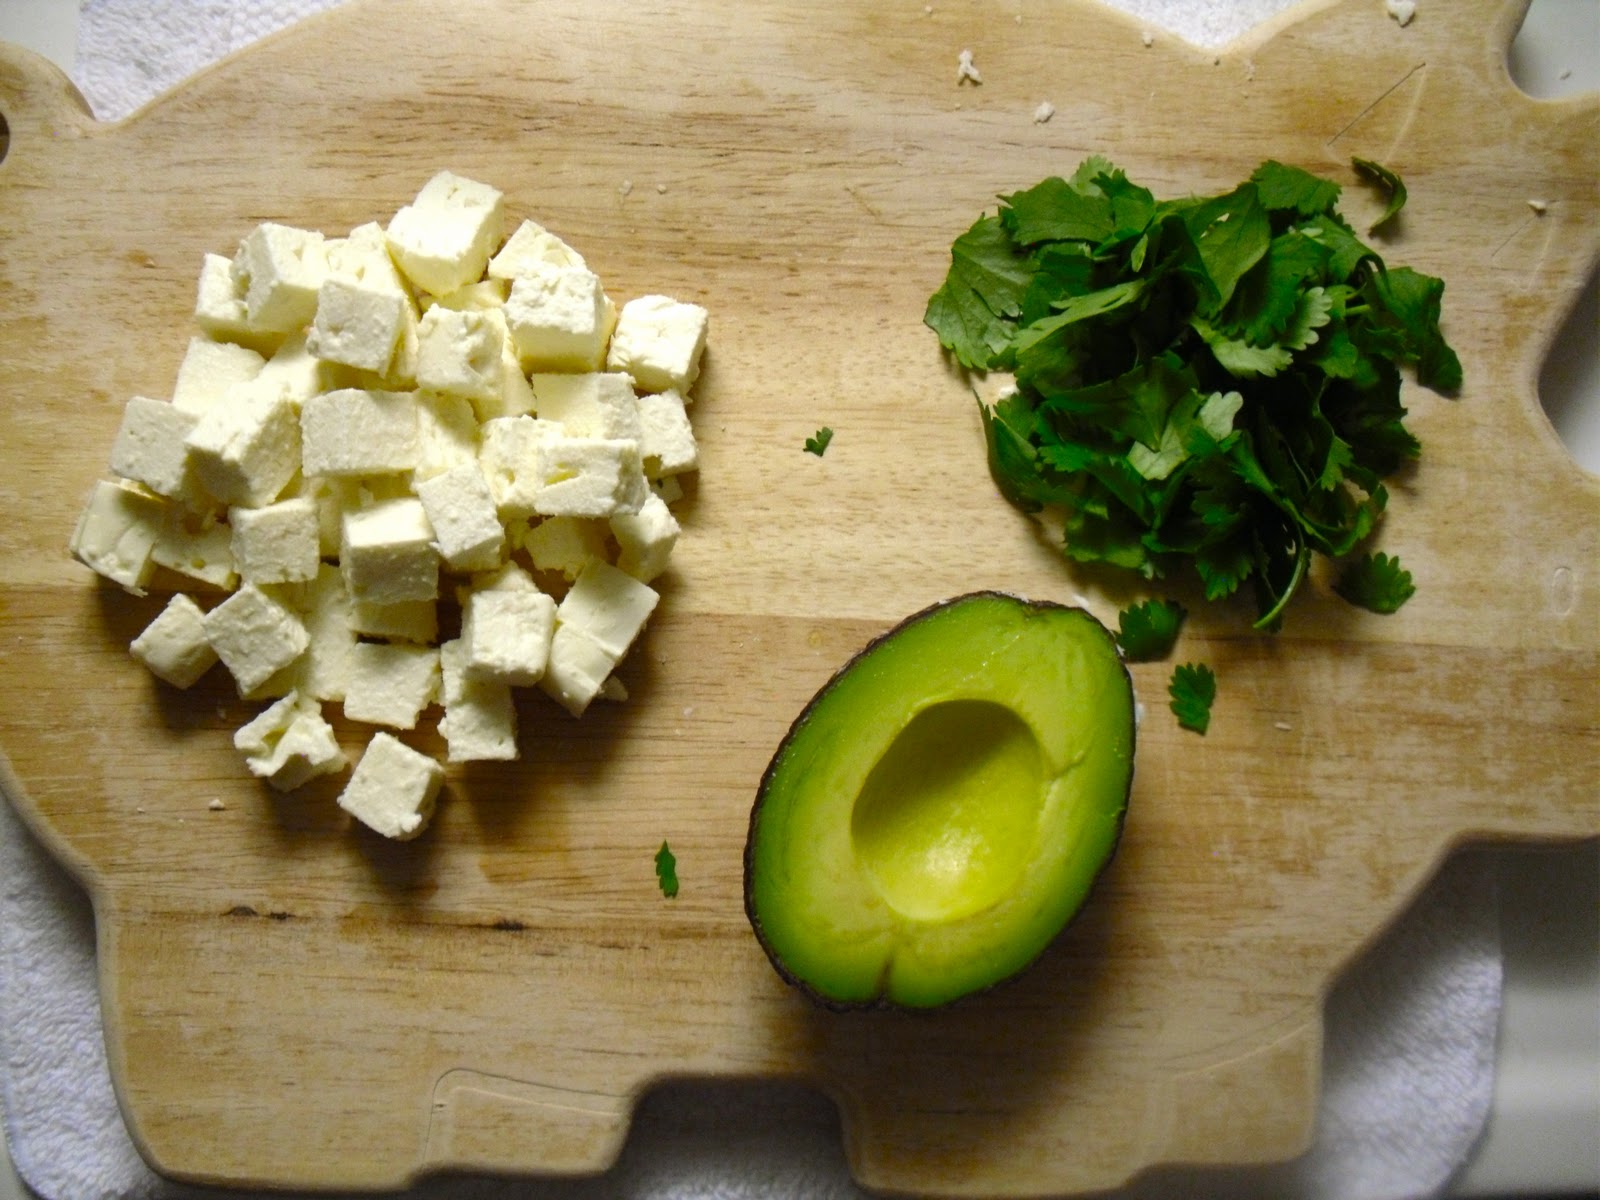
The best part of the soup may actually be the toppings.  Molly served it with a bevy of toppings:  tortilla chips, fresh cilantro, cheese, avocado, and onion.  She even had chopped tomatillos, fresh from her father’s garden.  My toppings were not quite as plentiful, but I followed the same basic idea.  I used fresh cilantro, diced avocado, and cubes of salty feta cheese.  Queso fresco is traditional, but Molly used feta, so I followed her example.  Plus, I love any excuse to eat feta cheese.  This was such an easy and delicious recipe, where the whole somehow exceeds the sum of its parts.  Sometimes, I enjoy cooking dishes that require lots of chopping and preparation, but this making this soup was a relaxing process that made for a hearty and delicious meal on a snowy Sunday night (during National Soup Month, no less).  
          
Tortilla Soup (serves 4-6)

2 tablespoons olive oil
1 onion, chopped
4 cloves garlic, minced
1 green pepper, chopped
Salt, pepper, garlic salt, seasoning salt, to taste
3-14 oz. cans reduced sodium chicken stock
1-14 oz. can diced tomatoes
2 teaspoons cumin
1 teaspoon hot pepper flakes (or to taste)
1 teaspoon chili powder
1 cup frozen corn kernels (no need to thaw)
1 can black beans, drained and rinsed
4 corn tortillas, cut in strips
2-3 tablespoons chopped cilantro.
Possible garnishes: avocado, cheese, sour cream, fresh cilantro, lime wedges

-       In a large soup pot, preheat the olive oil over medium heat.  Add onion, bell pepper, and garlic to pan.  Season to taste with salt and pepper (I used about a half teaspoon of each), and sauté for 10 minutes, or until vegetables are soft.
-       Add chicken stock, tomatoes, corn, cilantro, cumin, hot pepper flakes, and chili powder.  Increase heat and bring liquid to a boil.  When boiling, reduce heat so that the soup simmers. 
-       Add tortillas and black beans.  Cook for 20-25 minutes, stirring occasionally, until soup starts to thicken and tortillas break down.
-       Taste for seasonings and adjust as needed.
-       Serve soup and garnish as desired.

Thursday, January 6, 2011

Matzo Ball Soup

New Year’s Eve, 2010: the close of a remarkable year.  When I say “remarkable,” I mean it in the truest sense of the word, meaning striking, noteworthy, and worthy of attention.  I have been blissfully happy, stressed, inspired, disenchanted, and utterly devastated.  I have been to a wedding, and a funeral.  And it has now come to a close.  I have been accused of being a contrarian before, and while I am not certain that this shoe fits me in general, it definitely fits when it comes to New Year’s Eve.  To me, New Year's Eve is a recipe for disappointment:  over-crowded bars with over-priced drinks.  Because it marks the passing of years, it necessitates some sort of self-reflection, for which crowds of strangers are not conducive.  So, what do these negative opinions make me?  A party pooper.  And no better way to embrace my true party pooper self than to stay in on New Year’s Eve, and do some cooking to tend my wounds.

New Year’s Eve cooking provides the opportunity for leisurely, slow-simmering recipes.  I chose soul-soothing matzo ball soup, and indulged in all possible steps to make it as flavorful as possible, drawing out the process simply because I had the time to.  Honestly, what else is a party pooper going to do on New Year’s Eve when it is 10 degrees outside?
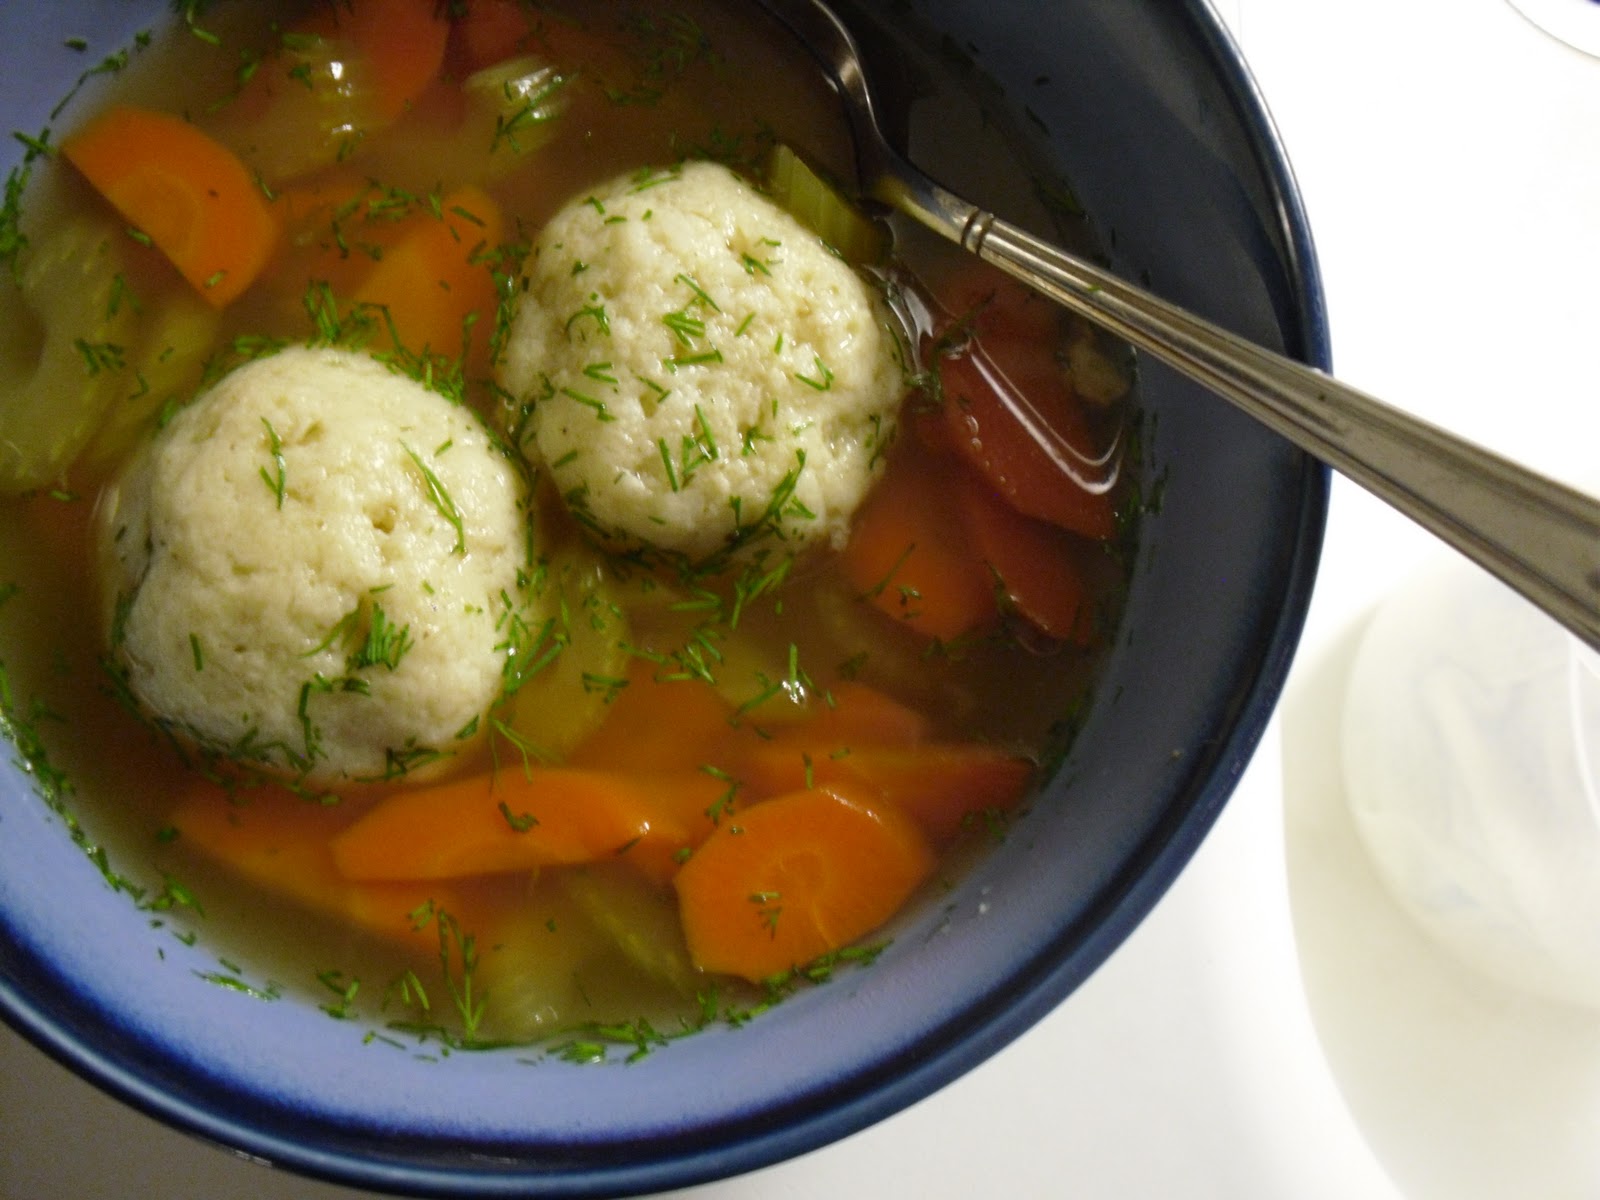
The first thing I did was prepare the tender little matzo balls.  If you’ve never had a matzo ball, it is sort of like a bland meatball made entirely with cracker meal.  I suppose it may be called a Jewish dumpling, comprised of matzo meal and a little oil, bound together with eggs.  They are tender, bland, and comforting.  Matzo balls are simmered in salted water, which results in random salty bites.  The whole process takes about 45 minutes, and it is largely unattended.  The easiest thing you can do is to go the kosher isle of the grocery store and pick up a box of matzo ball mix, then follow the instructions exactly.  It’s pretty simple.  Most importantly, do not, under any circumstances, lift the lid off the matzo balls as they simmer.  This will make them tough.  This advice has been passed down from my late grandmother, and must be heeded.  My grandma was not exactly known for her culinary prowess; she had a habit of  mixing any and all lingering beverages in the fridge into one cesspool of leftover liquids (juices, soda, anything).  However, the woman knew her matzo balls.  
Essentially, you mix one packet of matzo meal with 2 lightly beaten eggs and 2 tablespoons of vegetable oil.  Let this sit in the refrigerator for 15 minutes, and then roll the mixture into 1 inch diameter spheres.  Next, drop the them into boiling, salted water, and put a lid on the pot.  Reduce the heat to a simmer, and leave the pot alone for 20 minutes.  Anyway, if you follow these instructions or the one on the box, you should have matzo balls that look something like the picture above.  They will be tender and fluffy, yet substantial.  They are sort of like lumps of bread that can stand up to soup.  Furthermore, matzo balls can be made in advance and await your spoon in the fridge.  I made mine in the morning, but I don’t see why they couldn’t be made a day in advance.  
Next, I proceeded in making a delicious broth.  I did not make it from scratch, and instead fortified canned chicken stock with aromatic vegetables and herbs.  I used carrots (3 cut in thirds), celery (3 stalks cut in thirds), 1 onion (peeled and halved), 6 whole garlic cloves (peeled), fresh dill sprigs, and lots of black pepper.  All of these lovely vegetables took a leisurely bath in 4 cans worth of simmering chicken stock (with one cup water added).  This step of simmering vegetables is not necessary, but it adds richness to the stock, makes your apartment smell amazing, and it’s fun (at least that is my personal belief).  Simply add the aforementioned vegetables in large chunks and let the broth simmer away for an hour or so.  Cover the soup during this process, but vent the lid, and stir the broth occasionally.  When the vegetables are very tender, and they have relinquished their fresh flavor, remove them with a slotted spoon.  You can discard them, or enjoy them as a snack.  I always leave the garlic cloves in soup because I love them.  If you've never had slow-cooked garlic cloves, they may surprise you.  After all of that cooking, they become incredibly soft and lose their pungency.       
If you skip the previously discussed stock fortifying step, do not fear.  You will still have delicious soup.  Use the same amount of broth and add 4-5 thinly sliced carrots and 3 thinly sliced stalks of celery.  Pepper, dill (fresh or dried), or dried parsley are all nice additions.  In fact, treat your soup in this manner whether you have skipped the step above or not.  According to Marc Bittman, traditional matzo ball soup is served only with carrots, but celery was always in the mix at my family dinner.  Once you add the sliced carrots and celery, simmer for about thirty minutes to an hour so that the fresh vegetables may cook to your texture specifications.  Allow the soup to cook uncovered at this point so that the broth will reduce, and deepen in flavor. 
When you are ready to eat, add the matzo balls to the soup (they warm quickly, and I do it per each bowl).  Perhaps sprinkle some fresh dill on top.  With this soup, you now are ready to soothe your soul, even if it’s only a temporary measure.  That is, until you go back for seconds.