Tuesday, August 2, 2011

Zucchini Pasta

This summer, I attempted a little gardening, and I learned that I do not have a green thumb.  The truth is… I killed a cactus.  I bought the most darling hen and chicks cactus to live on my patio.  There were two plants, nestled together in a pitcher.  I named the big one Melanie, and the little one Melvin (Mellie and Mel for short).  Last week, I discovered that Melanie was all shriveled up and brown.  I made a fruitless attempt to save her by removing some of the brown leaves, and she became dislodged from the soil.  Below, you can see lonely little Melvin and the sad spot where Melanie used to reside.  I also have two leggy basil plants, named Rufus and Alberta, who have had multiple near death experiences due to highly inconsistent (and irresponsible) watering practices.
Luckily, people exist in the world that are able to maintain an actual garden, unlike me, the cactus killer.  I am grateful to these people because they give me hope that my gardening skills may turn around one day, and I am especially grateful when capable gardeners share their loot with me.  Some garden-fresh zucchini were recently placed in my custody, and they were so delicious.  I love zucchini, and to have some home grown ones bestowed upon me was such a treat.  They were small and tender, unlike some of those big, seedy ones you sometimes find in the market. 
Such perfect specimens deserved a simple preparation that would highlight the zucchini itself.  I chose to sauté the zucchini with garlic and olive oil, and toss this concoction with pasta, fresh herbs, and cheese.  It was delicious, and it can be prepared in the amount of time it takes to cook the pasta. 
While the water came to a boil, I chopped up the zucchini, garlic, and herbs, and once the pasta was in the water, I began sautéing.  For one generous portion, I used one zucchini, one clove of garlic, about ¼ of a box of pasta, and a few tablespoons of herbs.  I sautéed the zucchini for about 5-7 minutes, so it softened, but it was still crisp in the middle.  I also added a few tablespoons of white wine at the end to stop the garlic from getting too brown (and because I happened to have it in the fridge). 
When the pasta was done, I put it directly in the pan with the zucchini, and added the chopped herbs.  I had the perfect storm of leftover herbs for this dish: basil, parsley, and dill.  It was a fresh and delightful combination, but any one of those herbs would have done the trick.  And then of course, I added (a lot) of Parmesan cheese, and a little Asiago.  These ideas are merely guidelines (I intend to make it again tonight with thyme and basil from my dilapidated herb garden).  The method is less important than the fact that the fresh zucchini was such a treat.  I could have eaten the zucchini straight from the pan and called it dinner.

Tuesday, July 26, 2011

Mayonnaise: The Real Deal

Mayonnaise is a strange food.  It is the crux of many delicious recipes, but very few people yearn to crack open a jar of Hellman’s a dig in with a spoon.  Traditional mayonnaise is simply an emulsion of egg yolks, oil, and lemon juice, but commercial production sometimes renders into something seemingly more offensive.  Few have been spared the visual trauma of a vessel of mayonnaise that has been exposed to open air, out of refrigeration, translucent and gelatinous at the edges.  Despite this burdensome image, I truly enjoy mayonnaise on sandwiches, as a base for sauces and dips, and as a binder for various recipes.  Some of the most delicious (and unhealthy) foods hinge on mayo: spinach-artichoke dip, blue cheese dressing, the creamy sauce on a spicy tuna roll.  I can nearly guarantee that even the most vehement mayonnaise haters have unwittingly enjoyed it on a few occasions.
I actually had to be tricked into it myself.  When I was in elementary school, my brother became devoted to making turkey sandwiches one summer.  As part of this project, he made it a personal mission to convince me of the merits of mayo in such a context.  He handled this issue with exceptional finesse.  Catapulting off my deep-rooted love of butter, my brother told me that mayonnaise was “sandwich butter,” like butter but designed especially for sandwiches.  As he crafted my lunch, he would spread mayo on challah bread, and present it to me for approval, creating a thin, without the slightest hint of oozing or glopping.  Soon, I was regularly devouring his carefully constructed turkey sandwiches adorned with “sandwich butter.” 
I never really understood why my brother was so devoted to his cause, until I began sharing meals with someone who expresses a deep disdain for mayonnaise.  This person, also known as my co-chef (see “Fish Tacos”) will eat foods with mayonnaise in them, but only when thoroughly disguised.  This leaves me irrationally distressed, not only because it limits the food we can share, but also because I want him to experience the joy of a turkey sandwich or a BLT with mayonnaise, or other mayonnaise-enhanced foods (such as a corned beef sandwich with swiss, Russian dressing, and cole slaw). 
I have embarked upon my own mission, championing the merits of mayonnaise.  Similar to the “sandwich butter method,” I am trying to be gentle and non-threatening.  My subject is a willing participant, but the idea of mayonnaise makes his stomach turn.  As a first step, I chose to make him something simple with high quality ingredients, and a flavorful homemade mayonnaise.  And because I wanted him to truly enjoy what he ate, bacon seemed like an appropriate avenue.  Only one food could fulfill such exacting specifications: a BLT sandwich with basil mayonnaise.  I even added a little avocado to make it as palatable as possible, with sourdough bread, summer tomatoes, red leaf lettuce, and plenty of bacon (see two examples directly below).
For the mayonnaise, I used extra virgin olive oil and lots of fresh basil to make it minimally offensive and maximally flavorful.  I actually think that I overly-softened the blow by making it so flavorful.  It was rich and delicious, and it made for great sandwiches.  However, it was not a true introduction to mayo.  I was trying to be gentle, but I think I played it a little too safe, and my co-chef agreed.  In particular, the extra virgin olive oil resulted in quite a strong flavor.  For the next installment of our experiment, I intend to omit the basil and use half extra virgin olive oil and half canola or vegetable oil to impart a more bonafide mayo effect.  However, if you are looking for something delectable to put on a sandwich, I would include the basil, or any combination of fresh herbs.   
(photography courtesy of my co-chef)

Basil Mayonnaise (based on Marc Bittman’s basic mayonnaise recipe)

1 large egg yolk (this would be a good time for really high quality eggs)
1 tsp. Dijon mustard
2 tablespoons freshly squeezed lemon juice
Dash of cayenne pepper
½ teaspoon each of freshly ground pepper and kosher salt
¼ cup of fresh basil, torn (I used a combination of opal basil and regular basil because it was what I had)
½ cup extra virgin olive oil, divided
-       Mix together all ingredients besides the oil in the canister that accompanies an immersion blender or a regular blender.
-       Add a couple of tablespoons of oil, and then run the motor.
-       While the motor is running slowly drizzle in the remaining oil until a creamy, uniform emulsion results.

Wednesday, June 29, 2011

Fish Tacos

This post is long over-due, but the timing is perfect for this steamy weather.  I cannot take complete credit for this mini-series of recipes that resulted in some very tasty fish tacos, as a co-chef assisted me in their creation.  I can, however, take complete credit for my awkward, cheeky prose.  This was quite the journey for a couple of co-chefs.  And while we both worked hard to soften our culinary opinions in order to collaborate, the composition of the final product was quite simple.  In other words, the food was both good and easy. 

Deciding to make fish tacos was easy; deciding what to put on them was not.  There are so many viable options, and combinations (go to foodgawker and search “fish tacos;” the search results will make your head spin).  I will not go into the details of how we made our decision, but do know that this matter was not taken lightly.  We settled on the following combination: soft corn tortillas with sautéed white fish fillets, topped with guacamole, red cabbage slaw, and jack cheese.  The result was a fresh, light, and satisfying meal, which only required 10-15 minutes of heat from a single burner on the stove.  At the time it was thunder storming and 70 degrees, but it is currently 95 degrees outside, and the minimal heat requirements are becoming an increasingly important selling point.


First, my co-chef made guacamole.  It was a standard, but well executed guac, with the primary focus on the perfectly ripe avocados.  I think the key to this recipe is allowing the onions to sit in a bit of lime juice, which mitigated their raw, acrid flavor.  I tried to stay out of his way during its construction because, not surprisingly, I can be a little bossy in the kitchen.  However, I have gleaned the following information:

Guacamole
1 Roma tomato, diced
2 tablespoons minced red onion
Juice from ½ lime
2 ripe avocados, seed removed and flesh scooped out into a large bowl
1 teaspoon of mayonnaise
Kosher salt and freshly ground pepper, to taste

-       Squeeze the lime juice over the minced onion while preparing your remaining ingredients.
-       Add all ingredients in a large bowl and gently mix together.  Taste for seasoning.
-       Cover the guacamole with plastic wrap directly on the surface to prevent browning, and chill until you are ready to serve.

Next, I made the red cabbage slaw.  I have never worked with a whole head of cabbage before, and it was surprisingly easy.  First I removed a few of the outer leaves.  Then, while my co-chef watched nervously, I used a big knife to cut it in half, then quarters.  I removed the core by cutting into the cabbage on an angle, and then (carefully) made thin slices with a knife.  This was not a complex process, and so much more delicious than the pre-shredded bags (although those are not terrible if you’re in a time crunch).  The cabbage and some shredded carrots were dressed in a simple lime-based vinaigrette, formulated from the following recipe: http://une-deuxsenses.blogspot.com/2011/02/crispy-black-bean-tacos-with-feta.html.  Over all, this slaw was a little smoky and a little spicy, and had a refreshing and satisfying crunch.  As a testament to how good it was, I ate the leftovers the next day directly out of the bowl they had been stored in, and then proceeded to make another batch with the lingering cabbage.

Red Cabbage Slaw
½ red cabbage, sliced
1 carrot, grated
2 scallions, finely chopped
¼ jalapeno, seeds and ribs removed, and minced (this can be replaced with a good squirt of sriracha in the dressing)
2 tbs. lime juice
2 tbs. olive oil
1 heaping tsp. mayonnaise
¼-½ teaspoon cumin (I used the latter amount the second time I made it, and it was great)
½ teaspoon honey
Salt and pepper, to taste (about ¼ teaspoon each)

-       In a bowl, combine lime juice, salt, pepper, cumin, honey, and mayonnaise.  Whisk together until thoroughly combined.
-       Slowly whisk in olive oil.  Taste dressing and adjust seasonings.
-       In a large bowl, toss the dressing with remaining ingredients.

I then prepared a plate of condiments (shredded jack cheese, cilantro leaves, and adorable little lime wedges), and my co-chef cooked the fish.  For this, I have to adorn him with enormous culinary praise. It was perfectly cooked, and perfectly seasoned. We used basa, which is a firm white fish, similar to tilapia.  I cannot go into too much detail because he deliberately shielded me from the kitchen during his cooking process (a difficult task in a studio apartment).  This was not out of secrecy, but because I am a terrible “backseat cook.”  He claims to have done the following (but he is a lawyer, and probably can’t be trusted):

Sautéed Basa Fillets
-       Preheat a large non-stick skillet over medium high heat with a thin, even coating of olive oil.
-       Season 1 lb. of basa fillets with a spritz of lime juice and a light sprinkling of cayenne, Lawry’s seasoned salt, chili powder, cumin, and salt/pepper. (Skip the cayenne if you’re not into spicy; go very light with it even if you are into spicy.)
-       Sprinkle lightly with a couple of teaspoons of flour. (Mr. Co-Chef says he wouldn’t do this again, but I liked it.)
-       Cut the fillets in half and sauté until the fish is opaque and firm (a couple of minutes on each side).
-       Assemble tacos and enjoy!

We used small white corn tortillas, heated briefly in the microwave.  If the word “microwave” makes you cringe, you could use the oven or the stove.  This meal was so delicious: crunchy, creamy, spicy, tart, and fresh.  You will find ample visual evidence that supports these claims.  You are even allowed the pleasure of seeing my overly-freckled face take a perfect bite of “mini-taco” (i.e. a bite of all the ingredients besides a tortilla for those who are too full to eat another taco, but can’t stop eating).

Wednesday, May 25, 2011

Minestone

I handle periods of transition with the finesse of a baby tolerating a dirty diaper.  Under the best circumstances, I squirm and make faces to reflect my discomfort.  I may whine a little bit.  Depending on the severity of the situation, I feel compelled to burst into tears.  One would hope that my tolerance for change would increase with experience; this does not seem to be the case.  Under my critical observation, my improvements seem to be occurring at a rate that does not allow for functional changes. 

Currently, I am transitioning from the role of “life-long-student,” into the vastly unstructured environment of unemployment.  There are some advantages to this situation: free time, free time, free time.  There is also the dingy hope of an interview or better yet (gasp!) an actual job offer.  There are also some co-occurring problems: the highly pronounced anxiety that barges in when you don’t get the interview/job offer.  My coping strategy with these issues tends to involve falling back on comfortable, old routines, like cooking.  Alas, yet another soup recipe was born.

Minestrone is a time-honored tradition in my family, although I sort of took it in my own direction.  When I was little, I sort of dreaded it because of the presence of zucchini.  I would avoid the zucchini, and eat everything else I could, until my mom inevitably required that I finish it.  With a trembling hand, I would lift each spoonful of cold, neglected zucchini, and chew as quickly as possible to prevent gagging.

My “adult” palette has revised its opinion of zucchini, and I stand behind a firm recommendation of this soup.  This is a fairly traditional recipe, except that I included a good portion of tomato paste to give the broth a deep color and flavor.  I also cooked the pasta separately to prevent it from turning to mush, but this is matter of personal preference.  Overall, the soup was warm and comforting.  It had a round well-developed flavor from the garlic, herbs, and tomato paste.  Plus, it goes nicely with my favorite condiment: freshly grated Parmesan cheese.   I recommend the following progression:  cook the soup; drink a beer, eat a of soup bowl; drink another beer while eating another bowl; be happy.  But it’s just a suggestion (and please excuse the blurry photos).  


Minestrone

2 tablespoons olive oil
2 tablespoons butter
4 cloves garlic, minced
1 medium onion, diced
¼ teaspoon hot pepper flakes
Kosher salt and freshly ground pepper
3 celery stalks, diced
3 carrots, diced
3 tablespoons tomato paste
1 teaspoon dried basil
½ teaspoon dried oregano
1 tablespoon dried parsley
1 medium red skin potato, diced
6 cups reduced sodium chicken stock
28 oz can diced tomatoes
1 can chick peas, drained and rinsed
2 small zucchinis, diced
Small cut pasta (cook separately)
Parmesan cheese for garnish

-       Preheat a soup pot over medium heat.  Add the olive oil and butter.
-       Once the butter melts, add onion, celery, carrot, and garlic.  Season with hot pepper flakes, salt, and pepper.  Sauté for 10 minutes, stirring frequently, until vegetables become soft and translucent.
-       Add the tomato paste, stirring frequently for two minutes, until very fragrant.
-       Add canned tomatoes, broth, chickpeas, potatoes, and remaining seasonings. 
-       Bring to a boil.  Reduce to a simmer, and cook for 30 minutes.
-       Taste and adjust seasonings.  Add zucchini and cook for ten more minutes.
-       Place cooked pasta in soup bowls and add soup.  Garnish with parmesan.  

Wednesday, March 30, 2011

Pot Roast

I have never made or eaten a pot roast in my life.  Until Sunday.  Most cultures have some sort of dish that involves a cheap, tough cut of meat cooked over a low heat for a long period of time.  For example, Jews have brisket.  This may be done differently in every Jewish family and deli, but over all, we do brisket.  Pot roast was a slightly foreign subject to me, although it turns out, it’s similar in preparation:  Brown it, cook it in liquid with aromatic vegetables, and cook it for a long period of time. 

Last weekend, my friend Jacky told me she had recently made a pot roast, and I had to make it.  I was immediately enchanted.  I was also enchanted by what she reported for her chosen side dish:  mashed potatoes.  I will take any excuse to make mashed potatoes, including pot roast.  The truth is that soon it will be warm, and soon my apartment will be very warm.  I am desperately clinging to my waning opportunities to make comfort foods, and pot roast/mashed potatoes fits perfectly into that category.

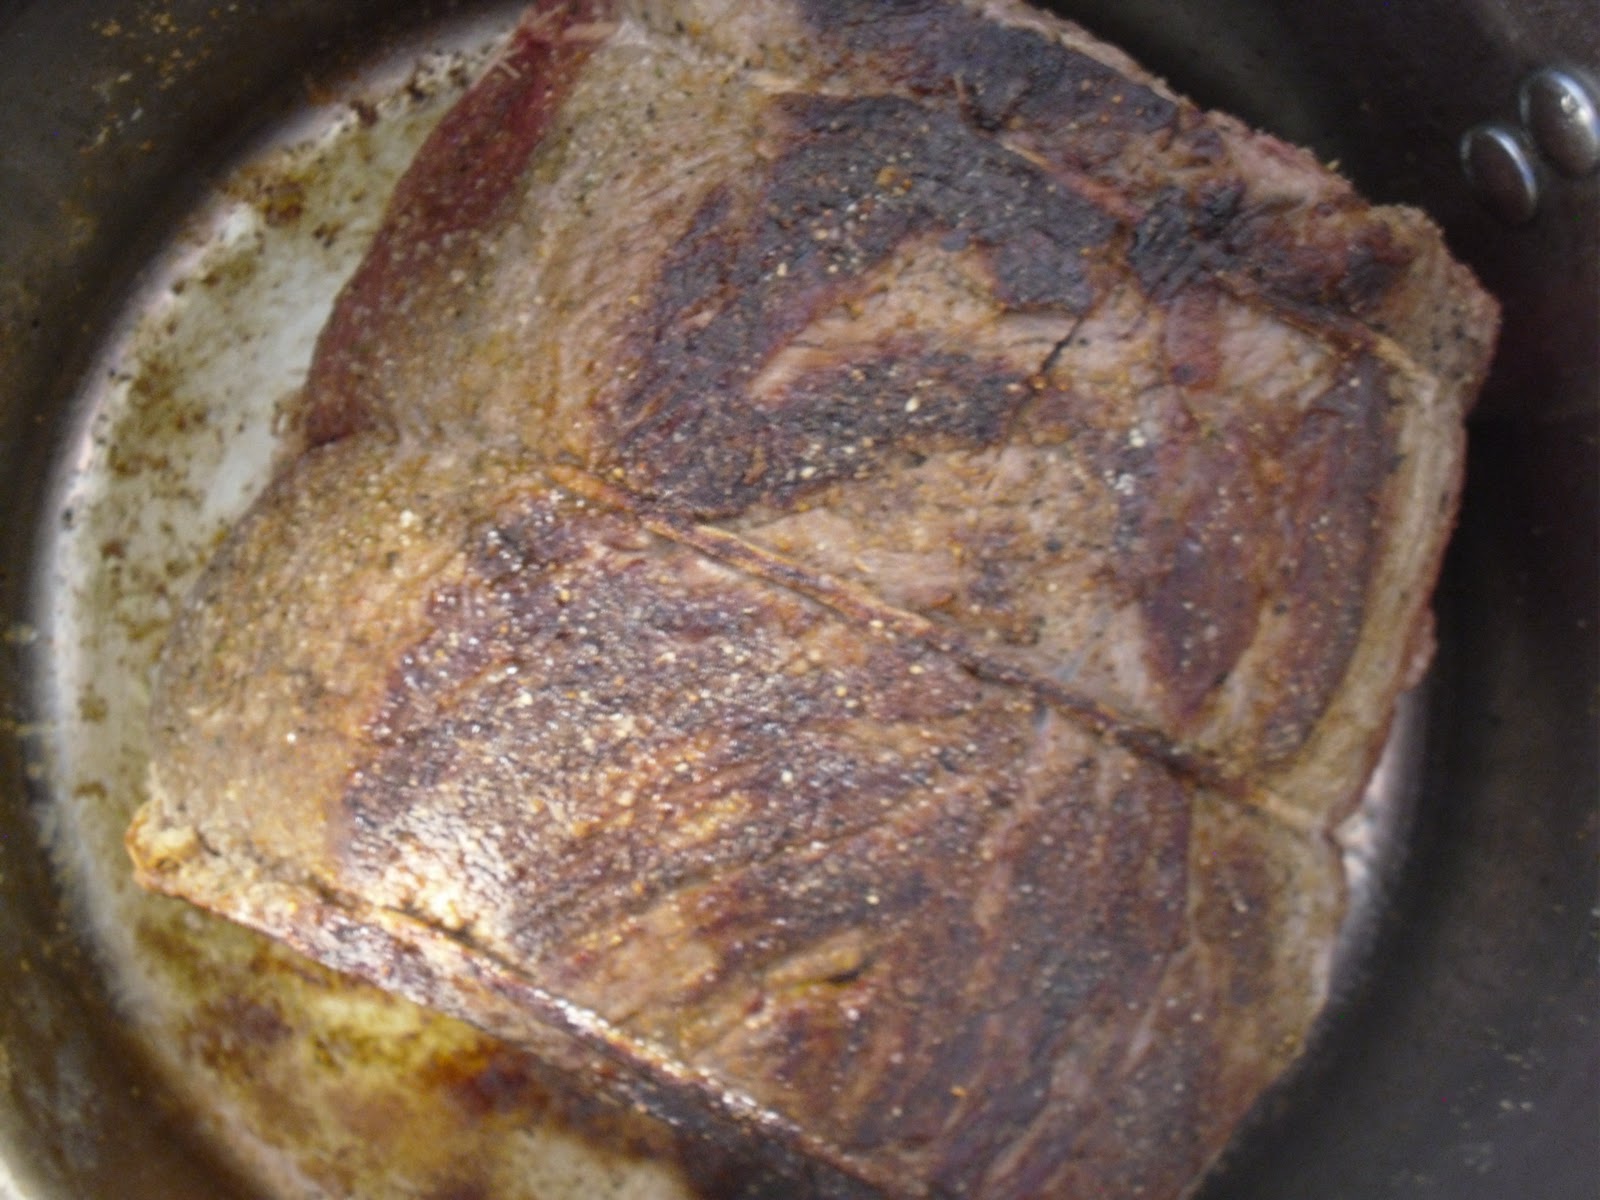
It turns out that pot roast is truly delightful.  I think that searing the meat is key.  (For the record, I used a chuck roast based on the recommendation of a charming butcher at Whole Foods.)  I digress:  make sure to give that roast a deep, dark, brown crust.  It’s worth the time, and it’s worth the discipline to leave that roast untouched as each side sizzles in the pan.  As for the pan, I used my soup pot, and braised my pot “roast” on the stove.  Many recipes call for a low oven, but my oven is the bane of my existence.  The only other advice you need is to season that brick of meat liberally, slice your vegetables thick, and don’t skimp on the butter in your mashed potatoes.  This is a perfect Sunday night dinner:  tender meat and vegetables, savory broth, an apartment that smells intoxicating, and unavoidably jealous neighbors.


Pot Roast

2 tablespoons olive oil
3-4 lb. chuck roast
5 carrots, sliced
5 celery stalks sliced
¼ pound button mushrooms, quartered
1 onion, quartered
4 cloves garlic, sliced
2 sprigs fresh rosemary
6 springs fresh thyme
2 bay leaves
3 cups liquid (I used a combination of 1 cup red wine, 1 ½ cups chicken stock, ½ cup water – all in all, pretty flexible)
Kosher salt, pepper, Lawry’s seasoned salt, garlic salt

-       Season roast liberally
-       In a large stock pot with tight fitting lid, preheat olive oil over medium high heat
-       Sear roast on all sides until browned (this should take about 5 minutes per side.  Leave it alone and let it brown.  Set a timer if necessary to keep your hands off of it)
-       Add liquid and scatter vegetables and herbs around the roast (some vegetables will not be submerged)
-       Cover and reduce heat to low so liquid simmers
-       Braise for 3 hours, basting every 30 minutes, until meat begins to fall apart (the braising liquid should be bubbling, but not boiling)
-       Serve meat and vegetables over mashed potatoes (watch out for bay leaves and the stems of rosemary and thyme)