Saturday, October 31, 2009

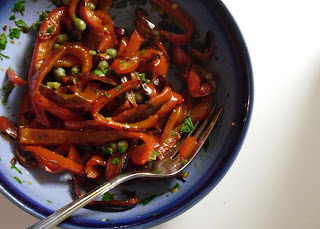
Blue Plate Special


In case you missed it on the national news, we had a veritable blizzard this week in Boulder.  In snowed for almost 48 hours without stopping.  I kept a close eye on what was going on outside from my balcony, and my total snow fall estimate is close to three feet, and I’m pretty sure the media agrees with me.  Somehow, by the grace of the gods, this resulted in an actual snow day.  I figured that, at 25 years old, I had already exceeded my snow day quota, but I was wrong.  Comfort food cooking was in order to keep myself warm and cozy.  Plus, my unexpected day off necessitated a celebration.  Of course, my first inclination was some sort of creamy pasta, but I make pasta all the time, and I felt that a blizzard deserved something a little less pedestrian.  Well, I mean pedestrian in terms of what frequents my kitchen, because what I chose happens to be one of the most common American dishes of all: meatloaf.  I decided to prepare a genuine blue plate special: meat, potatoes, and a vegetable.  If only I had one of those plates with dividers… 

Turkey Meatloaf

1-tablespoon olive oil, plus a drizzle for the bottom of the baking dish
½ onion, diced finely
½ red bell pepper, diced finely
¼ cup chopped flat leaf parsley
½ cup Italian style breadcrumbs
2 eggs, lightly beaten
2 tablespoons milk
¼ finely grated Parmesan cheese
1 lb. ground turkey (I used dark meat, more fat=more flavor)
3 big pinches kosher salt
About 25 grinds of black pepper
8 oz. can of tomato sauce

§  Preheat oven to 400 degrees (probably 375 would do if you’re at sea level).
§  Sauté onion and red pepper in the olive oil in a skillet over medium-high heat for about 5 minutes, until the vegetables start to soften.  Set aside to cool
§  Mix together parsley, breadcrumbs, cheese, eggs, milk, salt, pepper, and cooled vegetables.  Add turkey and mix gently, so all the ingredients are evenly distributed, but without over-working the meat.
§  Transfer to an oiled baking sheet or casserole dish and shape into an oval loaf.  Pour tomato sauce over the top.  Bake in the oven for an hour (or an hour and 15 minutes if you have salmonella paranoia like me.  If you have an instant read thermometer, the temperature should be 165 degrees in the center.  Otherwise cut into it to make sure it’s not pink).

Comments:  I went with turkey meatloaf, and gave it an Italian flare.  It tasted like a giant oven-roasted meatball (yum!) with a tomato sauce glaze.  I'm not sure if the milk was necessary.  It most likely would have been moist enough without it, but the milk was definitely not detrimental.  For potatoes, I made my family’s favorite twice-bake potato casserole, which I wrote about in my Rosh Hashanah post.  It is made with the flesh of baked potatoes (leaving me with a potato skin snack) mixed with sour cream, butter, garlic salt, Lawry’s seasoning salt, and parmesan, and then baked again.  It’s not exactly the culinary masterpiece I would want to serve James Beard, for example (assuming time travel is possible), but it is exactly what I wanted to eat while watching the wooden fence surrounding my apartment building shrink as the snow piled up.  On second thought, James would probably love those potatoes, and so would you.  Steamed broccoli rounded out this decadent meal.  Dinner is healthy when there’s something green on the plate, right?

If you make extra broccoli, the next day (or later that night if you get hungry), you can stuff it into the leftover potato skins.  Reheat them in the microwave, and top them with a little cheese.  Assuming you don’t go overboard with the cheese (and I promise I didn’t), this actually is healthy.  Speaking of leftovers, you haven’t truly lived until you’ve eaten a meatloaf sandwich.  You can brown up a slice in a pan or just have a sandwich cold; it’s wonderful either way.  It’s a lunchtime decision you won’t soon regret.

Wednesday, October 28, 2009

Sausage and Lentils with Fennel


I won’t try to dress it up: this was not my finest hour in the kitchen.  Before I even went to the market to get the ingredients, doubt whispered quietly in my ear about this recipe.  But I ignored it, and walked straight into this culinary mess anyway.  For a while, I’ve wanted to make something with fennel. So when I found this recipe on Epicurious.com, it sounded perfect: a lovely sauté of vegetables and lentils, served with sausage.  I love French lentils, those green little beauties, and with a chicken sausage substitution, this sounded healthful and unlike anything I’ve made in the past. 

Then I read the reviews: many were positive, but with a lot of changes to the original recipe, and there was a small, but conspicuous percentage of bad reviews, most accusing the dish of being boring.  I hoped I wouldn’t feel this way, but after making it, I agree with latter.  Not only was the end result boring, but the process of cooking this dish was a mess.  I don’t know if it was the altitude, my ancient stove, or my own ineptness, but every single step took an inordinate amount of time to complete.  I don’t mind a long leisurely recipe, in fact, I love it, but this was just a jumble of too many pans, and an unpleasant feeling of doubt. Every thing felt either rushed or uncertain.  For two hours. 

Usually, cooking is a feast for the senses: ingredients smell and look good, they sizzle, simmer, and transform into something delectable.  This sensory experience was mundane at best. I just knew my trials and tribulations would not trigger a great, big, involuntary “MMmmmm” at the first bite.  My suspicions were unfortunately realized.  The dish itself was edible, but nothing special.  I added a ton of parmesan cheese to it, which was a modest improvement.  Even after 40 minutes, the lentils were cooked through, but still not tender the way I wanted them.  And the fennel, which I was so excited about, was lost in its surroundings, the sea of boring.  I did have a little success with the leftovers: cooking the lentils and sausage in marinara and tossing it with pasta and parmesan, but this does not validate the initial struggle.  Below is the recipe as it came from Epicurious.com, with my feeble contributions denoted by italics. 

1 cup dried lentils (preferably French green lentils; 7 ounces)
4 ½ cups cold water  (or one can reduced sodium chicken stock, and 1 ¼ cups water)
1 ½ teaspoons salt
1 medium (3/4 -pound) fennel bulb (sometimes labeled "anise"), stalks discarded, reserving fronds
3 ½ tablespoons olive oil
1 medium onion, finely chopped
1 carrot, cut into ¼ -inch dice
2 cloves garlic, minced
½ teaspoon fennel seeds (optional, according to Psycho Cooker)
1 ¼ pounds sweet Italian sausage links (I used one pound of hot Italian chicken sausage)
3 tablespoons chopped fresh flat-leaf parsley
½ teaspoon black pepper
1 tablespoon red-wine vinegar, or to taste
Extra-virgin olive oil for drizzling

§  Bring lentils, water, chicken stock, and (½ teaspoon salt if you’re not using stock) to a boil in a 2-quart heavy saucepan, then reduce heat and simmer, uncovered, until lentils are just tender but not falling apart, 12 to 25 minutes (or 40+ minutes if you’re inept, like me).
§  While lentils simmer, cut fennel bulb into ¼ -inch dice and chop enough fennel fronds to measure 2 tablespoons. Heat 3 tablespoons oil in a 3- to 4-quart heavy saucepan over moderate heat until hot but not smoking, then stir in onion, carrot, fennel bulb, (fennel seeds,) and remaining teaspoon salt. Cover pan and cook, stirring occasionally, until vegetables are very tender, about 10 minutes.
§  Meanwhile, lightly prick sausages in a couple of places with tip of a sharp knife, then cook sausages in remaining ½ tablespoon oil in a 10-inch nonstick skillet over moderately high heat, turning occasionally, until golden brown and cooked through, 12 to 15 minutes (or 20 minutes, plus 5 minutes in the microwave out of paranoia regarding salmonella). Transfer to a cutting board.
§  Drain cooked lentils in a sieve set over a bowl and reserve cooking water. Stir lentils into vegetables with enough cooking water to moisten (¼  to ½ cup) and cook over moderate heat until heated through. Stir in parsley, pepper, 1 tablespoon vinegar, and 1 tablespoon fennel fronds. Season with vinegar and salt.
§  Cut sausages diagonally into ½ -inch-thick slices. Serve lentils topped with sausage and sprinkled with remaining tablespoon fennel fronds. Drizzle all over with extra-virgin olive oil.

Saturday, October 24, 2009

Avgolemono Soup


For the past few weeks, the weather has been extremely fickle in Boulder.  Three inches of snow one weekend, and 75 degrees and sunny the next.  After a miserable walk to school in precipitation that was somewhere between snow and rain, I decided that soup was the only food I would accept for dinner.  I chose egg-lemon soup, in homage to my hometown, Detroit, which seems to have a Greek diner at every major intersection (we call them “coney islands” in Detroit).  Egg-lemon soup, avgolemono*, is basically Greek chicken soup, but thickened at the end with a mixture of egg and lemon.  After scouring every recipe source imaginable, I created my own synthesized recipe of the ones I liked best.  I wanted to it hearty and satisfying, so I made it with plenty of chicken and vegetables.  Traditionally, it is made with either rice or orzo* pasta, and after a miniature existential crisis, I went with orzo.  I never knew how much anxiety I could generate over choosing between starches.   

Avgolemono Soup (adapted from Mark Bittman’s “How to Cook Everything,” foodandwine.com, and Cat Cora)

6 cups reduced sodium chicken stock
1 cup water
2 carrots, diced
1 celery stalk, diced
½ onion, diced
2 bay leaves
2 boneless, skinless chicken breasts (probably about ¾ to 1 lb.)
¼ cup freshly squeezed lemon juice
2 teaspoons lemon zest, grated (optional)
Generous ½ cup orzo
2 eggs
Salt and pepper to taste
Chopped flat leaf parsley for garnish (optional)

§  In a large stockpot, bring chicken stock and water to a gentle boil (I added a few grinds of pepper).  Add chicken breasts, and simmer in stock until cooked through (about 12-15 minutes).  Remove chicken, and shred meat when it’s cool enough to handle.
§  Add carrots, celery, onion, and bay leaf to the stock.  Simmer for 5-7 minutes, and add orzo.  Simmer vegetables and pasta, stirring occasionally, for about 15 more minutes, or until everything is tender.  Remove bay leaves, re-season if necessary, and remove from heat.
§  Meanwhile, beat 2 eggs until frothy and lemon juice in a large bowl.  Remove two cups of broth from the soup pot.  While whisking egg and lemon mixture, slowly stream in broth (this is called tempering*).  Then add tempered mixture back to the soup pot.  Reheat if necessary, but be careful.  If the soup comes to a boil, it will curdle.  Taste it for seasoning and add lemon zest if you want it more lemony.  Garnish with parsley and enjoy. 

Obviously, I enjoy cooking.  A lot.  However, this recipe was exceptionally fun.  It was a process, and a lovely one, at that.  I poached chicken, chopped vegetables, juiced lemons, whisked eggs, tempered liquids, and loved every minute of it.  I took my time, drank vodka, and listened to my Elvis Costello Pandora radio station.  As much as I loved the soup, I loved cooking it more.  And I don’t mean this to speak against the soup, but rather, to applaud cooking.

Ok, I’ll get off my soapbox now.  To honest, I wasn’t thrilled with the soup when I came off the stove.  It was fine; the broth had a nice flavor, but the texture wasn’t thrilling.  It didn’t have the body I was expecting.  Plus, I enjoyed the process to such an extent, that it would be hard for the actual soup to live up to it.  However, something magical happens with soup when stowed in the fridge overnight.  Somehow, the sum of its parts becomes a cohesive whole, and this soup definitely lived up to this prophecy.  The flavor deepened, and the broth became fuller in body, slightly viscous, without being a thick.  Simply put, the leftovers were divine.  And wouldn’t you just love to return home to a steamy bowl of avgolemono soup that needed just 10 minutes** on the stove?  Of course, you would.   

*See glossary for definitions
**Reheat soup over a gentle heat, and keep an eye on it so that it doesn’t curdle.

Wednesday, October 21, 2009

Black Bean Enchiladas


I fear I’m starting to lose credibility as I have raved about every recipe thus far.  Don’t worry:  I sense an impending disaster, however, not for this post.  On Sunday night, I made black bean and vegetable enchiladas, and they were a symphony of textures and flavors.  I did not make my own enchilada sauce.  All the recipes sounded laborious and time consuming.  When I have that much gratuitous free time, I promise to make enchilada sauce.  This blog may not be the best evidence, but the majority of my life is currently devoted to becoming a speech pathologist.  Until then, the canned sauce will do, especially when jazzed up with a little fresh cilantro.  Another disclaimer: this isn’t exactly authentic Mexican food.  I have a good friend in Philadelphia from Puerto Rico, who is an amazing cook; this is what we would call “Blanquita Mexican food,” but that doesn’t mean it isn’t tasty.

Ingredients:

1 tablespoon olive oil or vegetable oil
½ onion, diced
1 red bell pepper, diced
6-8 button mushrooms, chopped
2 garlic cloves, minced
3 oz. baby spinach (about half of a bag)
1-14 oz. can black beans, drained and rinsed
1-4 oz. can diced fire roasted green chiles (hot or mild depending on preference)
¾ teaspoon cumin
½ teaspoon chili powder
½ teaspoon oregano
½ teaspoon hot pepper flakes (optional)
Salt and pepper to taste
1 tablespoon finely chopped cilantro, plus extra for garnish
10 oz. can enchilada sauce
6 large whole wheat tortillas
1 cup shredded mild white cheddar (or any cheddar for that matter, or jack)

Preheat the oven to 400 degrees Fahrenheit.
Over medium-high heat, sauté the onion and bell pepper in the olive oil.  Season with salt and pepper, and cook until it starts to soften, about 5-8 minutes. 
Add the mushrooms, garlic, cumin, chili powder, oregano, and hot pepper flakes.  Stir to distribute spices, and then add the green chiles.  Allow to cook for a couple of minutes, or until mushrooms start to give off liquid.
Add spinach, black beans and cilantro.  Reduce heat to low (or you can just turn it off).  Allow spinach to wilt, but don’t obliterate it because it will cook more in the oven.  Taste, and re-season if necessary.   
Meanwhile wrap the tortillas in damp paper towels and microwave for 30-45 seconds, or until they are soft and pliable.
In a 9x13 inch baking dish, pour half of the enchilada sauce and evenly distribute in the bottom of the pan.
Then sprinkle about a tablespoon of cheese and a third of a cup of the bean mixture down the center of each tortilla (this is an approximation; all of mine were slightly different in size).  Roll them and up and place in the baking dish seam-side down. 
Pour the rest of the sauce over the enchiladas and top with remaining cheese.
Bake for 30 minutes or until cheese is melted and bubbling.  Garnish with remaining cilantro.

Comments:  This is delicious and a fiber-lover’s dream (there are four grams of fiber in each whole wheat tortilla, not to mention the beans).  I think zucchini would have been great in this, but tried to practice some restraint so I don’t become the subject of a zucchini intervention.  As much as I enjoyed the enchiladas, I must say that I do not recommend Ortega brand canned green chiles, for future reference.  I used them in this recipe and frequently came across tough, fibrous pieces.  Other than that, this was tasty and so satisfying.  The recipe yields six enchiladas.  This may not sound generous, but they are enormous.  I can tell you from experience that a two-enchilada portion is too much.  I went to bed feeling like Violet from Charlie and the Chocolate Factory after she turned into a blueberry.  Live and learn.  

Saturday, October 17, 2009

Presidential Broccoli Soup


Earlier this week, I was speaking with a friend, and amidst a variety of food-related topics, she told me about a fennel soup she had made.  I realized how rarely I make soup, and decided simultaneously that I should explore this unknown gastronomic territory.  My mom makes wonderful soup; she probably has twelve recipes that she whips up effortlessly.  Her proficiency is a little intimidating, but I decided I had to relinquish that feeling, and persevere.  And this is what I love about my silly, sapling of a blog: it continually forces me out of my comfort zone.  No one wants to read about the same recipes repeatedly, so novel foods are starting to dominate my kitchen.  On this particular occasion, soup took center-stage.  

I wanted to make something substantial, a soup that could stand on its own for dinner (perhaps with a little garlic toast to round it out).  I wanted it to be hearty, but not heavy.  After an hour of flipping through cookbooks, and searching on websites, I found the perfect recipe.  My hunt came to an abrupt halt with the title alone: “Rosalynn Carter's Cream of Broccoli Soup-with No Cream.”  Perhaps the title is a bit wordy, but it provides all the relevant information.  For that, I cannot fault it.  Plus, who am I to criticize the First Lady?  I had to chuckle over how bewitched I became with this presidential recipe because my dad has been calling me “president” since my toddler days.  Most little girls are nicknamed “sweetheart” or “sugar”; the Psycho Cooker is dubbed “president.”  I had a laugh, but it’s probably best not to think too deeply on this bizarre anecdote.

Creamless Broccoli Soup, adapted from Rosalynn Carter’s recipe

Ingredients
1 medium onion, chopped
1 clove garlic, crushed
1 tablespoon olive oil
1 bay leaf
1 pound green broccoli, chopped
1 small potato, peeled and chopped
2 14-oz. cans reduced sodium chicken stock (about 3 ½ cups)
Salt and pepper, to taste
1/2 lemon, juiced

Optional accompaniments
Shredded cheddar cheese
Garlic cheese toast

Directions
§  In a large pot, sauté onion and garlic seasoned with salt and pepper in the oil until soft, about 8 minutes.
§  Add bay leaf, broccoli, potato, and stock. Simmer gently, covered for about 15 minutes, until the broccoli and potato are tender, but the broccoli is still green. Remove bay leaf and turn off the heat.
§  Carefully puree with an immersion blender*, leaving some texture.  Or use a regular blender, pureeing it in small batches.  Make sure to vent it slightly (or remove the round plastic piece of the lid), covering it with a kitchen towel to protect yourself from being splashed.  If the blender is not vented, the heat will cause the pressure to build, and ultimately blow the lid off, which is dangerous and messy.
§  Season to taste; add lemon juice and return the pan to reheat if necessary.
§  Serve with shredded cheddar or cheese toast:
o   Lightly toast a piece of whole wheat bread.  While it is warm, rub it with a halved garlic clove.  Lightly drizzle with olive oil, sprinkle with cheese of your choice and return the bread to the toaster or broiler until the cheese has melted. 

Comments:  The soup was smooth, soothing, and hearty, without sitting in my stomach like a rock as a cream-based soup can.  The bay leaf added depth, and the lemon makes all the flavors shine through.  Next time, I would decrease the broth to 3 cups, or even a little less, so the soup would be thicker.  However, the consistency was by no means unpleasant.  In fact, I stashed a portion in the freeze, and I expect it will put a smile on my face one chilly night.  I suppose the cheese and/or cheese toast aren’t mandatory, but their absence seems foolish to me.  I, of course, included both.  Think about it:  you are essentially eating a giant bowl of broccoli for dinner; a little cheese is in order. 

*See glossary for definitions

Wednesday, October 14, 2009

Baked Pasta in Varying Dimensions

This dish is definitely not winning any beauty pageants, but it compensates for its unfortunate looks with flavor.  Baked pasta and vegetables is one of my favorite Sunday night dinners.  It gives me the opportunity to use any lingering vegetables or cheese in my fridge, and the leftovers make me so happy on Mondays, the longest of long days.  Honestly, when I prepare this, I usually eat it for one of the two meals I pack for school (because my Mondays are so long that they require two meals), and I’m generally thrilled to eat it again for dinner when I finally return to my cozy apartment.  This “recipe” is the epitome of flexibility.  Sauté some vegetables with flavors you love, boil some pasta, toss it all together with some type of tomatoey goodness and cheese (perhaps some sort of protein too), and bake the whole thing until it bubbles.  These are the guidelines I abide by, however, I will provide more details on how I created my latest adaptation to give a clearer picture of this incredibly malleable process.
  
Baked Pasta 

Drizzle of olive oil
½ to 1 pound chicken sausage (I used basil chicken sausage; use anything Mediterranean)
1 onion, chopped
3 garlic cloves, minced
1 red bell pepper, chopped
1 zucchini, chopped
8-10 button mushrooms, chopped
Generous sprinkles (at least a ½ teaspoon) of dried oregano, dried basil, hot pepper flakes
Salt and pepper to taste
Third to a half-pound mini penne (any short cut pasta will do)
2 to 2 ½ cups of jarred marinara sauce
3 tablespoons chopped flat leaf parsley
½-¾  cup crumbled feta cheese
½ cup seasoned breadcrumbs

     Preheat the oven to 400 degrees.  Over medium-high heat, sauté the chicken sausage in olive oil (squeeze it out of its casing right into the pan).  Break it up with a spoon (this takes a bit of effort), and allow it to brown and cook through.  Remove cooked chicken sausage from the pan and set aside (the more you buy, the more you can snack on while everything else cooks).

     In the remaining oil/delish chicken sausage drippings, sauté the onion and bell pepper.  After a few minutes, add the dried herbs and seasonings.  Also, put a pot of water on for the pasta.  Continue to sauté the onion and red pepper until tender, about 8 minutes.  Add mushrooms, zucchini, and garlic; sauté for a few minutes (they will finish cooking in the oven).

     Add pasta to boiling water.  Cook until just shy of al dente (a minute or two before the full cooking time).  Toss pasta, vegetables, marinara, cheese, sausage, and parsley together.  Adjust seasoning if necessary, and then pour into a 9x13-inch baking dish.  Add breadcrumbs (and maybe some parmesan and extra parsley) on top, and bake for about 30 minutes, or until hot and bubbling.  

Comments:  The chicken sausage is optional.  I would have added that into the recipe, but the truth is, everything in this recipe is optional.  It works well as a vegetarian meal, and I’m sure chunks of chicken breast would also be nice.  I usually add a 14-ounce can of diced tomatoes, rather than marinara.  However, the point of this is to use what I have, and my pantry is currently bursting with jars of marinara due to an irresistible sale.  Regarding cheese and vegetables, the options are limitless.  Cauliflower is great; broccoli, spinach, peas, eggplant… it all works.  A can of chickpeas or small white beans might be a pleasant accompaniment, especially for added substance to a vegetarian version.  For me, the following ingredients are mandatory: onion, garlic, abundant seasoning, pasta, tomatoes, and cheese.  The rest depends on my mood, and what I have. 

A plate of steaming, cheesy baked pasta is incredibly comforting on a Sunday night.  However, something else surpasses it:  opening my refrigerator after a grueling day to see a casserole dish, brimming with leftovers.  After a minute and a half in the microwave and a sip of icy vodka, the drama of the day melts away before you even take the first bite.

Saturday, October 10, 2009

Grits: Unveiling the Mystery

Born and raised in Metro Detroit, I am a Yankee through and through.  Years living on the East coast only helped solidify this.  In the past, when I heard Paula Dean raving about grits on the Food Network, I was intrigued, but grits were something I categorized with chitlins and other foreign Southern foods.  Luckily for me, the last restaurant I worked at, the Beverly Hills Grill, opened my eyes to the wonder and versatility of grits.  Ironically, this restaurant is located in Metro Detroit (shame on me).  The Beverly Hills Grill (or BHG) is a creative, contemporary American restaurant that miraculously pumps out a minimum of eight new specials daily.  At the BHG, I served grits in multiple capacities: from shrimp and grits for brunch to coriander-dusted swordfish with smoked Gouda and green chile grits (yum!) for dinner. 

Grits are, in a word, fantastic.  They are creamy (even without dairy), grainy, and soul-soothing.  They are perfect with stewed vegetables (one of my personal favorites), or as a side dish with any sort of protein in lieu of potatoes, pasta, or other starch.  And don’t be fooled by polenta: soft polenta and grits are the same thing, prepared the same way.  I call the exact same dish by different names purely based on the context of whatever I am serving them with.  Below, you will see a recipe for shrimp and grits, just without the shrimp.  I have nothing against shrimp, but I didn’t have any at the time.  Plus, grits are rich (especially with the amount of cheese that I like in them) and the purity of the vegetables counteracts that richness.  This is quite satisfying as a vegetarian dish.

(Shrimpless) Grits

1 small onion, diced
1 green pepper, diced
6-8 oz. button mushrooms, quartered (I use cute, little ones if possible)
2 garlic cloves, minced
1-14 oz. can of diced tomatoes (I like petite diced in this recipe)
1-2 tablespoons of olive oil
½ teaspoon of dried oregano
½ teaspoon of dried basil
½ teaspoon of hot pepper flakes (or to taste)
salt and pepper to taste
½ cup quick cooking grits
2 cups water
Salt, garlic salt, pepper (all to taste)
1 cup shredded cheese (anything that melts well; I used mild white cheddar)

     Sauté onion and bell pepper in about a tablespoon of olive oil over medium high heat for a few minutes.  (You could add a link or two of andouille sausage here, however I have never done this).  Then add oregano, basil, hot pepper flakes, and salt and pepper to taste.  Sauté for a total of 8-10 minutes, or until tender. 
     Add mushrooms and garlic.  Add another drizzle of olive oil if the pan looks dry.  Re-season if necessary.  Sauté for about 5 minutes, or until mushrooms start to soften and release some of their liquid. 
     Add tomatoes and stir to combine.  Reduce heat and simmer.  Check seasoning and simmer for about 10 minutes or until it is hot and bubbly and the flavors have come together.  (Optional: add raw shrimp and cook until they are opaque).
     While vegetables simmer, bring 2 cups of water to a boil.  Season the water before adding grits as you see fit (I usually add a generous pinch of salt and some garlic salt or garlic powder).  You can add more seasoning at the end, but it is best to add a little to the foundation. 
     Then stir in grits, reduce heat, cover, and simmer for 5 minutes or until grits at tender, stirring occasionally.  Then re-season and add cheese.  For this amount of grits, I add a generous cup, but if you aren’t a cheese mega-fan, you may want to cut it back a little. 
     Serve stewed vegetables over grits.  Garnish with extra cheese and parsley if desired. 

Comments:  I really love this dish.  It can handle pretty much any vegetable you might want to add to it:  zucchini, corn, or some fresh spinach wilted in at the end.  It is lovely with okra.  I adore the way those little pods pop in your mouth and release their slimy goodness.  While sliminess and good food generally do not go hand in hand, okra is an exception to this rule.  But I digress. 

If you are lucky enough to have extra grits (I make certain that I am in such a position), you can make the ever-desired grit cakes.  On this particular occasion, I ate grit cakes with leftover stewed vegetables and an over-medium egg, but they do not require an accompaniment. 

Delicious Grit Cakes:  Using chilled leftover grits, scoop them up and shape them into patties that are close to an inch thick, so they don’t fall apart.  Cook them in a skillet (preferably non-stick) over medium-high to high heat with a drizzle olive oil or butter.  Once the cakes are in the pan, DO NOT touch them for at least a minute, most likely 2-3 minutes more depending on how high your heat it.  This will allow them to form a crust.  But be careful not to let them burn; it’s better for them to be beige, rather than charred.  It’s very difficult for me to get them to brown sufficiently (as you can see by the photos).  They begin to lose their shape and return to their former quasi-liquid state, and it just gets challenging to handle them and to achieve a deep golden color.  However, it is not challenging to coax them into being delicious; in fact, it takes no coaxing at all.  Grit cakes and deliciousness simply cannot resist each other.

Wednesday, October 7, 2009

Baked Chicken Meatballs with Peperonta


Bob Dylan called it in 1964: the times they are a changin’.  Earlier this week, Conde Nast announced that Gourmet magazine would no longer be published after almost 69 years of exceptional food writing*.  This is truly the end of an era in the world of food, and journalism as well.  The recipes of Gourmet have been a little highfalutin for my kitchen, however it has sets the pace in the culinary world for at-home cooks, even if it is indirect.  It is a magazine I actually subscribe to, and I have spent many hours leafing through its glossy pages.  In honor of Gourmet and its departure, I made a recipe from the August 2009 issue: Baked Chicken Meatballs with Peperonata**.

This recipe epitomizes the appeal of Gourmet.  The dish employs a classic concept and refreshes it in a manner I would have never dreamed of myself.  Italian meatballs are generally prepared one way: in a red sauce served over pasta.  I would never have dared to alter such a dish because it is so lusciously perfect in its classic preparation.  However, Gourmet found a way to alter the classic that is different to the point where you won’t miss the original, yet its fundamental nature hits your palate and your soul in the same way.  The few changes I made are in italics.

Baked Chicken Meatballs with Peperonata**

For peperonata:
                        3 red bell peppers, cut into strips
                        1 1/2 tablespoons extra-virgin olive oil, divided
                        1 1/2 tablespoons drained capers
                        1 teaspoon red-wine vinegar
                        1/8 teaspoon hot red pepper flakes (or up to a half teaspoon)

For meatballs:
                        3 slices Italian bread, torn into pieces (1 cup)
                        1/3 cup milk
                        3 ounces sliced pancetta, finely chopped
                        1 small onion, finely chopped
                        1 small garlic clove, minced
                        2 tablespoons extra-virgin olive oil, divided
                        1 large egg
                        1 pound ground chicken
                        1 ounce finely grated parmesan
                        3 tablespoons finely chopped flat-leaf parsley
                        1 tablespoon tomato paste


Make peperonata: 
Preheat oven to 400°F with racks in upper and lower thirds.
Toss bell peppers with 1 tablespoon oil, then roast in a 4-sided sheet pan in lower third of oven, stirring occasionally, until tender and browned, about 35 minutes.

Stir together capers, vinegar, red pepper flakes, and remaining 1/2 tablespoon oil in a medium bowl and set aside.

Make meatballs while peppers roast: 
Soak bread in milk in a small bowl until softened, about 4 minutes.

Cook pancetta, onion, and garlic in 1 tablespoon oil with 1/2 teaspoon each of salt and pepper in a 10-inch skillet over medium heat until onion is softened, about 6 minutes.  Cool slightly.

Squeeze bread to remove excess milk, then discard milk. Lightly beat egg in a large bowl, then combine with chicken, pancetta mixture, another generous sprinkle of salt, parmesan, bread, and parsley. Form 12 meatballs and arrange in another 4-sided sheet pan.

Stir together tomato paste and remaining tablespoon oil and brush over meatballs, then bake in upper third of oven until meatballs are just cooked through, 15 to 20 minutes.

Toss bell peppers with caper mixture. Serve meatballs with peperonata.

Comments:  The meatballs practically rendered me speechless.  They are a savory delight, without being too heavy.  The tomato paste-olive oil glaze colors them beautifully and adds a palatable tang.  No need for a brush; I simply dabbed it on with a fork.  I think the cheese is a nice addition, but I am unconditionally biased in favor of cheese.  Next time, I will prepare a double batch of these meatballs.  The leftovers were divine in every capacity (reheated in the microwave, on a sandwich, or cold out of the fridge).  Actually, this recipe would make fabulous meatloaf.  The peperonata was tangy, smoky, and salty.  In fact, I may prepare the peperonta simply to have on hand as a condiment.  Some chopped olives and a conservative amount of garlic would be an appropriate supplement; it could turn an everyday turkey sandwich into a pseudo-muffaletta***. 

This may be one of the simpler recipes of Gourmet, but it exemplifies its breadth.  Thank you, Gourmet, for making such an immeasurable contribution to foodies everywhere. 

*Hear the story on the Takeaway of Public Radio International and WNYC
**See the original recipe at Epicurious.com
***See Glossary for definitions

Saturday, October 3, 2009

Breakfast for Dinner: Vegetable and Potato Hash


There is something immensely comforting about having breakfast for dinner.  I am unable to accurately verbalize why this is, and frankly, I want to keep it that way.  In fact, I refrain from having breakfast for dinner too regularly in order to preserve this enigma.  Last week, I had my first big exam of grad school, and the night before seemed like an appropriate occasion to indulge in my secret weapon of comfort foods. 

Simply eating your usual breakfast food does not qualify as “breakfast for dinner.”  To go by this title, it must be something special, like vegetable and potato hash.  I like to sauté whatever I am in the mood for (or whatever I have on hand) until it is crisp and browned on the edges.  I proceed to melt cheese over it, and top it with an over-medium egg, so the golden glory of the yolk makes it rich and luscious.  Below is a description of my most current rendition, however it represents a method, more than an exact recipe.

Vegetable and Potato Hash

§  Sauté about half of an onion and half of a bell pepper, both chopped, in olive oil for about 5-8 minutes, or until they start to soften.
§  Then add one chopped zucchini.  Season with Lawry’s seasoning salt, pepper, and a pinch of red pepper flakes and sauté for a couple of minutes.
§  Add 3 small red bliss potatoes that have been cooked (I microwaved mine) and chopped.  Re-season and sauté until potatoes are heated through and the hash starts to become brown and crispy (5-10 minutes).  When the hash is close to done, toss with chopped parsley and scallions
§  Top with shredded cheese (I used Monterey jack) and allow to melt.  Meanwhile cook an egg (any style will do, but I personally feel that a runny yolk is mandatory), and when the cheese is melted, top with the egg and enjoy.  Hot sauce and additional seasoning are optional. 

I have made this has a number of ways in the past, but this was the first time I added zucchini.  It was an attempt to increase the vegetable content in order to justify to the blanket of cheese covering the hash.  I love zucchini, but I was anxious about using it in the context.  Fortunately, my fears did not become realized, and zucchini will definitely play a part in future hash episodes. The scallions were also a new addition as well.  I happened to have some in the fridge, and they added a mild oniony flare.  In fact, next time I would be more generous with them (I only added two).  If I am making any sort of hash brown potato, Lawry’s seasoning salt is mandatory.  It reminds me of my oldest brother, Joe, making hash browns from left over baked potatoes on Saturday mornings. 

My brother, king of potatoes, also plays into the reason I used pre-cooked potatoes.  Growing up, precooked potatoes (usually leftover bakers) were the only potatoes used for hash browns by Joe.  Additionally, this will usually give the best results when the potatoes share the stage with other vegetables since raw potatoes have significantly longer cooking times than most vegetables.  Also, I abhor undercooked potatoes, so precooking them eliminates the risk of this tragedy.  As usual, the parsley is by no means a necessity, but in case you haven’t noticed, I cannot get enough of it.  Before eating, I added a drizzle of Sriracha* and some fresh pepper, not only for added taste, but to dress it up a little; a splash of red makes anything more appealing.   

*See glossary for definitions.