Monday, March 29, 2010

Tuna Noodle Casserole


The notion of “tuna noodle casserole” keeps finding its way to me.  First, it was a friend’s nostalgia about a roommate’s version of the recipe in college (Annie’s “Alfredo Style” mac and cheese, mixed with tuna, and topped with potato chips).  Then it was a feature recipe in March’s Bon Appétit (all gussied up with leeks, fresh dill, and béchamel sauce).  Additionally, I’ve been eating more tuna salad lately because I’m bored to death with my standby lunch of turkey sandwiches.  I know: tuna lacks glamour, and it tends to conjure up images of elderly couples splitting sandwiches on pumpernickel, but it has potential with the right preparation.  Ironically, there were many years when I wouldn’t even eat tuna, and I am still hesitant to eat tuna salad prepared by anyone other than myself and a few relatives.  However, between my turkey sandwich rut and my tight financial situation, tuna’s stock is currently up.
Last weekend, during one of my maze-like Internet binges of all things food-related, I found the perfect recipe for tuna noodle casserole.  I believe Tastespotting led me to it, but I can’t be certain.  The recipe’s creator is the blogger/author of “The Comfort is Always Here,” and I am currently quite grateful to this nameless, faceless, culinarily-gifted stranger.  The recipe includes the necessary components to earn the title of  “tuna noodle casserole”: canned tuna, egg noodles, and canned cream of mushroom soup.  The original recipe also includes some lump crabmeat, which puzzled me.  If I had the money for lump crabmeat, I’m pretty sure I would find a recipe to let that gorgeous crabmeat take center stage.  If I’m not mistaken, the whole point of tuna noodle casserole is to mask the potential funk of canned fish.  Lush lump crab requires no such masking.  Needless to say, I omitted the crab.  Anyway, I relished the fact that the resulting product would be an authentic tuna noodle casserole; however, due to some quality ingredients and flavors, it would be augmented to an undeniably delicious meal with humble (i.e. inexpensive) origins. 
How was this feat accomplished?  I added a little lemon zest to the tuna; I sautéed lovely little mushrooms, onions, celery, and garlic for flavor and texture; I topped the whole the thing off with extra-sharp cheddar (flavor!) and panko breadcrumbs (crunch!).  Everything brought a little something extra to the party, but I must say the celery and the panko were the big winners.  I am developing a new appreciation for celery.  It really adds a lot to the background of a dish, but it is so modest and unassuming, that it doesn’t call attention to itself.  Rather, it lets the whole dish shine.  It is truly a vegetable of integrity.  And the panko breadcrumbs add such a divine crunch.  Need I say more?  The crunch loses some of its tenacity with re-heating, but it will make you weak in the knees when this lovely casserole is fresh from the oven.
This dish is comprised of solid, non-controversial flavors, but another selling point is:  it is not a greasy mess.  It is a rich and satisfying comfort food, but even when you reheat it on high in the microwave, the sauce doesn’t separate or congeal.  Tuna noodle casserole: make it and enjoy.
 
Tuna Noodle Casserole (adapted from “The Comfort is Always Here”)

2-5 oz. cans solid white Albacore tuna, drained well and broken up with a fork
Zest from half a lemon
1-12 oz. package wide egg noodles
1 can Campbell’s Healthy Request cream of mushroom soup
2 cups milk (I used 1% lowfat milk)
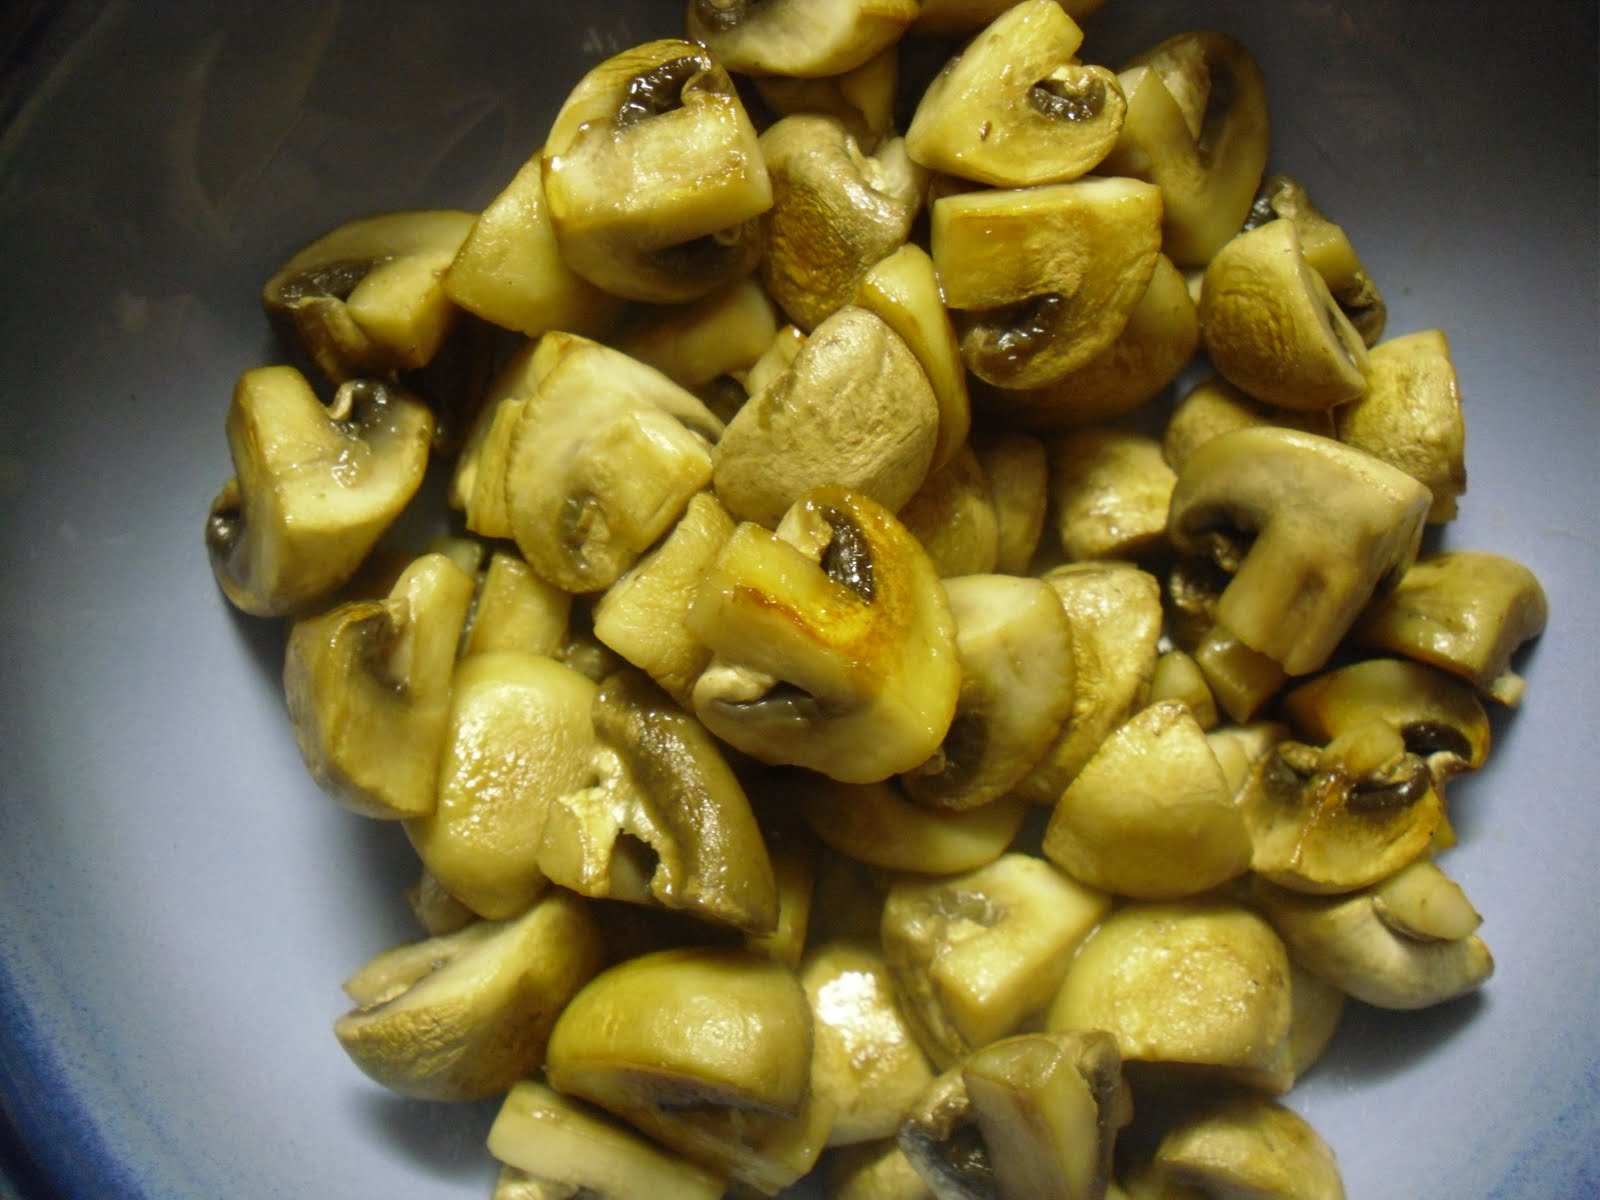
8 oz. white button mushrooms, quartered
1 tablespoon plus 1 teaspoon olive oil divided
2 teaspoons soy sauce
1 onion, small diced
4 stalks celery, small diced
2 cloves garlic, minced
1 cup frozen peas (no need to thaw)
¼ cup chopped flat leaf parsley
Loads of freshly ground black pepper
Kosher salt, garlic salt, and/or Lawry’s seasoning salt, to taste
1 ½ cups shredded extra sharp cheddar cheese
1 ½ cups panko breadcrumbs

·      Preheat the oven to 375 degrees; put on a large pot of water to boil for the noodles; spray a 9x13 inch-baking dish with non-stick spray, or use butter.
·      Mix drained, flaked tuna with lemon zest and season liberally with black pepper.  Set aside.
·      Whisk together the canned soup and two cups of milk.  Set aside.
·      Once water is boiling, add egg noodles.  Drain them when they are still a little underdone, and rinse with cold water.
·      Preheat one teaspoon of olive oil in large skillet over medium-high heat.  Once hot, add the quartered mushrooms.  Allow liquid to cook off so mushrooms can brown.  Remove from pan and season with soy sauce.  Set aside.
·      In the same pan, add the tablespoon of olive oil.  Add celery, onion, and garlic.  Season with salt and lots of pepper.  Sauté for 8-10 minutes, or until vegetables are tender.
·      In a large bowl or pot, mix together noodles*, tuna, soup mixture, mushrooms, sautéed vegetables, peas, and parsley.  Season as desired (I added more pepper and a dash of garlic salt and Lawry’s seasoning).
·      Transfer to the prepared baking dish.  Top with cheese and breadcrumbs.  Bake for 30 minutes or until hot and bubbly. 

*Note:  I didn’t quite use all of the noodles.  I maybe held back a cup or so.  Use your discretion.

Monday, March 22, 2010

Black Bean and Chorizo Soup with Quesadillas


Lately, I’ve been in a creative rut, both in the kitchen and in my life, in general.  Sometimes, it just seems like I’ve reached my limit in concocting creative ways to eat, or how to trick the kids I work with into doing what they need to do without being miserable.  Play-Doh only goes so far.  Lately, even my breakfasts and lunches seem like a drag, and I just feel cheated when I don’t enjoy a meal.  So much of the day is arduous, and a good meal can be so uplifting in the midst.  When the turkey wrap that you usually love bores you to tears, it’s time to change something.  I keep lists upon lists of recipes that I want to make, and I scoured them thoroughly for something inspiring: something affordable, foolproof, delicious, and something yielding leftovers that would revive my spirits at lunchtime. 
 
Luckily, I tapped into my Epicurious recipe box sooner, rather than later on my hunt, and found a recipe I had recently filed away, and forgotten about:  black bean and chorizo soup.  This soup could definitely be classified under the “quick and easy” category.  Given my current state of affairs, I was in no mood for messing with dried beans or anything complex.  This soup lacks complexity, but it is loaded with flavor.  Black beans, Spanish chorizo, bell pepper, and cumin swim together in chicken broth until they all become good friends.  This is not exactly a controversial combination.  I will refrain from expressing my deep love of black beans to you, because I know that rant must be getting a little tired, but I do love them so.  And, unless you have something against pork or meat in general, chorizo never hurt anything, especially if you are fan of all things salty and spicy, and not adverse to the richness you can only get from pork fat, a gift from the gods.  Most importantly, I felt that soup might just cure my lunchtime blues.  As this idea was brewing, I realized the soup needed a co-star, and as fate would have it, I had an abundance of wheat tortillas loitering in my fridge.  They usually would find their way into a turkey wrap for my lunch, but instead, they became the vehicle for white cheddar and green chile quesadillas.  Between the soup, the quesadillas, and the power of good leftovers, I began to look forward to lunchtime again, and all was right with the world.
 
Below, you will find the recipe, with my adaptations.  However, if you do not share my affinity for spiciness, you may want to cut back on the red pepper flakes.  You can always add more later, and the chorizo will automatically bring some heat.  Chorizo will also add salt, so be weary of that, as well.  Other than that, this recipe is utterly foolproof, and manages to get a little bit tastier every day.

Black Bean and Chorizo Soup with Quesadillas (soup recipe adapted from Epicurious.com)    

4-5 oz. Spanish chorizo (spicy cured pork sausage), coarsely chopped
1 medium onion, chopped
1 large garlic clove, finely chopped
1 green bell pepper, chopped
½ red bell pepper, chopped
1 teaspoon dried hot red pepper flakes
2 teaspoon ground cumin
¼ teaspoon salt
1-2 teaspoons olive oil
2 ½ cups reduced-sodium chicken broth
2 (15 oz.) cans black beans, rinsed and drained

½ pound shredded white cheddar cheese
Fresh cilantro leaves
1-4oz. whole green chiles, drained, and torn into large pieces
4 large whole-wheat tortillas

·      Cook chorizo, onion, garlic, and bell peppers in oil in a soup pot over moderate heat, stirring, until vegetables are softened, about 10 minutes.
·      Add cumin, hot pepper flakes, and salt.  Stir to combine.
·      Add broth and beans, and reduce heat to a simmer.  Cook, partially covered and stirring occasionally, for 15-20 minutes.
·      While soup cooks, assemble quesadillas: on half of a tortilla, layer ¼ of the cheese, green chiles, and cilantro to taste.  Fold in half and set aside. 
·      Proceed until you have four quesadillas.
·      Preheat a non-stick pan over medium-high heat.  Add a drizzle of olive oil, and add one quesadilla at a time (unless you can fit two), and cook until the tortilla is golden, and the cheese is melted.
·      Proceed with remaining quesadillas, and cut into wedges.
·      Serve soup garnished with cilantro, and quesadillas on the side.

Sunday, March 14, 2010

Roasted Chicken

In the world of food, there is little more wholesome and comforting than a golden-brown, crispy-skinned, roasted chicken.  Even if you don’t eat the skin, you can’t possibly argue with such pure aesthetics.  Honestly, the wholesome perfection of this dish has kept me at bay for years, out of mere intimidation.  A whole, roasted chicken reminds me acutely of my childhood, and the perfectly browned birds my mom would pluck from the oven, like magic.  I wouldn’t dare tackle something so sacred, for fear that I would ruin it. 
Last Sunday, I conquered this insecurity, and made my first roast chicken.  I didn’t ruin it; in fact, it was quite delicious.  However, it took at least a full hour longer than I expected.  In what world does a three and a half pound chicken require over two hours to cook at 400 degrees?  This cannot be attributed to the altitude.  Rather, psycho cooker has a psycho oven, or at the very least, an oven in dire need of proper calibration.  Honestly, even this explanation is not entirely sufficient because this isn’t exactly the first time I used the implicated oven.  Perhaps, since my burn fiasco, the oven picked up on the bad vibes, and decided to tone down the temperature as a protective measure for its owner.  Ironically, I burned myself again.  It was just your average first-degree, kitchen burn, but it still left me feeling sort of pathetic.  I was just getting so frustrated with taking that anomaly of a chicken in and out of the oven, that I was being hasty, and nicked my knuckle on the edge of the pan.  Note to self: invest in some sort of thermal kitchen glove.
Despite my frustrations and my burnt knuckle, the chicken was lovely: moist and flavorful.  I used my mom’s epic seasoning blend (Lawry’s seasoning, garlic salt, pepper, and paprika), and stuffed the bird with lemon and garlic, which truly makes the whole chicken full of flavor.  The method I followed was a conglomerate of too many recipes to list, and was mostly influenced by my mom, so I don’t have any specific recipes to reference (Tyler Florence and Ina Garten couldn't hurt).  The mixed-breed recipe below should yield a nearly perfect roast chicken, assuming your oven hasn’t been overtaken by poltergeist, like mine.  The experts say a chicken is done when the juices run clear after making an incision between the drumstick and the thigh.  I’m sure this is true, but it can be difficult to discern.  I will supply you with a more obvious (if vulgar) hint: the bird is definitely done when the legs flail apart, in a suggestive manner.  I apologize for the graphic depiction, but I assure you, with such imagery embedded in your mind, you’ll know what I am referring to when you see it (see the before and after shots above).  However, if you cut into your chicken, and you are horrified by a pink interior, calmly put it back in the roasting pan, cover it loosely with foil, and put it back in the oven for 15 to 20 minutes.  Meanwhile, clean your knife and cutting board, and when the chicken is finally cooked through, and carved up, no one will be the wiser, and hopefully you won’t have any burns to show for it.    
Roast Chicken

Olive oil (lots of it)
1-1½ lbs. red skin potatoes, scrubbed and chopped into chunks
1 onion, peeled and chopped into 6-8 pieces
1 lemon, halved
1 head garlic, halved
1 3-4 lb. chicken, rinsed and patted dry

The following seasonings to taste:
·      Garlic salt
·      Lawry’s seasoning salt
·      Paprika
·      Freshly ground black pepper

·      Preheat the oven to 450 degrees.
·      Toss the chopped potatoes and onion with olive oil.  Spread them in an even layer on the bottom of a 9x13 inch-baking dish.  Season with salt and pepper.
·      Rub the chicken with a liberal amount of olive oil, and stuff lemon and garlic into the cavity.
·      Season the chicken to taste with garlic salt, seasoning salt, paprika, and pepper.  Place on top of the bed of potatoes and onion.
·      Put the chicken in the oven, and reduce heat to 400.  Rotate pan every 20 minutes.  If the chicken gets brown too quickly, place an aluminum foil tent over it.
·      Cook the chicken for 1 hour to 1 hour and 15 minutes, or until juices run clear when the chicken is cut. 
·      Before carving, allow the chicken to rest for 15 minutes for the juices to redistribute. 
·      Carve the chicken.  Serve with the roasted potatoes and wilted spinach or steamed broccoli for an all-American dinner.

·      Note: if the chicken is done, and the potatoes are not, put them back in the oven while the chicken rests.
·      Additionally, if you’re chicken is taking an inordinate amount of time like mine, the pan drippings may start to burn.  Add about ½ to ¾ of a cup of liquid to the pan.  Water works, chicken stock is lovely, but a little white wine is best.

Sunday, March 7, 2010

Asparagus: A Sign of Spring


I believe that everyone has his or her own gauge of spring, and its impending promise.  I think it’s safe to say that increasing daylight is a universal point of reference for spring.  For many people, I think it also has something to do with baseball.  Personally, I keep an eye on the produce section, and when asparagus is abundant, I can see the light at the end of the tunnel.  Although asparagus is available year round, the in-season springtime asparagus sets itself apart.  Its vivid green stalks are tender and slender, as opposed to woody and thick.  Additionally, the price is quite agreeable during these early spring months (it was on sale for 99 cents a pound at the market this week). 
Asparagus is one of my favorite vegetables to roast.  Looking for a simple and tasty side dish?  Toss some asparagus with olive oil, salt, and pepper, and let it mingle in a hot oven for 10-15 minutes.  Last Tuesday night, this was a lovely accompaniment to a heaping helping of shrimp scampi and linguine.  If you’re feeling a little more adventurous, replace the olive oil with toasted sesame oil, the salt with soy sauce, and finish the asparagus off with a sprinkle of sesame seeds in the last couple of minutes of roasting.  I felt like that flavor combination might clash with my scampi, but it is my first choice in most other circumstances.
As delicious as roasted asparagus is, the tender perfection of the springtime crop allows for a little more versatility.  You can coax even the woodiest of stems into submission via roasting.  The delicate, in-season asparagus is so lovely and tender, that all it requires is a quick sauté.  So, I sliced some up, sautéed it in olive oil with garlic and soy sauce, tossed it with hot penne pasta, and garnished it with some freshly grated Parmesan.  Perhaps soy sauce and Parmesan sound like unlikely friends, but let me assure you they get along quite well.  Think about it: they are both essentially more complex versions of salt.  And of course, asparagus and soy sauce are veritable soul mates.  Essentially, this pasta is fresh, quick, and a little unexpected, without being off-putting.  So take my advice, and go cook yourself up a plate of springtime.
Asparagus Penne Pasta (serves one)

2 tablespoons olive oil
8-10 tender stalks of asparagus, sliced thin (about ¼ inch) at an angle (see photos)
1 garlic clove, minced
Freshly ground black pepper
BIG pinch hot pepper flakes
A couple of splashes of soy sauce (about 2 teaspoons)
¼ pound penne pasta

Garnish: freshly grated Parmesan, chopped fresh parsley

·      Put a pot of water onto to boil for the pasta.
·      Meanwhile, chop asparagus, garlic, and parsley.
·      When the water is at a rolling boil, add the penne and cook according to directions on the package.
·      Preheat the olive oil in a sauté pan over medium heat.  Then add asparagus, hot pepper flakes, pepper, and garlic.  Sauté, stirring occasionally, for 5-8 minutes, or until the asparagus is tender.
·      Add soy sauce to the asparagus, to taste.
·      When the pasta is ready, add it directly to the pan of asparagus.  Toss everything together and add more soy and pepper, if needed.  You may want to save a bit of pasta water to add in case the pasta is dry.
·      Plate the pasta, and finish with Parmesan cheese and parsley.

Thursday, March 4, 2010

Mapo Tofu


People say, “absence makes the heart grow fonder,” and my blogging hiatus has definitely increased my affinity for my corner of cyber space, and cooking, in general. People also say, “you want what you can’t have,” and during my functional break from my right hand, all I wanted to do was cook.  And I couldn’t.  So, as I started to see some progress with my burn, I began to plot.  Regardless of the diminishing pain, I knew the bandage would impede me from effective chopping, just as it impeded me from so many other things.  So I searched for a recipe that would satiate my need to cook and blog, but also placed little demands upon my right hand.  The recipe that fit these stipulations arrived in the form of mapo tofu, a spicy Chinese dish consisting of soft tofu and minced pork. 

That’s right, I said it: tofu and pork, happy together.  For us Americans, who generally view tofu as a health food, and a vegetarian mainstay, this may sound a little sacra-religious.  However, mapo tofu is a traditional Szechuan dish.  I think it’s genius: the smooth, tender tofu gets a flavor boost from the richness of a little ground pork.  It’s spicy; it’s garlicky; and the ingredients for this particular version are available at the regular grocery store, without costing a fortune.  Chopping requirements are as follows: minced garlic and ginger; chopped tofu; chopped scallions.  As far as my bum hand was concerned, I decided that grating the ginger and garlic (see photo below) with my left hand was feasible, and I CAREFULLY did some left-handed knife work on the scallions and tofu, with minor assistance from my right thumb.  To be honest, I’m pretty impressed with my impromptu lefty knife skills (however, I will not disclose how long those scallions took me).  Even more impressive, the authorities at the burn clinic gave me permission to let my burned hand see sunlight only 14 hours after my mapo tofu experience.  There’s only one explanation: cooking cures all (of course, as long you avoid metal that has been roasting in the oven).     
Now for the bad news:  I wasn’t exactly thrilled with my mapo that first night.  It satiated my cooking desires, but not my taste buds.  I primarily blame this on the fact that I absentmindedly ate Chinese food the night before, because I ended up enjoying the leftovers.  Initially, I wanted to serve this with brown rice, but I went with white rice due to time constraints.  That was a lucky choice because mapo tofu with brown rice would have resulted in a big bowl of beige, and beige is not appetizing.  White rice provides the necessary contrast for aesthetic appeal.  Overall, if you are looking to dabble in Asian cooking, this is nice starting point.  According to the author of this recipe, vegetables or ground turkey can be substituted for the pork.  Regardless of this, I would recommend reducing the sesame oil to ½ teaspoon for balanced flavor.    
Mapo Tofu (loosely adapted from “No Recipes”)

Serves 3-4

1 tablespoon tamari or other good soy sauce
2 tablespoons rice wine vinegar
2 tablespoons oyster sauce

2-3 teaspoons Sriracha [I used at least 3]
1 teaspoon sesame oil
[This was a little strong: I’d recommend ½ teaspoon.  You can always add more]
1 teaspoon corn starch

¼ cup water

1 teaspoon canola oil [or other light colored oil]
2 cloves of garlic, grated
1 tablespoon of fresh ginger, grated
6 scallions, sliced thin
½  lbs. ground pork [note: the original recipe permitted pretty much anything as a substitute from vegetables to ground turkey)
1 package silken tofu, cut into ½ inch cubes [the package I used was 19 oz.]
½ to ¾ cup frozen peas [they don’t have to be thawed]

§  Mix the first group of ingredients in a bowl to make the sauce. Adjust seasonings as you see fit.
§  Preheat oil in a sauté pan over medium-high heat.  Once it’s hot, sauté garlic, ginger, and scallions for about 30 seconds.
§  Add the ground pork, and break it up with a wooden spoon. When the meat is cooked, drain off any excess oil [this takes some time: carefully pour off what you can, and use paper towels to blot up the rest].
§  Add sauce mixture.  Stir to combine, then add the tofu and peas. If the sauce seems thick, add some water and cook until the tofu is heated through.  Handle the mixture gently so you don’t mash up the tofu.
§  Serve with white rice, and extra Sriracha, if desired.