Showing posts with label salad. Show all posts

Saturday, June 14, 2014

Taco Salads

“Plates or bowls?” Jean queried.

“Definitely bowls,” I responded.

This was the brief, yet definitive exchange I had with my friend as I put the final touches on the inventory of ingredients for taco salads.  There’s something infinitely satisfying about a smattering of ingredients heaped in a bowl, waiting to be mixed up and scooped up.  There’s no risk of a stray bean or avocado cube falling over the edge; you can enjoy with reckless abandon. 

Due to rising summer temperatures and a busy schedule, I have been seeking out quick meals, and this taco salad certainly fits the bill.  This is actually the second time I’ve made it in two weeks (the first time, my comrades and I were too hungry to pause for the photography process, which necessitated another production). I can say with authority that it can easily be compiled in twenty minutes. Despite its expedited preparation, this taco salad is elevated from a mere weeknight meal to something more worthy of your attention, with just a few simple touches. 
The foundational elements are aligned with any taco salad: chopped romaine, shredded cheddar, and seasoned ground beef.  I used an improvised version of my taco filling from a previous post.  The linked recipe could certainly be adhered to, but this meal is pretty forgiving.  Simply brown some lean ground beef in a skillet, and season with any taco-ish seasonings you have on hand, until it smells and tastes delicious.  The usual suspects showed up in mine: cumin, chile powder, red pepper flakes, and coriander.  Less conventional items like smoked paprika and dried Italian herbs also had cameo roles; essentially, anything goes. 

ingredients for salsa vinaigrette
I then made a simple vinaigrette with salsa as the base.  I used a smoky poblano salsa, but anything will do as long as it’s not chunky.  The texture of chunky salsa is a little weird for a dressing.  Add some fresh limejuice, a dash of vinegar, and olive oil, and the result is a simple, tasty vinaigrette.  Black beans, cubed avocado, and fresh corn add dimension.  You could pick one, and add it to the cheese/lettuce/beef/salsa vinaigrette backdrop, and you would have a complete meal; or you can use all three and have an elevated eating experience.  The corn is crucial, and do take the time to get fresh corn, and shuck it from the cob.  The sweet, starchy crunch is well worth the minimal effort, and ‘tis the season for fresh corn; frozen corn could never do it justice.  I layered all of my ingredients in big bowls, and finished it off with an extra spoonful of salsa and a dollop of sour cream.  The finished product resembles a savory Tex-Mex sundae; it’s crunchy and refreshing, yet hearty and satisfying.  Overall, a delightful summer meal.

Taco Salads (makes 3-4 servings)

Salad:
1 lb. lean ground beef, prepared with taco seasonings (see this recipe for ideas)
2 hearts of romaine, cleaned and chopped
2 ears of corn, shucked from the cob
1 can black beans, drained and rinsed
1/2 pound shard cheddar cheese, coarsely shredded
1 ripe avocado, cut into cubes
Salsa
1 lime (plus extra for garnish, if desired)
1-2 tablespoons of red wine vinegar
1/4-1/3 cup extra virgin olive oil
Sour cream

-       Prepare vinaigrette by mixing a quarter cup of store bought salsa with the juice of one lime and 1-2 tablespoons of red wine vinegar.  Whisk in enough olive oil to create a smooth emulsion.  Taste and add more vinegar or lime if more acidity is needed.  (A dash or two of a smoky hot sauce, like Chipotle Cholula or Tabasco is also a nice touch.)
-       Prepare the remaining ingredients.
-       Add a couple of handfuls of lettuce to each bowl and spoon over some of the vinaigrette. 
-       Top with corn, black beans, seasoned ground beef, shredded cheese, and avocado.  Add an extra spoon of salsa and some sour cream, if desired for garnish.


Wednesday, May 21, 2014

Grilled Chicken with Warm Chickpeas and Green Salad

Monday was the most glorious spring day in Boulder: mid seventies; sunny with a few clouds, alleviating the direct heat of the sun; foliage greening out before your eyes.  It seemed like the perfect day to lavish my grill with a little love, and I found the perfect recipe in the recent issue of Bon Appétit for the occasion. 
It was a simple dish of grilled chicken thighs, accompanied by a salad of baby greens and lightly sautéed chickpeas.  Straight out of the can, chickpeas can be a bit tinny, but when dressed up a bit, they can prove themselves to be a very worthwhile bean.  In this understated dish, the drained chickpeas are sautéed in olive oil with fresh thyme and red chile flakes.  The chicken thighs are seasoned simply, and grilled until just done. 
The chickpeas are supposed to be tossed with arugula, but silly Whole Foods was out of arugula.  In its place, I chose a baby greens mix, called “Super Greens,” which included arugula, and other bold, young greens.  The mix is made by Organic Girl, and the name is coined from the fact that it is composed of superfoods: red and green chard; tatsoi; arugula; spinach.  If you’ve never seen baby chard or tatsoi (a tender green with mild mustard quality), that experience in and of itself is certainly worth the cost of admission, as they are just about the cutest things I ever saw (see photo below for evidence).  The salad is finished with fresh lemon and olive oil, and I added a little bit of feta for a nice salty finish.  A perfectly satisfying warm weather meal.
Grilled Chicken with Warm Chickpea and Green Salad (adapted from Bon Appétit, May 2014)

4 tablespoons olive oil, divided
1-15 oz. can of chick peas, drained and rinsed
4 sprigs of thyme
1/4-1/2 teaspoon crushed red pepper flakes
8 small bone-in, skin-on chicken thighs
Kosher salt and freshly ground black pepper
4 cups arugula (or super greens)
Zest and juice of 1 lemon
3 oz. crumbled feta cheese

-       Heat 2 tablespoons of oil over medium high heat in a skillet.  Add chickpeas, thyme, hot pepper flakes, pepper, and kosher salt.
-       Stir occasionally until just warmed though, about 5 minutes.  Transfer to a large bowl.
-       Preheat a grill over medium heat (oil your grill if necessary), and season the chicken thighs with salt and pepper. 
-       Grill chicken, skin side down for about 8-10 minutes, until skin starts to become golden brown.  Turn and grill until cooked through, about 8-10 more minutes. 
-       Toss greens, lemon zest, lemon juice, and chicken peas with olive oil as needed.  Sprinkle salad with feta and serve with chicken.


Wednesday, February 26, 2014

Chopped Salad

Sometimes, I steal recipes.  This can happen in a completely innocent way.  For example, I may be perusing a cookbook or cooking magazine in a bookstore, and I stumble upon an enticing photograph or recipe.  The idea may simply stick with me, and lead to my own version of the aforementioned image, visual or verbal.  My previous post is prime example of this borrowed creativity.  I saw an idea that I liked, and put my own spin on it.  Other times, it is a little more malicious.  I might, say, take a picture of a photograph, or quickly type up a note on my phone, documenting a simplified version of a printed recipe.  Admittedly, this is sort of awful of me. 

This past weekend, I engaged in the latter type of activity.  I saw a recipe for the loveliest chopped salad, with two types of cabbage, fennel, olives, chicken, and an oregano vinaigrette.  Hunkered down on the floor of Barnes and Noble, tucked in an unassuming aisle, I jotted down a list of ingredients on my phone, and a few notes on the vinaigrette, while occasionally taking a nervous glance over my shoulder.  “I will make it my own,” I told myself, trying to rationalize my inappropriate behavior.  I had spent over an hour looking at the cookbook from which I stole the recipe.  There were quite a few additional recipes that caught my eye, but I only stole one.  Later that evening, I found myself wishing my notes on the vinaigrette were more thorough, but I figured that served me right, and I was not even feeling the proper kind of remorse, given the crime. 

The next day, I went back to Barnes and Noble on an unrelated errand.  As I was getting ready to leave my apartment, I suddenly realized I would get another opportunity to take a look at the now fuzzy vinaigrette assembly; I found myself involuntarily picking up the pace in excitement over spending a little more time with the cookbook.  I took care of my first task; I immediately sidled up to the cookbook section, and then blew another hour sitting cross-legged on the floor, with the cookbook nestled in my lap.  I suddenly heard a voice in my head, saying “BUY THE COOKBOOK.”  It was as if I became Pluto in an old Disney cartoon, and a mini-me angel tapped me on the shoulder, guiding me towards the right thing.  And I am now engaging in a bold-faced confession, hoping that it will entitle me to blog about the recipe with a (sort of) clean conscience.
Seriously though, in spite of my questionable moral compass, this chopped salad is very tasty.  I am not a big salad eater; they tend to be too crunchy and not rich or savory enough.  With that being said, I’ve got to hand it to Jeanne Kelley, author of SaladFor Dinner because her book truly lives up to its title.  She takes a genre of food known for leaving diners wanting more, and renders it worthy of calling it a satisfying dinner.  Her recipes, categorized by their protein, are all well-rounded, full flavored, and filling meals.  Granted I have only made this Chopped Salad, but I can tell that there are quite a few other recipes that will live up to its prowess.
Now about this Chopped Salad… it’s utterly divine.  Crunchy green and red cabbage, sweet fennel, and red onion are offset by the heartiness of plenty of shredded chicken breast, all kissed with a bright Oregano Vinaigrette.  This strong foundation is then highlighted by a wide array of salty, savory morsels, that elevate it from a glorified slaw into a balanced and thoughtful main dish.  Briny green olives and peppery parley leaves run throughout the salad.  And as if that weren’t enough, the salad is then garnished with feta and prosciutto (I know, it makes me swoon, too). 
When I initially read the recipe, I thought, “Why green olives?  Why not Kalamata?”  Shopping for the meal, I even paused at the olive bar, eyes darting between the bins of green Mt. Athos olives and Kalamata, questioning what I felt to be an otherwise brilliant recipe.  I made a last minute swerve to the left, and counted out my 10 green olives, upped from Kelley’s six.  I’m willing to defend my choice on this particular judgment call, but I have to say that the Kalamatas would have been a grave mistake.  The color and the firm texture alone make green olives worth their salt in this context, and I think the brinier, milder flavor is the perfect compliment.  As for the prosciutto and feta, I’m pretty sure those two ingredients speak for themselves, and  they truly yield a whole that is greater than the sum of its parts. 
Another strong selling point for the delectable Chopped Salad is that is one of the few in the history of salads that actually holds up as a decent leftover, and that is because it made with cabbage instead of lettuce or baby greens.  Tossed in dressing, it retained its immaculate crunch over a couple of days, only deepening in flavor.  I kept the prosciutto and feta separate (they were a garnish, after all).  Please note, I did not add any salt to this recipe, besides in the preparation of the dressing and the chicken.  The smorgasbord of salty flavors is adequate without actually salting the dish.  My favorite salty element?  The prosciutto, no question.  The sweet, meaty flavor and toothsome texture definitely add a certain “je ne sais quoi,” and the color is the icing on the cake.  The recipe written below is true to how I made it, including a few minor tweaks that veered slightly from the original text; however, I stuck to Kelley’s overall vision because she gave me no reason not to. 

Chopped Salad (slightly adapted from Jean Kelley’s Salad forDinner):
Serves 4

3-4 cups very thinly sliced green cabbage
2-3 cups very thinly sliced red cabbage
12 ounces shredded cooked chicken breast (cooked in the same way at the previous post)
1 fennel bulb, trimmed and very thinly sliced (about 1 cup)
1/4 cup red onion, very thinly sliced, tossed with a few tablespoons of fresh lemon juice
1/2 cup fresh Italian parsley leaves
10 good quality green olives, pitted and chopped
3 ounces thinly sliced prosciutto, torn into pieces
4 ounces feta, crumbled

Oregano Vinaigrette
3 tablespoons red wine vinegar
1 tablespoon fresh lemon juice
1 teaspoon dried oregano, crumbled
2 teaspoons Dijon mustard
1/4 teaspoon kosher salt
1/8 teaspoon crushed red pepper
1 garlic clove, lightly smashed
1/3 cup extra virgin olive oil

Whisk all ingredients for vinaigrette together except oil and garlic.  Gradually whisk in oil.  Add garlic clove, and allow dressing to sit for 30 minutes.  Allow garlic clove to continue sitting in dressing, but don't eat it.


In a large bowl, combine both cabbages, fennel, onion, parsley, olives, and chicken.  Add enough Oregano Vinaigrette to lightly coat, and toss well.  

Divide salad on dinner plates and garnish with prosciutto and feta, and an additional drizzle of vinaigrette and freshly ground black pepper.

Thursday, June 7, 2012

Roasted Red Pepper Salad

I have spent the last month cooking hamburgers on my grill, striving towards the perfectly cooked, medium burger.  Grilling is a delicate dance between timing and heat.  It takes just the right balance to achieve a moderate char on the outside and a juicy, pink inside.  No one wants a blue burger, or a hockey puck, and no one wants a burger with a gray exterior, no matter how perfectly pink it may be in the middle.  Apparently, I have a few more burgers to screw up before I manage to avoid all of these undesirable traits. 
Roasted red peppers seemed like an appropriate antidote to alleviate my grilling frustrations.  Roasting peppers is fairly foolproof, although it is definitely a labor of love.  It takes time and patience, but yields something delectable.  Store-bought roasted red peppers are perfectly fine, especially when used as an augmentative ingredient in pasta or a green salad.  However, when the peppers are headlining the event, it makes a notable difference to roast them yourself.  They are smoky, meaty, and sweet, with a soft, buttery texture.  If you have the time, it is actually fun, and largely uninvolved.  You simply put whole peppers on the grill until they are charred.  Then they steam together for a bit, and last they must be lovingly peeled.  Then they are ready for you to chow down.  If you are going to do it, do it with at least 4 peppers so that it is worth your while.
The salad I made was comprised of the smoky peppers, cut into strips, as well as every herb I have growing on my patio, with capers, kalamata olives, and a kiss of garlic.  I am particularly proud of my thriving herb pot because I attempted this last year, and it was a disaster.  My herbs were infested with earwigs, and then I refused to water them, and eventually I had a pot of dead herbs camped out on my patio.  My full, green plants are a sight for sore eyes.
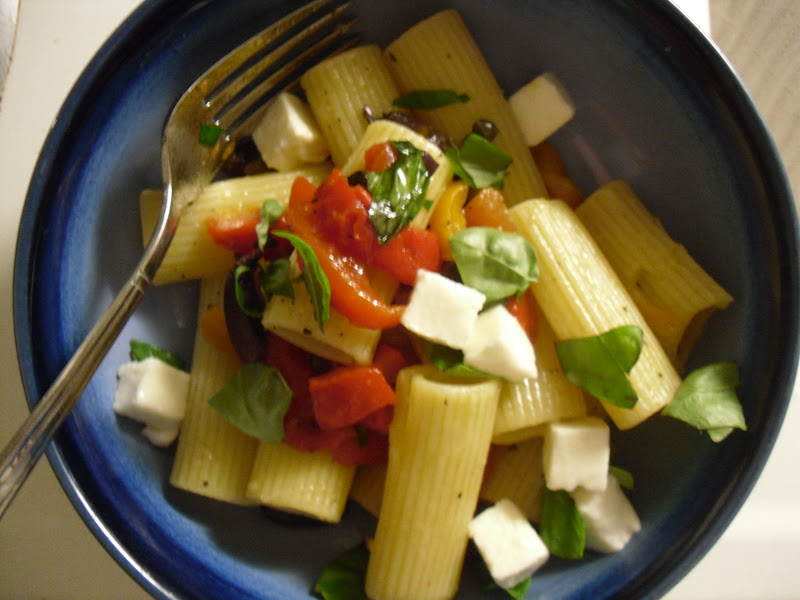
Essentially, this salad is all things good in the world mixed in a bowl.  And if you were concerned that a few were missing, you could follow my example and serve a caprese salad and some bread along side.  I love a dinner like this on a hot summer night: cold, and vegetable-laden, yet still rich and satisfying.  With the leftovers, I chopped the salad roughly, and tossed it with hot rigatoni, extra basil, and fresh mozzarella.  Delicious.

Roasted Red Pepper Salad (based on Giada de Laurentiis’s recipe)

2 red bell peppers
1 orange bell pepper
1 yellow bell pepper
1 teaspoon chopped fresh thyme
2 tablespoons chopped fresh parsley
12 basil leaves, torn
1/3 cup kalamata olives, pitted and quartered
2 tablespoons capers
1/2 garlic clove, grated on a microplane
2-3 tablespoons extra virgin olive oil
1 teaspoon red wine vinegar
Kosher salt and freshly ground black pepper to taste

-       Preheat a grill to medium high for about 10 minutes
-       Place the peppers on the grill, and cook for 20-25 minutes.  Rotate every 5 minutes so that the skin of the pepper becomes evenly charred, and the whole pepper softens.
-       When charred, remove peppers from the grill and place in a large bowl.  Cover with plastic wrap and let sit for 10-15 minutes.
-       Next place peppers on a plate or cutting board to cool for an additional 10 minutes, or however long it takes for you to be able to handle the peppers.
-       Tear peppers open, remove stem and seeds and peel off all the skin.  It should be easy to remove.  If it is difficult to remove seeds, rinse the peppers gently.  Only do this when necessary and use water sparingly as it will rinse off the smoky flavor of the grill.
-       Cut the peppers into strips, and add all of the remaining ingredients, seasoning to taste.  Eat the salad as is, or with chicken, a caprese salad, bread, or however you’d like.  It’s also great as a condiment on a sandwich.

Sunday, February 12, 2012

Pan-Fried Tilapia Remix


Pan-fried tilapia is simply delicious, and if you need further justification of that statement, you can read about it in more detail in a one of my previous posts, singing its praises.  I usually don’t blog about the same dish twice, unless I find a way to improve it.  My recipe for tilapia recently received an upgrade, not by varying ingredients, but by varying the cooking vessel.  I recently purchased my very first cast iron pan, and my only regret is that I waited so long to do so.  This is not only an upgrade for tilapia, but also an improvement for my kitchen in general.  This is particularly good news for anything sautéed/pan-fried, as those foods always tastes best when they achieve a golden, brown hue.  Deeper color results in deeper flavor, and a crispier texture.  Cast iron pans help to maximize this “golden (brown) rule,” and my most recent batch of pan-fried tilapia exemplified this.  My new favorite pan yielded crispy, golden fish fillets that were perfectly moist on the inside.  Cast iron gets hotter than non-stick pans, which allowed for the beautiful color to develop quickly, without overcooking the fish.
I also made a dill-mustard cole slaw to go alongside my fish.  Cole slaw is a common side dish for fried fish for a reason: it is a perfect complement.  It’s like serving your fish with a refreshing, crunchy tartar sauce.  Creamy, crunchy, tart, and briny: pan-fried tilapia couldn’t ask for anything more.  The dressing was both creamy and vinegary, with a nice bite from spicy mustard, and bright from the addition of fresh dill.  Following the general trend of cole slaw, this one gets better as it sits, so I recommend making it at least 30 minutes to an hour before serving.  It will continue to get better over the next day or so, as well.

Pan-Fried Tilapia: click here

Mustard-Dill Cole Slaw (loosely based on the Food Network’s recipe)

•                1/2 cup mayonnaise (I prefer olive-oil based)
•                2 tablespoons white wine vinegar
•                1 tablespoon whole-grain mustard, spicy brown mustard, or German mustard
•                3 tablespoons chopped fresh dill (plus extra for garnish)
•                Kosher salt and freshly ground pepper
•                1/2 head light-green cabbage, thinly sliced (about 6 cups)
•                1 small carrot, shredded
•                1 bunch scallions, white and light green parts, thinly sliced

-       Wisk together mayonnaise, vinegar, mustard, with about 20 grinds of fresh pepper and about ¼ teaspoon of kosher salt.
-       In a large bowl add the cabbage, carrot, and scallions.  Add about ¾ of the dressing and the dill.  Add more dressing if needed.  Garnish with dill when serving. 

Wednesday, February 2, 2011

Snow Day

Although my student status technically remains, as I am not yet gainfully employed or anything normal like that, I no longer function as a student in the classic sense of going to class, writing papers, and taking tests.  No, no, I am now done with that.  Now I am essentially “playing house” as a speech pathologist, tagging along with a real speech path in a public school, working with students, dabbling in the paper work, and trying to soak up every last bit of knowledge I can before I am expected to fend for myself (and get a pay check).  Unfortunately, I am essentially paying tuition to work 40 hours a week, but there are some bonuses that come with it.  Like free time at night and on the weekends.  That is huge.  And even better: snow days!

On Monday afternoon, I received the information that school was cancelled for Tuesday.  Imagine my elation of having a surprise mid-week mini break, when the bona fide weekend had ended not even 24 hours earlier.  School was cancelled due to extreme cold temperatures, basically because children can’t be expected to wait for the bus with a wind chill of 35 below zero.  Some criticize this decision, but I have no complaints.  I prefer children to be safe (and time off). 

That evening, I went out for a drink to celebrate, but I immediately started plotting and scheming the perfect menu for frigid temperatures.  It had to involve the oven blaring at high temperatures for a few hours.  My apartment is poorly insulated, and thus quite cold (I am currently wearing wool socks, two pairs of pants, 2 shirts, and a scarf).  Not surprisingly, my ancient oven is also poorly insulated, and it not only cooks food, but it belches heat out into the apartment.  It’s great for winter, not so great for summer, but summer is not of great concern right now.   

Alas, I decided to make lemon-dill roasted drumsticks, which I find so comforting.  My love of chicken on the bone runs so deep that it is slightly disturbing.  In hindsight, brisket would have been a good choice since it takes at least 4 hours in the oven, not including preheating time, but I spent too much time out of the house to pull it off.  So, after fighting through the wind and cold to Whole Foods to get my chicken (8 drumsticks), I whipped up a marinade, consisting of loads of fresh lemon zest and juice (2 lemons to be exact), about 3 tablespoons of finely chopped fresh dill, 2 tablespoons Dijon mustard, a heaping teaspoon of honey, about 3 tablespoons of olive oil, a generous shake of Lawry’s seasoned salt, and freshly ground fresh pepper.  I whisked the ingredients together, and put the mixture and the chicken into a large Ziploc bag to marinate for an hour or so.  (See picture below, and try not to be too grossed out by the raw chicken). 
In the meantime, the oven was preheating, and heating my apartment, set to about 400 degrees (375 would probably do on a functional oven).  After they marinated, the drumsticks went into a foil-lined pan with an extra dusting of Lawry’s and pepper, and into the oven for about 45-50 minutes.  I like to rotate the pan occasional for even cooking. 
While the chicken became browned and blistered in the oven, I proceeded to make one of the coziest side dishes known to man: risotto-style orzo pasta.  It consists of orzo, delicate, rice-shaped pasta, cooked slowly in chicken stock so that it releases its starches to make the end product creamy and luxurious.  The chicken stock makes it so flavorful, and onions sautéed in butter at the start of the dish don’t hurt the flavor factor either.

First, sauté a half of an onion, diced, in 2 tablespoons of butter over medium heat for about 10 minutes, until the onion is soft, but not browned.  Season the onions liberally with salt and pepper at the start of cooking, and stir frequently. 
Then add 1 cup uncooked orzo pasta, stirring for about one minute until it is evenly coated with the butter, and starting to toast a bit. 
Then add two cups of chicken stock (I buy one 14 oz. can of stock and make up the difference with water).  Bring the mixture to a low simmer, then cover, and allow it to cook for 20-25 minutes, stirring occasionally.  You can always add more water if it starts to look dry or too thick (just a tablespoon or two at a time).  When it’s done, douse it with freshly grated Parmesan (about ½ cup) and ¼ cup of chopped flat leaf parsley.  Frozen peas are also a nice touch, especially if you don’t have parsley on hand, but it definitely needs something green at the end.
I served my chicken and orzo with a simple baby arugula salad, drizzled with extra virgin olive oil, a spritz of fresh lemon juice, parmesan cheese, and just because I had it on hand, some fresh dill.  And as if this meal wasn’t delicious enough, I received some news as I was about to start cooking that made it taste even better: I had another snow day the following day!  Please curb your jealousy.  You can simply make this delicious meal, and live vicariously through me. 

Monday, April 12, 2010

Al Fresco Dining


What’s the perfect ending to a perfect spring day?  The perfect dinner, outside, of course.  What’s the perfect outside dinner?  Parmesan chicken topped with a simple salad dressed in lemon vinaigrette.  There’s really no witty story or commentary behind this recipe.  Last Sunday, I just happened to spend a lovely homework-free day in good company.  I literally forgot I was in grad school for they day, and as I rode this wave of contented delirium, this recipe popped in my head.  I saw Ina Garten make it for Mel Brooks on Barefoot Contessa a while back.  If it is good enough for Mel Brooks, it is good enough to complete my perfect spring day. 

The gist:  pounded out chicken breasts, coated in Parmesan and panko breadcrumbs, and sautéed.  Then you top it with a simple salad, and eat perfect morsels of lemony greens with crispy chicken.  It doesn’t take too long to make, and it’s perfect for warm weather because you only need to have the stove on for about 10-15 minutes.  Eating this dinner outside definitely makes it taste better, and I do have a witness.
Parmesan Chicken (adapted from Ina Garten's recipe)

2 boneless skinless chicken breast halves
1 cup panko breadcrumbs
½ cup grated Parmesan cheese (the crumbly kind you find at the grocery store)
1 teaspoon kosher salt
Lots of freshly ground pepper
2 large eggs
Olive oil

For the salad:
Salad greens for two (I used about 2/3 of a bag of spring mix)
Juice of one lemon
1½ teaspoons Dijon mustard
Kosher salt and freshly ground pepper
About ¼ cup extra virgin olive oil
Extra parm for garnish

·      First order of business:  make the chicken breasts thin (about ¼ inch thick) to make them more tender and quick cooking.
·      You can do this by pounding them out with the flat side of a meat mallet, the bottom of a skillet, or a rolling pin.  Put the chicken between 2 pieces of plastic wrap to contain the mess.
·      Or you can butterfly them first, and then pound them out (my preferred method), but if you’re not very comfortable with a knife go with the other method.  To butterfly, I place the palm of my hand on the chicken breast, and press down to stabilize it.  Then with my Santoku knife sideways, I slowly work it through the middle of the chicken.  The result is two thin pieces.  Then I pound.
·      Mix together panko, Parmesan, salt and pepper in a large shallow bowl.  Taste for seasoning.
·      In another large shallow bowl, beat the two eggs with a splash of water (about a couple of teaspoons).
·      First dip the chicken in the beaten egg, then the panko mixture.  Press the chicken into the panko for an even coating.  Proceed with the rest of the chicken.  [This can be done a couple of hours in advance.  Separate layers of chicken with wax paper and refrigerate.]
·      In a large skillet, preheat a shallow layer of olive oil (about 3 tablespoons) over medium-high heat.  When it’s good and hot, add the chicken in a single layer.  Cook in batches if necessary.  The chicken should sizzle.  Cook for about four minutes, and then flip.  Continue cooking until the chicken is firm to the touch and cooked through (nicely browned, too).  If you are cooking the chicken in batches, be sure to add more olive oil to the pan.
·      While the chicken cooks, make the dressing.  Whisk together the lemon juice, Dijon, salt, and pepper.  Then slowly drizzle in the extra virgin olive oil while whisking.
·      When the chicken is reading, lightly dress the greens with the vinaigrette.  Mound salad on top of chicken breasts, and top with more Parmesan.

Friday, December 18, 2009

Black Bean Salad and Roasted Poblano Quesadillas


I adore Deb Perelman’s blog, Smitten Kitchen.  It’s fun to read, the recipes always sound great, and she takes beautiful pictures.  Deb even provides pictures of her adorable baby, who lacks the alien-like quality frequently associated with newborns.  I say the food sounds great because I had never made one of her recipes until the other night.  I actually have a document on my computer devoted entirely to Smitten Kitchen recipes that I intend to make, but I only acted on this for the first time earlier this week.  It was a variation of her black bean confetti salad.  I stumbled upon the recipe about two months ago, and immediately wanted to make this delightful concoction: black beans, bell peppers, in a lime and cumin vinaigrette.  As ridiculous as it may sound, I have an irrational love of black beans.  I love their creamy texture, and the contrasting colors of the exterior and interior. 

The recipe had me entranced, but I struggled to dream up an appropriate companion for this salad.  Deb suggests a green salad, but the absence of salad on my blog may serve as an indicator for how I feel about that.  Sometime last week, the notion of roasted poblano quesadillas dawned upon me.  I’d love to take credit for the idea, but I have no doubt that the notion was planted in my head by some Food Network show eons ago, and it has just been waiting for an opportunity to come to fruition.  Anyway, once I thought of it, I felt like black bean salad and roasted poblano* quesadillas would be the best of friends, and it would be an utter tragedy to keep them apart.  Plus, school has been audaciously encroaching on my cooking endeavors of late, and I felt that the process of roasting peppers might soothe my culinarily-deprive soul. 

Black Bean Salad (adapted from Smitten Kitchen’s Black Bean Confetti Salad)

1 green pepper, diced
½ red pepper, diced
About 15 grape tomatoes, halved
2 tablespoons finely chopped red onion (about a quarter of an onion)
1-14 oz. can black beans, drained and rinsed
2 tablespoons finely chopped parsley or cilantro
Juice of one lime (one generous tablespoon)
3 tablespoons extra virgin olive oil
1 teaspoon cumin
½ teaspoon honey
¼ teaspoon Sriracha* hot sauce
BIG pinch of kosher salt
Freshly ground black pepper

Quesadillas:

2 poblano* peppers
1½ cups shredded Monterey jack cheese
4 large wheat tortillas
2 teaspoons olive oil

·      First, prepare the peppers:
·      Most people prepare these using a broiler or the open flame of a gas stove.  I have an electric stove and my broiler scares me, so I used one of my burners like a broiler.  I turned one of the burners on to high, and let it preheat until it was red-hot.  Then, using tongs, I held a pepper just above the burner (about an inch, give or take) until the skin was charred and blistered (about 3-4 minutes per side).
·      Place the peppers in a bowl and cover tightly with plastic wrap.  Let sit for at least 10 minutes.
·      Peel off charred skin.  Cut or tear the pepper open, and remove seeds and stems.  Cut or tear the pepper into ½ to one-inch strips (this is very easy to do with your clean hands).  Set strips of pepper aside.  Wash your hands thoroughly, and until then, and avoid touching your eyes or face, not that you should be touching those elements while cooking, anyway.

·      Next, prepare the salad:
·      Whisk together lime juice, cumin, honey, Sriracha, and salt.  Then whisk in olive oil, and set dressing aside.
·      Prep vegetables, beans, and fresh herb of choice.  Combine in a bowl.
·      Add about half the dressing and a few grinds of pepper; taste for seasoning, and add more dressing if necessary. 

·      Last, make the quesadillas:
·      In a large skillet, preheat a drizzle of olive oil (about a half teaspoon) over medium-high heat.
·      Place a tortilla in the pan.  Add about a quarter of the cheese and a quarter of the roasted peppers on half of the tortilla, and fold over the empty side.  Cook for a few minutes on each side until cheese is melted and the tortilla is golden.
·      Add more oil if necessary and repeat with the remaining tortillas, cheese, and peppers; cut quesadillas into wedges.
·      Serve quesadillas with black bean salad and enjoy!

Comments:  This was so lovely, and the leftovers made for a few very satisfying lunches, and I did not even bother to reheat the quesadillas.  Be careful with the dressing:  you will most likely not need all of it.  I foolishly dumped all of it on my salad.  The recipe only yields a quarter cup of dressing, which didn’t seem excessive.  Well, it turned out to be quite excessive, and I ended up having to drain my salad through a sieve, which was a simple antidote, but could be easily avoided by a savvy reader like you. 

This method of roasting peppers is a little time consuming, due to the fact that you can only tackle one pepper at a time.  My broiler scares me, so it seemed like the safest way.  Safety aside, it was more fun than an amusement park.  I kid you not:  the process was a lot of fun, and a feast for the senses.  You can smell, see, and hear the progression occurring before you.  The squeaky noise the peppers make as they blister is just blissful.  I would recommend holding the tongs with an oven mitt, because they will get quite hot, and your arm may get a little tired, but it’s worth it.  Not only is it fun, but those roasted peppers are a tasty treat.  Mine had a nice kick, but most poblanos are pretty mild.  If you have an aversion to heat, just use a bell pepper, and I’m confident that you will be quite content with your meal. 

*See glossary for definitions