Showing posts with label egg. Show all posts

Friday, April 25, 2014

Easter Egg Pasta

The most recent issue of Bon Appétit is pretty brilliant; while I read it every month upon arrival in my mailbox, this month’s copy has myriad recipes that I truly want to make, flagged with hot pink Post It notes.  On the list of intriguing items, there was a short article on various uses for leftover Easter Eggs.  Though I don’t celebrate Easter, but I do enjoy eggs.  One of the recipes 
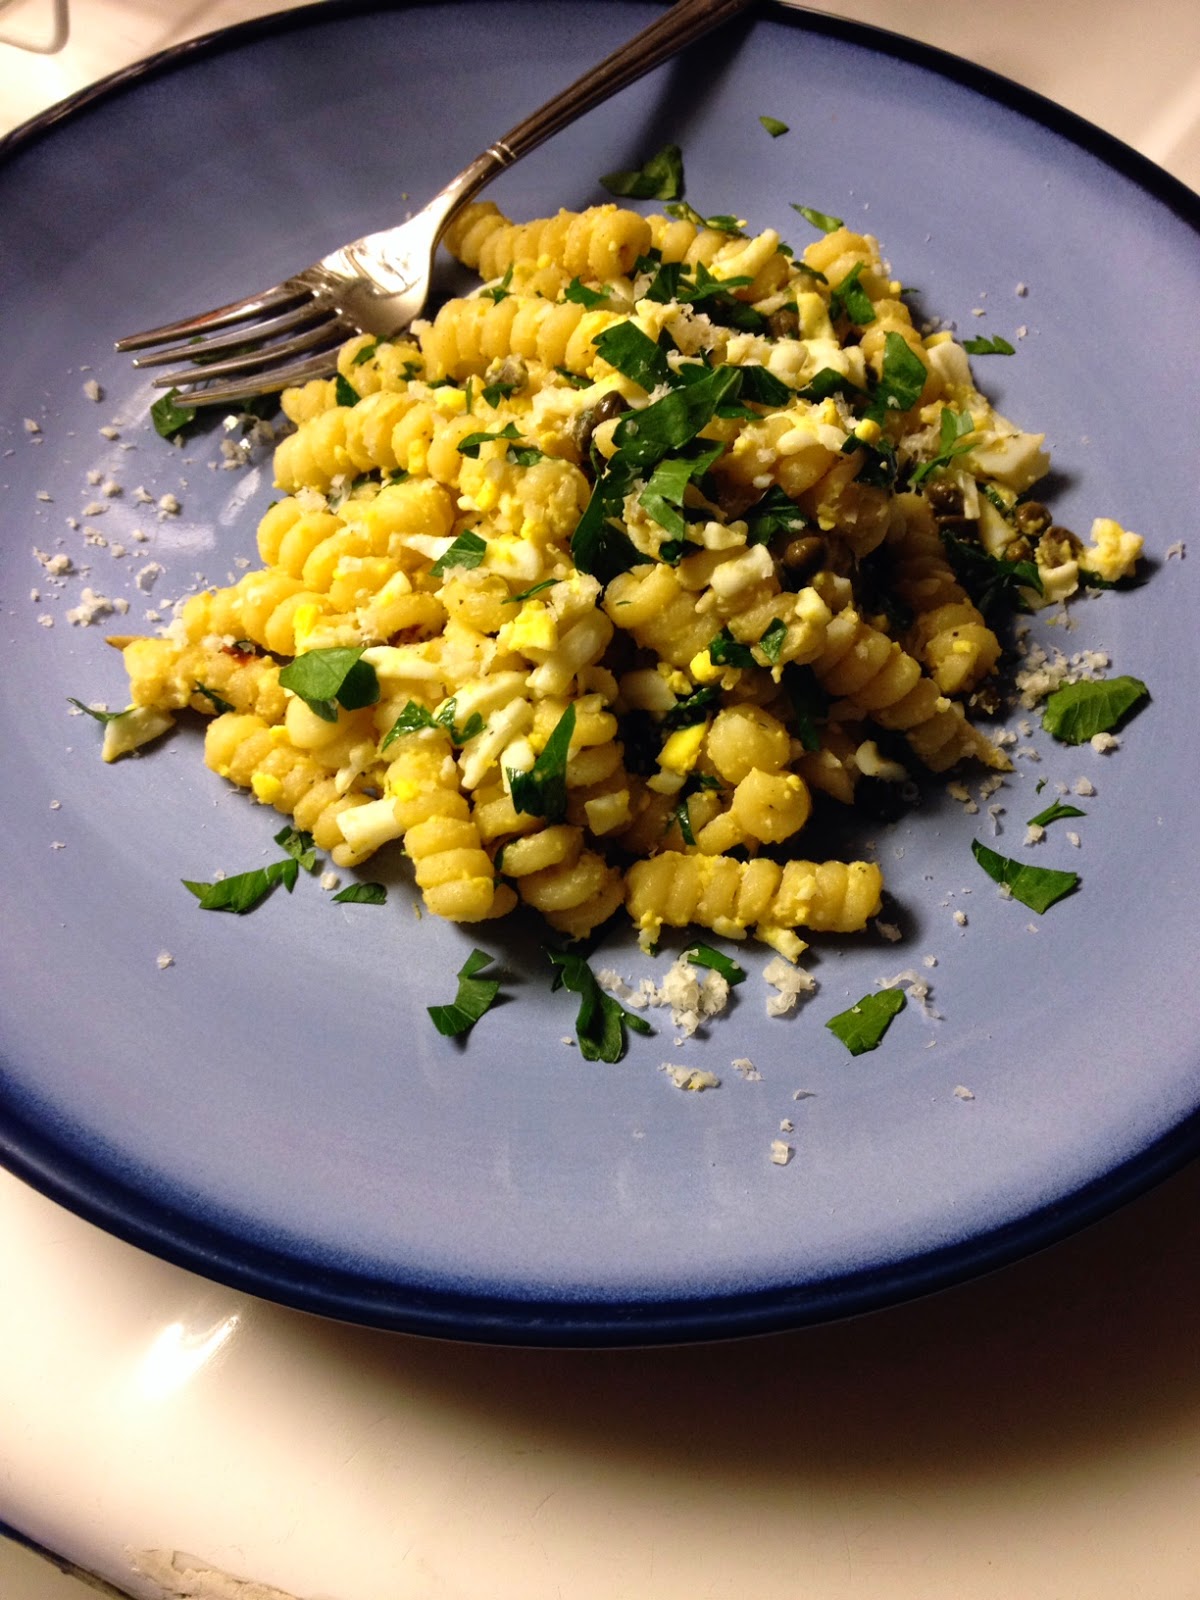
was for a garlic-olive oil-anchovy-based pasta that was finished with grated hardboiled eggs and parsley.  I would never in a million years imagined adding hardboiled eggs to my pasta, but the rest of the ingredients are some of my all time favorites, and the addition of the eggs was intriguing enough for me.
I have been a long time fan of pasta dressed in garlic-lemon oil, and finished with a ton of parsley and Parmesan.  There are many variations to this theme:  a little anchovy paste sautéed with the garlic; a few capers; olives; a splash of white wine.  Nonetheless, the result is always some version of lemony, bright, garlicky pasta, with a healthy dose of freshness from plenty of chopped parsley and salty Parmesan.  It’s a recipe for success. 
This Easter-inspired version is exactly that with the addition of hardboiled egg.  It’s certainly a strange idea, but I enjoyed it at every turn.  For starters, I’ve never grated an egg before, which turned out to be a satisfying experience.  Using the large holes of a box grater, the soft egg all but disappeared with a few stokes, resulting in stands of egg white and crumbles of egg yolk, ready to absorb the salty, rich dressing on the pasta.  The richness of the egg juxtaposes nicely against the coarsely chopped parsley leaves, which render this dish almost to a salad like state. 
This dish is rich, but well balanced.  I did not skimp on the anchovy paste, which was evident in the toasted brown color that the pasta took on when it was tossed with the spicy, anchovy-infused oil.  This richness is then tempered by multiple elements.  The first and most obvious is the parsley leaves; peppery, a little lemony, and decidedly green in flavor, they impart lightness with both their flavor and texture.  Ironically, the egg also lends levity that is unexpected.  The yolks and whites act in very different ways.  The yolk coats the pasta and absorbs the olive oil-based sauce, softening the flavors from preserved fish and red chile flakes.  On the other hand, the egg whites provide lightness with tenderness and little volume.  Basically, they prevent the pasta from being construed as a big, dense heap of carbs, a noble and necessary task.  I’m sure the entire idea sounds bizarre (hardboiled eggs in pasta?), but it was quite delightful.  And a senior food editor at Bon Appétit created this concoction, not me, so hopefully that indicates that this is a legitimate recipe, as opposed to me losing my mind with my pasta-loving ways. 

Easter Egg Pasta (adapted from Bon Appétit)
Makes 2 servings

1/4 pound short cut pasta, like campanelle or fusilli
2 tablespoons olive oil
2 cloves garlic, minced
1/4 teaspoon red chile flakes
1 teaspoon lemon zest
2 teaspoons anchovy paste
3 tablespoons finely grated Parmesan
1 tablespoon lemon juice
1 1/2 tablespoons capers
2 hard boiled eggs, coarsely grated
1/2 cup coarsely chopped Italian parsley leaves

-       In salted boiling water, cook pasta until it is al dente per package directions.  Reserve 1/2 cup of the cooking water, and drain the pasta.  Set aside.
-       In a sauté pan, cook garlic, red chile flakes, lemon zest, and anchovy paste in the olive oil for about 3 minutes.
-       Add pasta to the pan, and toss to coat.  Season with freshly ground black pepper.
-       Add lemon juice, capers, and Parmesan.  Add a few tablespoons of the reserved pasta cooking water if the mixture seems dry. 
-       Add the parsley and hard-boiled eggs.  Garnish with more cheese and parsley if desired.


Sunday, January 8, 2012

Shakshuka


This recipe is foolproof.  The evening I made it, I was behaving like a fool, and it still came out great.  That day, I picked up a new pair of glasses, which was an exciting event since they are my first new pair in nine years.  When I retrieved them from the optometrist’s office, I relegated my contacts to a clean, white case in order to test out the glasses, and wore the glasses home.  This was my first foolish decision as the new prescription left me initially disoriented, which probably did not bode well for my driving.  I drove home nervously, hauled my things up to my apartment, and couldn’t find the contacts case.  After a quick and unsuccessful peruse of my car, I became a little panicky.  When the new prescription left me feeling nauseous, my heart rate picked up.  After a more thorough but equally unsuccessful search of my car and a call to the optometrist’s office to see if I had abandoned them, I started to sweat.  Just when I was in a complete state of panic, I found my contacts tucked neatly into my new glasses class, which left me feeling stupid, but relieved.
I then began to focus my nervous energy on dinner.  I had some feta cheese I wanted to use, so I turned to Tastespotting for inspiration.  While browsing the website, I was amazed to find every recipe had feta cheese in it.  I thought the stars were aligning in my favor, but then I realized that I had actually searched for feta cheese, and forgotten that detail.  Sigh.  Luckily, amidst all of this, I remembered something called shakshuka, which I have been meaning to make for some time (I pronounce this as “shack-shooka,” but I probably wrong).  It is an Israeli dish where eggs are poached in a spicy tomato sauce and topped with feta cheese.  Eggs in tomato sauce may sound strange, but it is common in Italian cooking and, of course, in shakshuka.  At an old restaurant job, one of the chefs used to make it for the staff.  Also, a friend recently e-mailed me a shakshuka recipe and Bon Appétit published a version in the December issue.  I’m not sure how all of this information was accessible in my brain when I was incapable of retaining other more recent and relevant details, but I went ahead and made shakshuka anyway. 
The tomato sauce had a good, strong kick from fresh jalapenos (which I partially seeded), and bold smokiness from a healthy dose of cumin and paprika.  I first sautéed onions and jalapenos in olive oil and added the spices to toast them before adding the tomatoes.  The spices mixed the onions looked like sludge and smelled like heaven.  Then that mass of concentrated flavor was simmered with tomatoes and some chickpeas.  After bubbling and mingling together, eggs were gently poached in the sauce until the whites were cooked, but the yolks remained runny and luscious.  Personally, I air on the side of a slightly overcooked yolk to prevent the dilemma of snotty egg whites.  The bottoms of the yolk were cooked hard, but there was still plenty of velvety yolk (and none of that snot that I hate).  I finished it with fresh parsley and lots of salty feta, and ate it with a spoon to effectively scrape the bottom of the bowl.  It made for a spicy, satisfying, and inexpensive weeknight meal. 

Shakshuka (adapted from Smitten Kitchen and Epicurious)

¼ cup olive oil

2 jalapeños, stemmed, seeded, and finely chopped (I removed about ½ of the stems/seeds)
1 small yellow onion, chopped

3 cloves garlic, minced

1 teaspoon ground cumin

1 tablespoon paprika

1 28-ounce can whole peeled tomatoes, undrained
1 14-ounce can chickpeas, drained and rinsed (I used about a cup)
Kosher salt, to taste

4 eggs

1/2 cup feta cheese, crumbled

2-3 tablespoons chopped flat-leaf parsley

Warm pitas, for serving (optional)

Heat oil in a 12-inch skillet over medium-high heat. Add chiles and onions and cook, stirring occasionally, until soft and golden brown, about 10 minutes.

Add garlic, cumin, and paprika, and cook, stirring frequently, until garlic is soft, about 2 more minutes.

Put tomatoes and their liquid into a medium bowl and crush with your hands. Add crushed tomatoes and their liquid to skillet along with ½ cup water and chickpeas, reduce heat to medium, and simmer, stirring occasionally, until thickened slightly, about 15 minutes. Season sauce with kosher salt.

Crack eggs into a small bowl one at a time, and add them gently to the sauce so that eggs are evenly distributed across sauce’s surface. Cover skillet and cook until yolks are just set, about 7 minutes. Using a spoon, baste the whites of the eggs with tomato mixture, being careful not to disturb the yolk. Sprinkle shakshuka with feta and parsley and serve with pitas, for dipping.

Tuesday, July 26, 2011

Mayonnaise: The Real Deal

Mayonnaise is a strange food.  It is the crux of many delicious recipes, but very few people yearn to crack open a jar of Hellman’s a dig in with a spoon.  Traditional mayonnaise is simply an emulsion of egg yolks, oil, and lemon juice, but commercial production sometimes renders into something seemingly more offensive.  Few have been spared the visual trauma of a vessel of mayonnaise that has been exposed to open air, out of refrigeration, translucent and gelatinous at the edges.  Despite this burdensome image, I truly enjoy mayonnaise on sandwiches, as a base for sauces and dips, and as a binder for various recipes.  Some of the most delicious (and unhealthy) foods hinge on mayo: spinach-artichoke dip, blue cheese dressing, the creamy sauce on a spicy tuna roll.  I can nearly guarantee that even the most vehement mayonnaise haters have unwittingly enjoyed it on a few occasions.
I actually had to be tricked into it myself.  When I was in elementary school, my brother became devoted to making turkey sandwiches one summer.  As part of this project, he made it a personal mission to convince me of the merits of mayo in such a context.  He handled this issue with exceptional finesse.  Catapulting off my deep-rooted love of butter, my brother told me that mayonnaise was “sandwich butter,” like butter but designed especially for sandwiches.  As he crafted my lunch, he would spread mayo on challah bread, and present it to me for approval, creating a thin, without the slightest hint of oozing or glopping.  Soon, I was regularly devouring his carefully constructed turkey sandwiches adorned with “sandwich butter.” 
I never really understood why my brother was so devoted to his cause, until I began sharing meals with someone who expresses a deep disdain for mayonnaise.  This person, also known as my co-chef (see “Fish Tacos”) will eat foods with mayonnaise in them, but only when thoroughly disguised.  This leaves me irrationally distressed, not only because it limits the food we can share, but also because I want him to experience the joy of a turkey sandwich or a BLT with mayonnaise, or other mayonnaise-enhanced foods (such as a corned beef sandwich with swiss, Russian dressing, and cole slaw). 
I have embarked upon my own mission, championing the merits of mayonnaise.  Similar to the “sandwich butter method,” I am trying to be gentle and non-threatening.  My subject is a willing participant, but the idea of mayonnaise makes his stomach turn.  As a first step, I chose to make him something simple with high quality ingredients, and a flavorful homemade mayonnaise.  And because I wanted him to truly enjoy what he ate, bacon seemed like an appropriate avenue.  Only one food could fulfill such exacting specifications: a BLT sandwich with basil mayonnaise.  I even added a little avocado to make it as palatable as possible, with sourdough bread, summer tomatoes, red leaf lettuce, and plenty of bacon (see two examples directly below).
For the mayonnaise, I used extra virgin olive oil and lots of fresh basil to make it minimally offensive and maximally flavorful.  I actually think that I overly-softened the blow by making it so flavorful.  It was rich and delicious, and it made for great sandwiches.  However, it was not a true introduction to mayo.  I was trying to be gentle, but I think I played it a little too safe, and my co-chef agreed.  In particular, the extra virgin olive oil resulted in quite a strong flavor.  For the next installment of our experiment, I intend to omit the basil and use half extra virgin olive oil and half canola or vegetable oil to impart a more bonafide mayo effect.  However, if you are looking for something delectable to put on a sandwich, I would include the basil, or any combination of fresh herbs.   
(photography courtesy of my co-chef)

Basil Mayonnaise (based on Marc Bittman’s basic mayonnaise recipe)

1 large egg yolk (this would be a good time for really high quality eggs)
1 tsp. Dijon mustard
2 tablespoons freshly squeezed lemon juice
Dash of cayenne pepper
½ teaspoon each of freshly ground pepper and kosher salt
¼ cup of fresh basil, torn (I used a combination of opal basil and regular basil because it was what I had)
½ cup extra virgin olive oil, divided
-       Mix together all ingredients besides the oil in the canister that accompanies an immersion blender or a regular blender.
-       Add a couple of tablespoons of oil, and then run the motor.
-       While the motor is running slowly drizzle in the remaining oil until a creamy, uniform emulsion results.

Wednesday, March 16, 2011

Stracciatella

I actually do cook food other than soups, but somehow soup seems to be the only thing I am motivated to write about.  Soon, it will be too swelteringly hot in my apartment to make soup, so please bear with me.  Alas, I present you with one more soup recipe: straciatella.  The recipe is the result of highly impromptu cooking.  Straciatella is a combination of chicken noodle and egg drop soup with an Italian flair.  I have been thinking about making it for a bit.  When it crossed my mind again this morning, I realized I had almost all of the ingredients already, including these darling, teeny, tiny star shaped noodles.  I bought them over two months ago, and I have been stewing over the perfect recipe to utilize them in.  Every time I open my kitchen cabinet and lay eyes on them, I find myself sighing dreamily.  They are just that cute.  Straciatella was the perfect excuse to eat them by the heaping spoonful.
In brief, my straciatella is a broth-based soup with the aforementioned noodles.  Before serving, an egg beaten with parmesan cheese is streamed into the soup, creating tender cheesy, eggy strands thoughout the hot broth.  I added carrots to the soup to flavor to the canned broth, and to prevent monotonous texture.  I seasoned it with cayenne, dried parsley, and black pepper.  Yum.

Stracciatella:

 - Bring 5 cups reduced sodium chicken broth to a simmer, and add 2 diced carrots and 2 whole cloves of garlic.  Season broth with a healthy dash of cayenne pepper, freshly ground pepper, and a tablespoon of dried parsley.
 - Allow carrots to simmer for 10 minutes, or until they start to become tender.  Add a half cup stelline (star-shaped) pasta.  Allow soup to simmer until the pasta is tender.
 - In the meantime, beat together one egg and 1/4 cup grated parmesan cheese.  Season with black pepper.
 - When pasta and carrots are tender, reduce the heat until the soup is at a bare simmer.  Stir in egg mixture slowly so that strands of egg form.  Remove garlic cloves.  Garnish soup with extra parmesan and pepper, and enjoy.

Saturday, February 5, 2011

Snow Day Part 2

Sometimes, Wednesday morning can feel like Sunday morning.  I’m sure you’re scratching your head, wondering: how is this impossible feat accomplished?  I will tell you.  It’s due to a rare and wonderful circumstance: the second of two snow days consecutive snow days due to sub zero wind chills!  Doesn’t it sound wonderful?  Let me tell you, it is.  I had a weekend in the middle of my week, and I enjoyed every minute of it.

When I woke up on this “Sunday” morning, I felt that I needed to prepare some sort of luxurious breakfast, as opposed to my usual English muffin and hard-boiled egg in a hurry.  The day before, I had purchased some mushrooms.  I was shopping for my roasted chicken dinner (see previous post), but I added the mushrooms to my cart so I could make a mushroom omelet the following morning, based on the unlikely chance that school would be cancelled again.  I was concerned that my presumptuousness about a second snow day would certainly jinx this possibility, but I was wrong.  And in this type of circumstance, I love being wrong.

When I woke up that morning, I decided against an omelet for my leisurely breakfast, and started toying with the idea of a breakfast sandwich.  Vegetarians frequently praise mushrooms as a meat substitute because of their hearty texture and flavor.  I would say there is a distinct possibility that the first veggie burger was actually a grilled portobello mushroom cap on buns.  In light of this, I thought it might work out well to add sautéed mushrooms to a breakfast sandwich with some cheese and an egg.  This is exactly what I did, and I was pleased by the results:  meaty, savory, and satisfying.
First, I sliced up about 5 button mushrooms, and added them to a hot pan with some olive oil.  I know the pictured pan looks a little big for that amount of mushrooms, but they brown much better if they have a little breathing room.  Plus, the bigger pan will allow you to cook your egg in the same pan, and cut back on dirty dishes.  Also, refrain from salting mushrooms until they have browned.  Salt draws out water, so if mushrooms are salted in the beginning, it will bring out extra water, and it will take the mushrooms longer to brown.  (Conversely, it always good to salt onions immediately when you just want to cook them, but not brown them, for the same reason.  When you’re making a soup or sauce, you just want them softened, and salting them immediately will bring out their liquid and prevent them from browning).  When the mushrooms were done, I added a little fresh dill along with the salt and pepper.  The dill is completely optional; I just happened to have it in the fridge, but it could be left out of substituted with another herb. 
Then, I pushed the mushrooms to one side of the pan, added a touch more olive oil and one egg to the pan.  I made my egg over medium (maybe even over medium-well).  For breakfast sandwiches, I don’t like the yoke to be too runny because I want to be able to pick it up and not mess about with a fork and knife.  However, of course cook your egg in whatever way you see fit. 
While the egg was cooking, I toasted one big piece of sour dough, and put a slice of cheese on it while it was still hot.  I used Swiss cheese, but any cheese would do.  I then topped the cheese with the shrooms, then the egg, and last one more slice of cheese, and sprinkled the whole concoction with a little more dill and pepper.  Maybe it sounds like sort of an odd combination, but I thought it was one great big yum, and would encourage anyone with time and mushrooms on their hands to pursue this as a delicious breakfast option.

Friday, August 6, 2010

Bacon and Vegetable Fried Rice


Fried rice is a delectable treat, usually reserved for otherwise-boring leftover rice.  However, seeing that rice takes a mere 15-20 minutes on the stove, I have no problem whipping some up when the mood for its fried variation attacks.  Besides, there is plenty of chopping and sautéing to do in the meantime.


Fried rice is a vehicle for practically any lingering vegetable you may have in your refrigerator.  The recipe below is merely a guideline.  Carrots, celery, scallions, spinach, watercress, corn (fresh or frozen), cauliflower, and zucchini would all be welcome additions.  The version below may also be grossly simplified with satisfying results:  I’ve made fried rice with just garlic, soy sauce, egg, and frozen peas as add-ins.  Despite my excessive detail, my point is that fried rice is versatile, and may be easily adjusted to both your tastes and the contents of your refrigerator.  However, I do feel the following ingredients are mandatory in addition to rice: garlic, soy sauce, egg, and some sort of vegetable.  This combination provides crucial elements in the domains of both flavor and texture.  The tender egg is particularly delightful, and it provides substance. 
Protein in addition to the egg is purely optional, but fried rice can breathe new life into less-than-thrilling leftover chicken, beef, etc.  The sky’s the limit in this regard.  I usually use leftover chicken, but last night, I had a hankering for bacon.  While bacon is by no means obligatory, I feel the need to sing its praises as key player in this dish.  The chewy, salty, smoky pieces dispersed throughout the rice were a pure joy.  But then again, when is bacon not a joy?  If you want to make the recipe below, and you happen to suffer from pork aversion or vegetarianism, skip the first step, and sauté your vegetables in light colored oil, instead of bacon grease.  Also, if you feel so inclined, a tablespoon of grated fresh ginger would be lovely added with the garlic.  A drizzle of toasted sesame oil wouldn’t hurt at the end.  About a half teaspoon would be a nice touch, without overpowering the other delicious flavors (like bacon!)  I may be providing far too many options and modifications, but this is the reality of fried rice.  My advice to you:  be decisive, go forth and fry some up. 
Bacon (and Vegetable) Fried Rice

3 slices of bacon (about ¼ lb.)
½ onion, diced
½ red bell pepper, diced
6 mushrooms, sliced
2 cloves garlic, minced
Medium head of broccoli, chopped into small florets
½ cup frozen peas (no need to thaw)
3 cups cooked rice (white or brown)
2 large eggs, scrambled
Soy sauce (probably about 2 tablespoons)
Oyster sauce (probably about 2 teaspoons)
Black pepper
Sriracha hot sauce, to taste (optional)

-       Preheat a large non-stick pan over medium heat.  Add bacon to the hot pan, and sauté until crisp.  Remove from the pan to a plate lined with paper towel.  When cool, coarsely chop the bacon.
-       Carefully remove all but 2-3 tablespoons of the remaining bacon grease (when in doubt, go with less; you can always add some oil later if need be).  Add the onion and bell pepper.  Season with about 2 teaspoons of soy sauce and black pepper.  Sauté until the vegetables begin to soften, about 5 minutes.
-       Add mushrooms.  Allow to cook until they start to give off liquid and begin to brown (about 5 minutes).  Add garlic.
-       Meanwhile, par-cook the broccoli: place the chopped broccoli in a microwave safe bowl.  Cover with plastic wrap, leaving one side vented.  Microwave on high for a minute and a half.
-       Add the broccoli to the pan.  Stir to combine and season with about 2 teaspoons of soy sauce and more black pepper.  Allow to cook for about 2 minutes.
-       Add rice, peas, and bacon to the pan.  Season with more soy sauce, oyster sauce, and Sriracha (if using).  Stir fry everything together for 3-5 minutes, or until everything is heated through.
-       Move rice mixture to one side of the pan, and add the eggs.  Allow to set for a minute, then scramble them until cooked through.  (See pictures above).  Mix the eggs into the fried rice.
-       Taste for seasoning and add more soy sauce and Sriracha if needed. 

Friday, January 1, 2010

New Year's Eve: Appetizers Galore


I personally feel that New Year’s Eve is a slightly overrated holiday.  If you enjoy paying a cover charge to go to a crowded bar, where you have to fight to get the bartender’s attention, the more power to you.  It’s just not for me.  I do, however, enjoy any occasion where it is socially acceptable to eat excessively and decadently.  So for that, New Year’s Eve, I tip my proverbial hat to you.  I spent the holiday with my food-loving cousin, Shell, and her food-loving fiancé, Micah.  We decided we would each make 2 appetizers, and watch bad TV.  Shell has a penchant for referring to things by their initials, thus the event has been dubbed “N.Y.E.” 

My aunt Debbie has a NYE motto:  no New Year’s is complete without shrimp.  Being an obedient niece, I abide by this motto, and made shrimp cocktail.  This is a simple, yet delicate culinary feat.  I think the quality of this shrimp is crucial, and your best bet is to buy frozen, raw shrimp.  Unless you live a stone’s throw from the ocean, “fresh” shrimp are truly frozen shrimp that have been thawed for who knows how long.  Defrost the shrimp yourself just prior to cooking by running cold water over them for a few minutes, or letting them sit in a bowl of cold water for those who are environmentally-minded.  I heard through the family grape vine that my aunt made a dangerously delicious cocktail sauce.  It ends up being a fairly traditionally recipe with the addition of a wild card ingredient:  butter!  As fate would have it, the recipe is the brain baby of one of my favorite food writers, Mark Bittman.  It sounds bizarre, it sort of smells bizarre while it cooks, but it tastes divine.  It makes the sauce silky and rich.  And let’s be serious: butter doesn’t exactly have a reputation for hindering flavor.  In the words of Micah, I want to dip my life in that sauce.    
Shrimp and Cocktail Sauce (adapted from Mark “the man” Bittman’s recipe)
1 pound of shrimp, peeled, deveined, tails left on
1 small onion, quartered
1 carrot, chopped in thirds
3 cloves garlic, whole and peeled
20 peppercorns
3 bay leaves
2 tablespoons kosher salt
About 2 ½ to 3 quarts of water (this approximate: I used a 6 quart pot and filled it about half way with water)

·      Add onion, carrot, garlic, peppercorns, bay leaves, and water to a large pot.  Bring to a boil and add salt.  [Note: a halved lemon would be lovely here, but I forgot to add it.]
·      Allow the mixture to boil gently for 20-30 minutes so the flavors infuse the water.
·      Add all of the shrimp, remove the pot from heat, and cover.  Allow the shrimp to steep in the hot water for 4-5 minutes.  (I used medium-sized shrimp [26/30 per pound] and it took 4 minutes).
·      Drain mixture in a colander.  Remove shrimp and place on a plate, preferably in one layer.  Pay dry with paper towels, and allow to chill in the refrigerator for at least one hour.
Delicious Cocktail Sauce
1 cup ketchup
1 tablespoon red wine vinegar
3 tablespoons butter
2 tablespoons (or to taste) prepared horseradish

·      Combine ketchup, vinegar, and butter in a small saucepan over medium-low heat.
·      Stir frequently and take off heat once butter has melted.
·      Add horseradish, and chill.

My second food contribution was stuffed mushrooms.  Please don’t judge me, but I adapted the recipe from one of Rachael Ray’s creations.  I have mixed feelings about Ms. Ray: I understand why people are critical of her, but I kind of like watching her show.  Yes, her “cutesy-isms” are pretty tired, as are her stories about her husband and her in-laws, and she has a vicious hyper-functional voice disorder.  Nonetheless, sometimes she makes some pretty tasty food.  Artichoke and cheese stuffed mushrooms?  Yes, please!  I have changed the recipe a bit, but I would never have dreamed up this combination if Rachael Ray had not planted the seed in my head.

Artichoke and Cheese Stuffed Mushroom Caps (adapted from Rachael Ray’s recipe)
1 lb. button mushrooms (20-24 mushrooms)
2-3 tablespoons of olive oil
1 can artichoke hearts, drained and patted dry with paper towels, and chopped
1 ½ cup shredded Monterey jack cheese (Any mild white cheese will do.  I’ve used Gouda [not smoked] in the past, and it’s great)
2 tablespoons chopped parsley
1 garlic clove, minced
¼ cup seasoned breadcrumbs
Freshly ground pepper to taste

·      Preheat oven to 400 degrees.
·      Wipe mushrooms clean, and remove stems.
·      Place mushrooms in a 9x13 inch baking dish.  Drizzle with 2-3 tablespoons of olive oil and toss to coat.
·      Arrange mushrooms so the rounded side is facing up.  Bake for 10-12 minutes, or until they are starting to soften and give off some liquid
·      Remove mushrooms from oven.  (Optional, but recommended:  Remove mushrooms from baking dish to a plate lined with a few sheets of paper towel.  Wipe remaining liquid from baking dish.  This will prevent your final product from being too wet.)
·      Mix artichoke hearts, breadcrumbs, cheese, parsley, garlic, and pepper (about 15 grinds).  No salt is necessary: between the artichokes, the breadcrumbs, and cheese, you’re covered. 
·      Mound filling into the hollow portion of the mushroom cap (a rounded tablespoon should do).  Don’t be afraid to pack it in there with your (clean) fingers. 
·      Place mushrooms in baking dish.  Bake for 10-15 more minutes, or until cheese is melted and filling is heated through.

Last, as an act of complete compulsion, I decided to make deviled eggs.  I love deviled eggs.  They are like miniature boats of egg salad.  Seeing as there are only so many egg yolks a person should eat with a clean conscience, I refrain from making them often.  But I felt that NYE’s inherent decadence was a perfect excuse.  If you search "deviled eggs" on epicurious.com, you will find the craziest ingredients: chipotles, pickapeppa mayo, salmon roe, etc.  Come on, people!  I know that in European countries they can get a little frilly, but here in America, deviled eggs are picnic food for Midwesterners and Southerners alike, not exactly a froufrou ordeal.  I kept mine simple, but I could not resist adding a touch of lemon zest and a pretty garnish.  Please forgive my hypocrisy. 

Deviled Eggs
8 large eggs, hard-boiled
2 tablespoons mayonnaise
1 ½ teaspoons Dijon mustard
1 teaspoon lemon zest
1 tablespoon finely chopped parsley
Kosher salt and freshly ground pepper to taste
16 small whole parsley leaves for garnish (optional)

·      Peel eggs and remove all shell fragments.  Cut eggs in half, and compile yolks in a bowl.  Set aside hollow egg whites. 
·      Mash together yolks, mayonnaise, Dijon, lemon zest, parsley, salt, and pepper.  Mix until smooth.
·      Distribute yolk mixture between egg white halves, and garnish with parsley if desired. 

Post Script:  As an amateur food blogger, my New Year's resolution is to post more pictures, hence the great increase on this post.  Thoughts?

Saturday, October 3, 2009

Breakfast for Dinner: Vegetable and Potato Hash


There is something immensely comforting about having breakfast for dinner.  I am unable to accurately verbalize why this is, and frankly, I want to keep it that way.  In fact, I refrain from having breakfast for dinner too regularly in order to preserve this enigma.  Last week, I had my first big exam of grad school, and the night before seemed like an appropriate occasion to indulge in my secret weapon of comfort foods. 

Simply eating your usual breakfast food does not qualify as “breakfast for dinner.”  To go by this title, it must be something special, like vegetable and potato hash.  I like to sauté whatever I am in the mood for (or whatever I have on hand) until it is crisp and browned on the edges.  I proceed to melt cheese over it, and top it with an over-medium egg, so the golden glory of the yolk makes it rich and luscious.  Below is a description of my most current rendition, however it represents a method, more than an exact recipe.

Vegetable and Potato Hash

§  Sauté about half of an onion and half of a bell pepper, both chopped, in olive oil for about 5-8 minutes, or until they start to soften.
§  Then add one chopped zucchini.  Season with Lawry’s seasoning salt, pepper, and a pinch of red pepper flakes and sauté for a couple of minutes.
§  Add 3 small red bliss potatoes that have been cooked (I microwaved mine) and chopped.  Re-season and sauté until potatoes are heated through and the hash starts to become brown and crispy (5-10 minutes).  When the hash is close to done, toss with chopped parsley and scallions
§  Top with shredded cheese (I used Monterey jack) and allow to melt.  Meanwhile cook an egg (any style will do, but I personally feel that a runny yolk is mandatory), and when the cheese is melted, top with the egg and enjoy.  Hot sauce and additional seasoning are optional. 

I have made this has a number of ways in the past, but this was the first time I added zucchini.  It was an attempt to increase the vegetable content in order to justify to the blanket of cheese covering the hash.  I love zucchini, but I was anxious about using it in the context.  Fortunately, my fears did not become realized, and zucchini will definitely play a part in future hash episodes. The scallions were also a new addition as well.  I happened to have some in the fridge, and they added a mild oniony flare.  In fact, next time I would be more generous with them (I only added two).  If I am making any sort of hash brown potato, Lawry’s seasoning salt is mandatory.  It reminds me of my oldest brother, Joe, making hash browns from left over baked potatoes on Saturday mornings. 

My brother, king of potatoes, also plays into the reason I used pre-cooked potatoes.  Growing up, precooked potatoes (usually leftover bakers) were the only potatoes used for hash browns by Joe.  Additionally, this will usually give the best results when the potatoes share the stage with other vegetables since raw potatoes have significantly longer cooking times than most vegetables.  Also, I abhor undercooked potatoes, so precooking them eliminates the risk of this tragedy.  As usual, the parsley is by no means a necessity, but in case you haven’t noticed, I cannot get enough of it.  Before eating, I added a drizzle of Sriracha* and some fresh pepper, not only for added taste, but to dress it up a little; a splash of red makes anything more appealing.   

*See glossary for definitions.