Showing posts with label tomatoes. Show all posts

Sunday, November 4, 2012

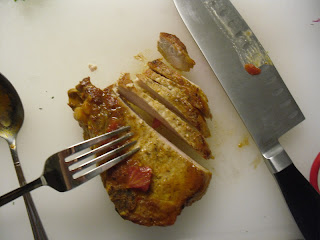
Braised Pork Chops


It has recently been brought to my attention that I have not written to a new blog post since early August.  I have been really busy since August, starting a new school year, and then promptly switching to an entirely new school district a month later.  This transition has taken a fairly significant toll on me; however, despite any excuses I may have, the idea of a three-month absence from my blog honestly makes me wince.  A blog is not a static creature; it only exists for as long as it is actually being written, and mine was coming dangerously close to extinction.  The longer I went without writing, that more difficult it was to even consider making time for it.  Alas, I am sitting in front of my computer, with my proverbial tail between my legs, with the offering of some humble pork chops to my audience (assuming I still have one).  This is my first prolonged absence (and probably not my last), but hopefully this post bring a resurgence of cooking and blogging in my life.  At the very least, it brought some braised pork chops into my kitchen.
The weather is getting colder and days darker, and this is truly my favorite time of year to cook.  Soups, braises, baked pastas, and roasted vegetables are perfect for the winter months, and these are the recipes that resonate with me.  I don’t believe there is a pork chop recipe to date on my blog, so I thought I would expand my horizons, but do so with one of my favorite and familiar cooking methods: braising.  First, I seared the pork chops.  The key is to let them get really brown; make sure the pan is hot and let them sear, undisturbed, for about 5 minutes on each side.  There may even be a few wisps of smoke.  Then I let them simmer in tomatoes and white wine, with capers and herbs.  I don’t make a lot of pork chops, but in general, bone-in cuts result in more flavor, so I went with bone-in, center cut pork chops, and they were even better than expected.  I used fresh thyme, but I think any combination of herbs would work (dried or fresh).  Despite the fact that it is November, my outdoor thyme plant is thriving on my balcony, so I am taking advantage of it while I still can.  Lately, I’ve been cooking the simplest things possible, mostly on the grill to minimize dishes.   I’ve been avoiding anything more involved, but cooking and writing about these pork chops felt like a relief.  I also made some lemon-thyme couscous, which seemed right at home with the tomatoey sauce.  And I made some roasted broccoli as well because I can’t seem to get enough of it lately, but sautéed spinach would have been another perfect accompaniment. 
Braised Pork Chops with Capers, Tomatoes, and Thyme

1/2 tablespoon butter
1/2 tablespoon olive oil
salt and pepper
1/4 teaspoon hot pepper flakes (optional)
1 lb. pork chops (center cut, bone-in.  This amount of sauce could handle one to one and half pounds)
1 small red onion, sliced
2 garlic cloves, sliced
2 tablespoons tomato paste
2-3 teaspoons fresh thyme, plus extra for garnish
1 cup white wine
1 14 oz. can diced tomatoes
2 tablespoons capers
1 teaspoons red wine vinegar or lemon juice
Freshly chopped parsley for garnish (optional)

-       Season pork chops liberally with salt and freshly group black pepper
-       In a large sauté pan, heat olive oil over medium high heat, for 4-5 minutes, until lightly smoking, and add the butter.  Stir to combine.
-       Add pork chops in a single layer or in batches (do no crowd them, or move them around to allow them to brown for about 5 minutes per side).  Remove browned pork chops from pan and set aside.
-       Add onions, season with salt and pepper, and hot pepper flakes, if using (add another teaspoon of oil if the pan looks dry), and sauté and stir frequently for 8-10 minutes until they are softened but not browned.
-       Add tomato paste, garlic, and thyme and sauté, stirring constantly, for about 1 minute. 
-       Add white wine, bring to a boil and add canned tomatoes.  Allow mixture to boil for about 5-8 minutes so it reduces slightly (by about a 1/4-1/3)
-       Add capers to the mixture, then return the pork chops to the pan.
-       Reduce the heat to medium (so the mixture is simmering, but not aggressively boiling), cover the pan, but leave the lid vented so that steam can escape.
-       Allow to cook for about 15 minutes, flipping pork chops every 5 minutes.
-       Finish with lemon juice or vinegar; serve with lemon-thyme couscous

Lemon Thyme Couscous

1 cup reduced sodium chicken stock
2 teaspoons fresh thyme leaves
Zest of 1 lemon
3/4 cup of couscous
2 teaspoons fresh lemon juice
2 teaspoons extra virgin olive oil
Salt and pepper

-       Add chicken stock, thyme, and lemon zest to a small pan and bring to a boil.
-       Add couscous, turn off heat and cover.  Let stand for 5 minutes until all liquid is absorbed.
-       Fluff with a fork and season with lemon juice, olive oil, and salt/pepper.


Sunday, January 8, 2012

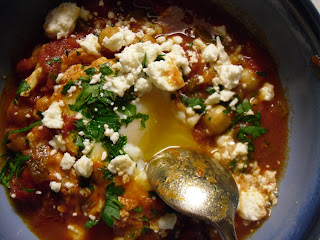
Shakshuka


This recipe is foolproof.  The evening I made it, I was behaving like a fool, and it still came out great.  That day, I picked up a new pair of glasses, which was an exciting event since they are my first new pair in nine years.  When I retrieved them from the optometrist’s office, I relegated my contacts to a clean, white case in order to test out the glasses, and wore the glasses home.  This was my first foolish decision as the new prescription left me initially disoriented, which probably did not bode well for my driving.  I drove home nervously, hauled my things up to my apartment, and couldn’t find the contacts case.  After a quick and unsuccessful peruse of my car, I became a little panicky.  When the new prescription left me feeling nauseous, my heart rate picked up.  After a more thorough but equally unsuccessful search of my car and a call to the optometrist’s office to see if I had abandoned them, I started to sweat.  Just when I was in a complete state of panic, I found my contacts tucked neatly into my new glasses class, which left me feeling stupid, but relieved.
I then began to focus my nervous energy on dinner.  I had some feta cheese I wanted to use, so I turned to Tastespotting for inspiration.  While browsing the website, I was amazed to find every recipe had feta cheese in it.  I thought the stars were aligning in my favor, but then I realized that I had actually searched for feta cheese, and forgotten that detail.  Sigh.  Luckily, amidst all of this, I remembered something called shakshuka, which I have been meaning to make for some time (I pronounce this as “shack-shooka,” but I probably wrong).  It is an Israeli dish where eggs are poached in a spicy tomato sauce and topped with feta cheese.  Eggs in tomato sauce may sound strange, but it is common in Italian cooking and, of course, in shakshuka.  At an old restaurant job, one of the chefs used to make it for the staff.  Also, a friend recently e-mailed me a shakshuka recipe and Bon Appétit published a version in the December issue.  I’m not sure how all of this information was accessible in my brain when I was incapable of retaining other more recent and relevant details, but I went ahead and made shakshuka anyway. 
The tomato sauce had a good, strong kick from fresh jalapenos (which I partially seeded), and bold smokiness from a healthy dose of cumin and paprika.  I first sautéed onions and jalapenos in olive oil and added the spices to toast them before adding the tomatoes.  The spices mixed the onions looked like sludge and smelled like heaven.  Then that mass of concentrated flavor was simmered with tomatoes and some chickpeas.  After bubbling and mingling together, eggs were gently poached in the sauce until the whites were cooked, but the yolks remained runny and luscious.  Personally, I air on the side of a slightly overcooked yolk to prevent the dilemma of snotty egg whites.  The bottoms of the yolk were cooked hard, but there was still plenty of velvety yolk (and none of that snot that I hate).  I finished it with fresh parsley and lots of salty feta, and ate it with a spoon to effectively scrape the bottom of the bowl.  It made for a spicy, satisfying, and inexpensive weeknight meal. 

Shakshuka (adapted from Smitten Kitchen and Epicurious)

¼ cup olive oil

2 jalapeños, stemmed, seeded, and finely chopped (I removed about ½ of the stems/seeds)
1 small yellow onion, chopped

3 cloves garlic, minced

1 teaspoon ground cumin

1 tablespoon paprika

1 28-ounce can whole peeled tomatoes, undrained
1 14-ounce can chickpeas, drained and rinsed (I used about a cup)
Kosher salt, to taste

4 eggs

1/2 cup feta cheese, crumbled

2-3 tablespoons chopped flat-leaf parsley

Warm pitas, for serving (optional)

Heat oil in a 12-inch skillet over medium-high heat. Add chiles and onions and cook, stirring occasionally, until soft and golden brown, about 10 minutes.

Add garlic, cumin, and paprika, and cook, stirring frequently, until garlic is soft, about 2 more minutes.

Put tomatoes and their liquid into a medium bowl and crush with your hands. Add crushed tomatoes and their liquid to skillet along with ½ cup water and chickpeas, reduce heat to medium, and simmer, stirring occasionally, until thickened slightly, about 15 minutes. Season sauce with kosher salt.

Crack eggs into a small bowl one at a time, and add them gently to the sauce so that eggs are evenly distributed across sauce’s surface. Cover skillet and cook until yolks are just set, about 7 minutes. Using a spoon, baste the whites of the eggs with tomato mixture, being careful not to disturb the yolk. Sprinkle shakshuka with feta and parsley and serve with pitas, for dipping.

Tuesday, November 22, 2011

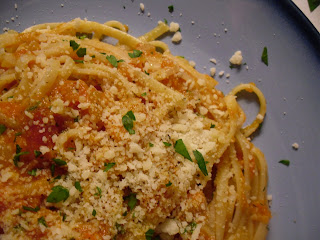
Blackened Chicken Pasta


On the off chance that you don’t have enough decadence planned for your Thanksgiving festivities, I recommend indulging in this delicious Cajun pasta.  I actually made this a few weeks ago.  Usually, my intrinsic motivation can tolerate about a one-week delay between cooking and writing.  I rarely retrieve the necessary motivation to write outside of that timeline, but this pasta defied my usual patterns.  I had to share it; it was that good.

Those clowns at the Food Network have come up with yet another enticing gimmick: a show called The Best Thing I Ever Made.  A smattering of “Food Network Stars” use their licentious foodie language and provide recipes for delectable items like lamb kebabs, mushroom polenta and… blackened chicken pasta.  It’s a Guy Fieri recipe: blacked chicken, tossed with fettuccine and a cream sauce, flavored with white wine, garlic, and sundried tomatoes.  Guy Fieri is a goof, but charming in his own dorky way.  His pasta is as lush and tasty as you might imagine creamy pasta to be.  I added some tomato puree to the sauce for some acidity and color, and I would definitely recommend that addition (included in my version of the recipe below).  I used canned tomato sauce (which is really just tomato puree with some spices).  The quantities specified below are approximations, but do what looks and tastes right to you.
 
The best part of this recipe is the spice rub.  Not only is it delicious, but it is so much fun to make.  I don’t understand why I found its assembly so enjoyable, but I grinned like a fool throughout.  The process is simple: measure and dump spices in a bowl, enjoying the aromas and colors along the way.  Then chicken breasts are coated with the rub, and placed them in a very hot pan.  The smell of the spice rub searing on the chicken is intoxicating.  I think the primary culprits contributing to the smell are the cumin and the Italian herb blend, but I’m sure every ingredient plays its part.  The spice rub did not render the dish particularly spicy.  This may be exactly what you want to hear, or you may want to add an extra teaspoon of cayenne, if the news of the mildness is disappointing. Or, you can do what I did: season the whole pasta dish at the end with hot pepper flakes.  Either way, finish it with plenty of Parmesan cheese and enjoy.
 
Blackening Spice
1 tablespoon granulated garlic
1 tablespoon freshly cracked black pepper
½ tablespoon salt
2 teaspoons ground cumin
2 teaspoons granulated onion
1 teaspoon cayenne pepper
1 teaspoon Italian seasoning
1 teaspoon paprika
½ teaspoon chili powder
Combine the garlic, black pepper, salt cumin, onion, cayenne pepper, Italian seasoning, paprika and chili powder in a small bowl. Store in an airtight container.

Blackened Chicken Pasta (recipe adapted from Guy Fieri)

2 skinless chicken breasts (½ to ¾ pounds)
Blackening Spice Rub
1 tablespoon vegetable or canola oil
1 tablespoon olive oil
1 clove minced garlic
½ cup dry white wine
1 cup heavy cream
1 ½ cups canned tomato sauce
½-¾ cup roughly chopped marinated sun-dried tomatoes
½ pound fettuccine
¾ cup grated Parmesan
Kosher salt and freshly ground black pepper
Hot pepper flakes (optional)
2 tablespoons minced flat leaf parsley

Preheat the oven to 350 degrees F. Bring a large pot of salted water to a boil. Heat a medium skillet and vegetable oil over high heat.

Dredge the chicken breasts in the Blackening Spice Rub. Place in the skillet. Blacken both sides of the chicken, 3-4 minutes per side.
Transfer the chicken to a baking dish and place in the oven until the internal temperature of the chicken reaches 165 degrees F on an instant-read thermometer, about 10-15 minutes.
 
Remove from the oven, allow to rest, then slice the chicken.

In a large skillet over medium heat, heat the olive oil. Add the garlic and lightly sauté it for 1-2 minutes. Stir in the wine. Allow it to reduce by half.  Pour in the heavy cream and tomato sauce, bring to a simmer and cook until for about 5-10 minutes, simmering gently. Add the sun-dried tomatoes and chicken slices.
Meanwhile, cook the fettuccine al dente, according to the package directions. Drain.

When the cream sauce is at the desired consistency, stir in 1/2 cup of the Parmesan, pasta, and about ¾ of the parsley.  Season to taste with salt and pepper (and hot pepper flakes, if using).
To serve, toss the pasta with the cream sauce.  Garnish with the parsley and the remaining ¼ cup Parmesan.

Sunday, September 5, 2010

Marinara Sauce with Fresh Tomatoes

It’s no secret that psycho cooker is psycho for pasta.  It is just so tasty and versatile, not to mention affordable.  Of all the ways to cook pasta, there are few that are as pure and classic as marinara.  I have no qualms about using canned tomatoes, or even cracking open a good jarred brand.  However, making it from scratch with fresh tomatoes elevates this simple pleasure to a new elegance, and there is no better time to tackle such an endeavor than late summer, when tomatoes achieve their deepest color and flavor.


Fresh marinara is not a quick feat, and while it is not difficult, there are a lot of steps, and it requires some organization.  The recipe requires that Roma tomatoes be blanched, peeled, and seeded, which is less difficult than it sounds, but takes a good half hour to forty-five minutes.  What does this mean exactly?  Score all the tomatoes, by using a paring knife and making an X in the bottom of each one.  Then drop them into boiling water for about 20 seconds.  The tomatoes go promptly from the boiling water to a bowl of ice water for about a minute to cool down (this is called “shocking” the tomatoes, and I imagine that, as a Roma tomato, it would indeed by quite shocking).  After removing them from the ice water, the skins of the tomatoes will easily slip off with a gentle tug.  You can then remove the majority of the seeds by slicing each tomato in half and gently squeezing the halves in the palm of your hand.  This process may sound like nuisance; I personally find it incredibly comforting.  To each him own, but if you find yourself siding with the prior statement, the recipe could also be made with a large can of whole peeled plum tomatoes, and a significantly decreased cooking time. 
Marinara requires diced aromatic vegetables as its flavor base.  I recommend chopping the aromatics (onion, carrot, celery, and garlic) first, while a BIG pot of water comes to a boil for blanching the tomatoes (the water can be used again later to boil the pasta).  Chopping these vegetables in advance and setting them aside will make the whole process smoother, and it will only require a few extra minutes (we can all come up with 10 extra minutes, right?)  You could skip the carrot and celery, but I think they add a nice dimension, and balance the tomatoes’ acidity.
Did I mention how delicious this sauce is?  I let it cook for about 50 minutes, of course tasting it along the way.  It retained the flavor of raw tomatoes for so long that I was getting a little concerned, but something magical happened in the last 10 or minutes of cooking; all the flavors came together to yield a rich, deep, slow-simmered tomatoey flavor.  I gave mine a blitz with my immersion blender to make it smooth and silky.  This is not necessary, especially if you like a chunky sauce, but it also helps create the creamy color.  Despite the color, there is actually no cream in this recipe.  That is just the natural pigment of the fresh tomatoes, and I can practically guarantee that your sauce will have the same lush color.  In a world with so much chaos, it is certainly a comfort to know that simple, raw ingredients can be transformed into something so much greater than the sum of their parts with a little thought and organization, and of course, heat.  You can always rely on good, old chemical reactions.     
This recipe yields about 5 cups of sauce.  What to do with the leftovers?  Freezing it is a good option, but I have a more delicious idea.  Stay tuned (hint: it involves crispy, breaded chicken and melted cheese).   

Fresh Tomato Marinara (yields about 5 cups)

¼ cup extra virgin olive oil
3 lbs. ripe Roma tomatoes
1 medium onion, diced
1 carrot, peeled and diced
1 stalk celery, diced
4 cloves garlic, minced
2 tablespoons tomato paste
1 teaspoons dried oregano
Hot pepper flakes, to taste (optional)
1 teaspoon sugar
Kosher salt and freshly ground black pepper
½ -1 cup chicken stock, vegetable stock, water, white wine (optional)

Serving suggestion:
Freshly cooked pasta, Parmesan cheese, chopped parsley or basil

-       Dice the onion, carrot, celery, and garlic set aside. 
-       Put a large pot of water over high heat to come to a boil.  You want it to be large enough to boil your pasta.
-       While the water heats up, rinse the tomatoes, and score them on the bottom, making an X.  Use a paring knife to do this and try not to cut too deep into the tomato.  Also, set up a large bowl of ice water.
-       When the water is boiling, add about 3 tomatoes at a time with a slotted spoon, and let them boil for 20 seconds.  Remove from the boiling water, and add to the ice water.  Allow the tomatoes to sit in the ice water for one minute, and then set aside.  Repeat until all tomatoes have been blanched and chilled.
-       In a three-quart sauté pan (or larger – definitely not smaller), heat the olive oil over medium heat.  Add chopped vegetables and garlic.  Season with a big pinch of salt (about a teaspoon), pepper, and add the oregano and hot pepper flakes (if using).  Sauté until soft, stirring frequently, about 12-15 minutes total.
-       While the vegetables cook, pull the skins off the blanched tomatoes, and cut each one in half.  Place a tomato half in the palm of your hand, cut side up.  Gently the tomato gently into a fine strainer, lining a large bowl.  Squeeze each tomato half until the majority of the seeds come out, and set the tomatoes aside.  When you are done with all the tomatoes, push the pulp through the strainer with the back of a large spoon. 
-       Coarsely chop the peeled and seeded tomatoes, removing any large white cores.
-       When the vegetables have softened, add the tomato paste, and stir to combine (some chunks of tomato paste are okay), and then add all of the tomatoes and any strained juice from the seeding process.
-       Add more salt and pepper, a teaspoon of sugar, and stir to combine.  Increase heat so the sauce is gently bubbling.  Put a lid on the pot, but keep it vented.  Stir occasionally, and allow the sauce to simmer for 45 minutes to an hour.
-       If you’re sauce looks like it has reduced a lot, but it still has a raw tomato flavor (e.g it’s not done), and requires more cooking, add some liquid (½ to 1 cup).  I used chicken stock, but water, wine, or vegetable stock would work too.
-       When your sauce tastes and smells delicious (taste it for seasoning), you may want to give it a blitz with an immersion blender, but don’t obliterate it.  You could also do this with a standing blender.  I would recommend only blending about half the sauce so you maintain some texture, and make sure you don’t fill your blender more than half way, and vent it, to prevent explosions.
-       Toss your sauce with freshly cooked pasta and lots of delicious Parmesan, and maybe a little parsley.  Be sure to set aside some pasta cooking liquid before draining your pasta to help bind everything together.  A little extra virgin olive oil at the end is also delicious.  (By the way, unless you're cooking for a really big crowd, be sure to set a couple of cups of sauce aside for other applications.  Always better to set aside too much than too little.  It goes back into the pasta a lot easier than it comes out.)      

Monday, July 26, 2010

White Wine Braised Chicken


I’ve been craving roast chicken.  Bone-in, skin-on, luscious chicken.  It is far too hot to turn on my ancient oven in my tiny, non-air-conditioned apartment; however, I thought I might be able to get away with braising, without suffering the consequences of a sleepless night, as heat seeps from the oven for hours.  Plus, braising has some added benefits that roasting lacks.  A braise, by definition, requires a notable amount of liquid.  Wine just happens to be a liquid, and cooking something in wine always makes food better.  And thus, white wine braised chicken was born. 
It was a fairly simple process, which yielded very delicious results.  First, I seasoned some chicken legs with salt and pepper, and sprinkled them with flour (you could embark in a full-on dredging process if you wanted thicker sauce, but I enjoyed the gently viscous sauce that this process produced).  Then I seared the chicken until it was deeply browned, but not cooked through, and set it aside.
I sautéed sliced onions and cremini mushrooms in the remaining chicken-y goodness, followed by some minced garlic and dried thyme.  Next I added a healthy squirt of tomato paste for richness and color, as well as some diced Roma tomatoes (in the middle of July, it would be a sin to use canned tomatoes).  Then I dumped in half a mere half bottle of white wine, and nestled the seared chicken into this lovely concoction.  The whole mixture bubbled away for about a half hour, and the result was tender, moist chicken bathed in a lush sauce.  I served it on a bed of lemon-herb orzo, and I had no complaints.
What’s lemon-herb orzo, you ask?  Simply toss some freshly cooked orzo pasta with fresh lemon juice/zest, extra virgin olive oil, chopped parsley, salt and pepper, and you can see for yourself.  
White Wine Braised Chicken

4 chicken legs, split (bone in, skin on!)
1-2 tablespoons flour
1 teaspoon olive oil
½ onion, thinly sliced
6-8 oz. of cremini mushrooms, sliced
2 fat cloves garlic, minced
3 Roma tomatoes, chopped
½ teaspoon dried thyme
1 tablespoon tomato paste
1 dried bay leaf
½ bottle of dry white wine
kosher salt and freshly ground black pepper
¼ cup chopped fresh parsley

-       Preheat a large, heavy non-stick skillet over high heat* with about teaspoon of olive oil (you want it hot!)  In the meantime, liberally season chicken with kosher salt and pepper, and sprinkle with the flour.  When the olive oil is rippling and starting to smoke, add the chicken, skin side down, in a single layer.  Leave undisturbed for at least 5 minutes (it will splatter, be careful).  Flip and allow to brown on the other side, and then set aside on a plate.
-       Reduce heat to medium.  Carefully remove all but about 2 tablespoons of grease from the pan (I use wadded up paper towels).  Add sliced onions, season lightly with S &P, and sauté until they start to soften, about 5 minutes.
-       Add mushrooms, with a little more S & P, and cook until they start to brown and release their liquid, about 5 minutes.
-       Add garlic and thyme.  Cook for about a minute, and add tomato paste.  Stir, and cook for about 1 minute.
-       Add tomatoes, and little more S & P.  Cook for 2-3 minutes, until they start to soften.
-       Dump in half a bottle of dry white wine and a bay leaf; stir to combine.
-       Add the chicken back to pan.  Cover the pot with a lid, slightly vented.  Cook for 20-30 minutes (depending on how big the pieces are, and your fear of salmonella), turning chicken occasionally.
-       Add parsley and enjoy. 

*I actually switched between high and medium-high heat during this process, but my stove is awful.  Medium high would probably suffice for a decent stove.

Tuesday, June 15, 2010

The Easiest Mac and Cheese Made Easier

Last weekend was the first I spent without Warren since my return to Boulder.  We spent the majority of our time together on the weekends, and I knew the first one here without him would be particularly difficult.  Thus, I preemptively made plans to surround myself with good people and to do some cooking, as cooking is one of the few things that provide me unconditional solace right now.  Good friends help, too.  It happened to be a cold weekend, and between the weather and the circumstances, it was a perfect opportunity to delve into my favorite culinary realm: comfort food.  Between me and a friend, we plotted to prepare a veritable feast:  baked mac and cheese, roasted meatballs with a bell pepper and caper relish, oatmeal chocolate chip cookies, and a tender mixed green salad with a lemon-caper vinaigrette, julienned carrots and zucchini, chopped egg, and parmesan. 

Unfortunately, this meal never came to fruition.  I began cooking by attempting to julienne my vegetables for the salad, and this first step became my downfall.  I had just purchased a new (and evil) mandoline slicer earlier that day, and what the slicer called “julienne” was closer to the thickness of a French fry.  While I was busy hating my new mandoline, the zucchini slipped, and I sliced my thumb instead, in three places, perfectly spaced apart.  With a single look at my wound, I knew stitches were probably the best solution.  Luckily, after my burned-hand-incident, I already knew the emergency room drill.  Two hours and seven stitches later, I emerged from the ER, having survived yet another kitchen casualty.  I spent the first half of my ER visit cursing my existence (because I had no one else to blame but myself), and the second half laughing, and I’ve been trying to laugh about it ever since.  How could I make two culinary-related trips to the ER in such a short period of time?  There is only one answer:  I am ridiculous.  It just made me miss Warren so much.  He would have been sweet about it, and helped with tasks that require 2 hands (i.e. dishes), but mostly, we would have laughed about it together. 

The delicious dinner was thwarted by the trip to the ER, and instead we dined on Wendy’s.  After being flooded with adrenaline and having my thumb sewn together, nothing could have been tastier.  Although, I must admit, I will sing the praises of a Wendy’s baked potato any day.  Nonetheless, the following evening, I felt the need to cook, despite my physical limitations.  I made a modified version of my mac and cheese with tomatoes, which eliminated the need for chopping.  It was the most delicious, and easiest thing I could fathom at that point in time.  It’s sort of like pizza mac.  Plus, Warren loved this version of mac and cheese; he literally groaned with his first bite when I made it for him.  Wherever he is, maybe he can still smell it.  More importantly, if he has any inkling of what’s going on in my life, I hope he had a good laugh at me and my bum thumb.

Mac & Cheese with Tomatoes for Idiots:

Cook one pound of penne a few minutes shy of al dente.  Drain quickly (a little pasta water is good).  Return to pot.
Add one 28 oz. can of diced tomatoes (I used petite diced).
Add one pound shredded cheese (I used a combination of sharp cheddar and a mild cheddar/jack blend).  
Stir to combine; season with salt and pepper to taste; transfer to a greased 9x13 baking dish; cover allow to sit for at least 2 hours or up to overnight in the refrigerator.
Bake at 350 degrees for 40-50 minutes (perhaps with a little extra cheese on top), or until bubbling and browned.  Carefully (I don’t need a burn on top of stitches) remove from the oven.  Allow to sit for 10 minutes or so and enjoy.

Wednesday, May 26, 2010

A Tribute

My blog focuses on food, but it is a reflection of my life.  It represents my life, through the lens of food, and right now, my life and my heart are broken.  Someone passed away recently who was near and dear to many hearts, but mine especially.  I thought there was a chance we might choose to walk through this life together, but instead he left this world and my life far too early.  Now, I remain in his absence, trying to make sense of the impossible. 

I did a lot of cooking for him over the last few months.  If you look closely, he is peppered throughout my blogs posts.  I would have written about him more explicitly, but I figured there was plenty of time for that, and I didn’t want to jinx our “blossoming romance” (as he referred it to).  Warren loved my love of cooking.  He certainly seemed to love the steaming plates of food I put in front of him.  However, I think he also loved to watch me happily smash garlic cloves or see me grin over the whirring of my immersion blender.  Being the thoughtful person that he was, Warren bought me a subscription to Cooks’ Illustrated, as part of my birthday present.  As painful as it will be to receive that in the mail for the next year, I owe it to both him and myself to cook from it, and cook from it with gusto. 

Below is a recipe for vegetable lasagna, adapted from the spring issue of my birthday present.  I made it for Warren just a few weeks ago, and it was excellent, prepared just as the recipe was written.  But I thought I could make it a little bit better, with some extra vegetables and a few other minor adjustments.  I planned on making it again for him, but instead I made it in honor of him.  Forgive me for not going into detail about it.  It’s currently beyond my capacity, but I will say the Barilla brand no-boil lasagna noodles are imperative.  I used them the first time as well, and while discussing the meal with Warren, I described them as “thin and tender, but not mushy.”  Warren responded, “that’s how I describe you to other people.”  I miss you dearly, Warren.         
Vegetable Lasagna for Warren (adapted from Cooks’ Illustrated)

5 tablespoons olive oil, divided
10 oz. baby spinach
1 medium onion, diced
1 pound white button mushrooms, sliced thin
1 small carrot, julienned
1 large or 2 small zucchini, julienned
2 cloves garlic, minced
½ teaspoon red pepper flakes
1-28 oz. can crushed tomatoes
¼ cup chopped fresh basil
12 no-boil Barilla lasagna noodles
½ pound mozzarella cheese, shredded
½ pound Italian fontina cheese, shredded
3 ounces Parmesan cheese, grated
Salt and freshly ground pepper

·      I would recommend prepping all ingredients before starting.  Mix together mozzarella and fontina cheeses.  Use a mandoline slicer for the carrot and zucchini (these vegetables are additions to the original recipe.  Feel free to leave them out).
·      Preheat the oven to 375 degrees.
·      In a large skillet, heat 2 tablespoons olive oil over medium-high heat.  Add all of the spinach, and sauté until it is just wilted (about 4 minutes), and season with salt and pepper.  Set spinach aside in a colander to drain.  When cooled, squeeze out liquid gently.
·      In the same skillet, over medium high-heat, add 2 more tablespoons of olive oil.  When hot, diced onion and sauté for 10 minutes, until softened.  Add mushrooms and cook for about 8-10 minutes.  Allow all liquid to cook out of mushrooms, and let them brown.  When nicely browned, season with salt and lots of pepper.  Add to a large bowl, and add drained spinach.  Mix vegetables together.
·      In the same skillet, add last tablespoon of olive oil.  Add minced garlic and red pepper flakes.  Sauté until fragrant (about a minute).  Add crushed tomatoes.  Season with salt and pepper.  Over medium heat, stir frequently and cook for about 15 minutes.  Stir in basil.
·      Pour sauce into a large measuring cup, and add enough water to have 3 ½ cups of sauce.
·      In a greased 9x13 pan, pour ½ cup of sauce and top with 3 lasagna noodles, making sure they are not touching each other or the sides of the pan. 
·      Add one cup of mushroom-spinach mixture, topped with 1/3 of carrots and 1/3 of zucchini.  Then top with 2/3 cup of tomato sauce, 1 cup mozz/fontina, followed by 1/3 cup of parmesan.  It’s a lot measuring, but it makes for a beautiful lasagna. 
·      Follow with 2 more layers, starting with noodles.
·      Finish with a fourth layer of noodles, the rest of the sauce (about 1 cup), last cup of mozz/fontina, and ½ cup of Parmesan.
·      Seal the pan with aluminum foil.  Cook in the oven for 20 minutes.  Remove foil, and cook for 15 more minutes.  Remove when cheese is spotty-brown.  Allow to stand for 10 minutes, and serve.