Wednesday, May 26, 2010

A Tribute

My blog focuses on food, but it is a reflection of my life.  It represents my life, through the lens of food, and right now, my life and my heart are broken.  Someone passed away recently who was near and dear to many hearts, but mine especially.  I thought there was a chance we might choose to walk through this life together, but instead he left this world and my life far too early.  Now, I remain in his absence, trying to make sense of the impossible. 

I did a lot of cooking for him over the last few months.  If you look closely, he is peppered throughout my blogs posts.  I would have written about him more explicitly, but I figured there was plenty of time for that, and I didn’t want to jinx our “blossoming romance” (as he referred it to).  Warren loved my love of cooking.  He certainly seemed to love the steaming plates of food I put in front of him.  However, I think he also loved to watch me happily smash garlic cloves or see me grin over the whirring of my immersion blender.  Being the thoughtful person that he was, Warren bought me a subscription to Cooks’ Illustrated, as part of my birthday present.  As painful as it will be to receive that in the mail for the next year, I owe it to both him and myself to cook from it, and cook from it with gusto. 

Below is a recipe for vegetable lasagna, adapted from the spring issue of my birthday present.  I made it for Warren just a few weeks ago, and it was excellent, prepared just as the recipe was written.  But I thought I could make it a little bit better, with some extra vegetables and a few other minor adjustments.  I planned on making it again for him, but instead I made it in honor of him.  Forgive me for not going into detail about it.  It’s currently beyond my capacity, but I will say the Barilla brand no-boil lasagna noodles are imperative.  I used them the first time as well, and while discussing the meal with Warren, I described them as “thin and tender, but not mushy.”  Warren responded, “that’s how I describe you to other people.”  I miss you dearly, Warren.         
Vegetable Lasagna for Warren (adapted from Cooks’ Illustrated)

5 tablespoons olive oil, divided
10 oz. baby spinach
1 medium onion, diced
1 pound white button mushrooms, sliced thin
1 small carrot, julienned
1 large or 2 small zucchini, julienned
2 cloves garlic, minced
½ teaspoon red pepper flakes
1-28 oz. can crushed tomatoes
¼ cup chopped fresh basil
12 no-boil Barilla lasagna noodles
½ pound mozzarella cheese, shredded
½ pound Italian fontina cheese, shredded
3 ounces Parmesan cheese, grated
Salt and freshly ground pepper

·      I would recommend prepping all ingredients before starting.  Mix together mozzarella and fontina cheeses.  Use a mandoline slicer for the carrot and zucchini (these vegetables are additions to the original recipe.  Feel free to leave them out).
·      Preheat the oven to 375 degrees.
·      In a large skillet, heat 2 tablespoons olive oil over medium-high heat.  Add all of the spinach, and sauté until it is just wilted (about 4 minutes), and season with salt and pepper.  Set spinach aside in a colander to drain.  When cooled, squeeze out liquid gently.
·      In the same skillet, over medium high-heat, add 2 more tablespoons of olive oil.  When hot, diced onion and sauté for 10 minutes, until softened.  Add mushrooms and cook for about 8-10 minutes.  Allow all liquid to cook out of mushrooms, and let them brown.  When nicely browned, season with salt and lots of pepper.  Add to a large bowl, and add drained spinach.  Mix vegetables together.
·      In the same skillet, add last tablespoon of olive oil.  Add minced garlic and red pepper flakes.  Sauté until fragrant (about a minute).  Add crushed tomatoes.  Season with salt and pepper.  Over medium heat, stir frequently and cook for about 15 minutes.  Stir in basil.
·      Pour sauce into a large measuring cup, and add enough water to have 3 ½ cups of sauce.
·      In a greased 9x13 pan, pour ½ cup of sauce and top with 3 lasagna noodles, making sure they are not touching each other or the sides of the pan. 
·      Add one cup of mushroom-spinach mixture, topped with 1/3 of carrots and 1/3 of zucchini.  Then top with 2/3 cup of tomato sauce, 1 cup mozz/fontina, followed by 1/3 cup of parmesan.  It’s a lot measuring, but it makes for a beautiful lasagna. 
·      Follow with 2 more layers, starting with noodles.
·      Finish with a fourth layer of noodles, the rest of the sauce (about 1 cup), last cup of mozz/fontina, and ½ cup of Parmesan.
·      Seal the pan with aluminum foil.  Cook in the oven for 20 minutes.  Remove foil, and cook for 15 more minutes.  Remove when cheese is spotty-brown.  Allow to stand for 10 minutes, and serve.

Monday, May 10, 2010

Linguine with Cauliflower and Bacon


This is a new twist on an old favorite:  linguine with cauliflower and bacon.  In the fall, I wrote a post about pasta with cauliflower, green olives, and almonds.  It was a lovely dish, with a perfect balance of savory flavors and textures.  This recipe is similar:  pasta with beautifully caramelized cauliflower, swathed in garlic and hot pepper flakes.  However, instead of saltiness from green olives, and crunch from toasted almonds, bacon takes over, boasting both salt and crunch. 
I will not try to be coy about it: this is not a low fat dish.  I started this by rendering chopped bacon in a pan.  When it was crisp, I set it aside, and proceeded to cook the cauliflower in some of the remaining bacon grease.  However, the cauliflower wasn’t caramelizing to my specifications, so I proceeded to add some butter to the pan.  Later, while tossing the pasta with the cauliflower, it seemed dry, and I added a drizzle of olive oil.  And, of course, the pasta is finished with the crispy bacon and feathery ribbons of parmesan. I’m sure you won’t be surprised to hear that this was absolutely delicious. When I concocted this idea in my food-obsessed brain, I was most excited about the flavor the bacon grease would impart upon the cauliflower.  However, this did not fully live up to my expectations.  I made it a second time a week later, and cooked the cauliflower in olive oil, thus saving my arteries from unnecessary saturated fats, and difference was minimal.  Nonetheless, there is no substitute for the crispy bacon garnish.  Despite all the olive oil, and butter, (and potentially, bacon grease), if you follow the measurements below, this dish is loaded with cauliflower.  Cauliflower, in turn, is loaded with vitamin C and fiber, thus negating some concerns you may have regarding the bacon.  Personally, I think those crispy, salty, meaty morsels are worth their weight in gold.    
Linguine with Cauliflower and Bacon (makes 2 large servings)

1/3 pound bacon, chopped
1 ½ pounds cauliflower, chopped
1/3-1/2 pound pasta
2 cloves garlic, minced
½ hot pepper flakes
pepper
salt
¼ cup parsley, chopped
½ tablespoon butter (optional)
olive oil
2 tablespoons of water

·      Preheat a large non-stick skillet over medium heat, cook the bacon for about 8-10 minutes, stirring often, and until browned and crisp.
·      Remove crisped bacon from the pan and drain on a plate lined with paper towel.  Set aside (and try not to eat too much of it).
·      For the high fate version: using paper towels, carefully mop up all but 2-3 tablespoons of bacon grease.  For the lower fate version, wipe up all of the bacon grease and add 2-3 tablespoons of olive oil to the pan. 
·      Increase the heat to medium high, and add the cauliflower.  Stir to even goat with the olive oil or bacon grease.  Allow to cook, for about 20 minutes total.  Stir every 5-7 minutes, leaving it undisturbed when possible so it will caramelize.  If it isn’t browning well, add about ½ tablespoon of butter (it has a lower smoke point than olive oil/bacon grease, thus it assists with browning).
·      In the last 5 or so minutes of cooking, add minced garlic, hot pepper flakes, salt and pepper.
·      Meanwhile, cook linguine in a pot of boiling water according to package directions.  Drain linguine when it’s ready, reserving some of the pasta cooking water.  Or you can use tongs and pull the linguine directly from the pot and add to the pan of cauliflower.
·      Toss the linguine with the cauliflower and parsley.  Add a few tablespoons of pasta cooking water and/or a drizzle of olive oil if the pasta is dry.
·      Plate pasta and garnish with reserved bacon and parmesan cheese.

Wednesday, April 28, 2010

Mujadra


April is not exactly a joyous time of year for graduate students.  The weather is getting nicer, yet the time you spend studying only increases.  At this juncture, I feel like I worry so excessively about school that I absolutely refuse to worry about how I’m going to be fed.  During times like these, I want to have a big pot of food in my refrigerator, on call for the demands of my stomach.  Mujadra is perfect for such desperate circumstances.  In a nutshell, it is vegetarian, Middle Eastern, comfort food.  It also happens to be nutritious and dirt-cheap.  It consists of just a handful of ingredients: lentils and rice, seasoned with sautéed onions and cumin, all cooked together in stock.  I prefer chicken stock, but of course vegetable stock is would work, as well.  According to the recipe, you can also use water, but I cannot vouch for that. 
I understand if you think it sounds boring.  In fact, I’ll admit it: it sounds boring.  However, it happens to be so delicious and satisfying.  I’m not sure what happens in that pot while it cooks, but there must be little magicians housed in those lentils because somehow that boring ingredient list creates a sum that is much greater than its parts.  Give your mujadra a generous spritz of fresh lemon (or top with caramelized onions if you have the time), and enjoy this simple pleasure, that’s both easy on your stomach and your pocket.  The leftovers will provide abundant repeat performances. 
Mujadra (recipe courtesy of my mom)

1 cup dried lentils (I prefer green French lentils, but my mom always uses brown lentils)
1 cup white rice
1 medium onion, chopped
2 tablespoons olive oil
1½ teaspoons ground cumin
4 cups stock or water (I use two 14 oz. cans of chicken stock and make up the difference with water)
Kosher salt and freshly ground pepper

Lemon wedges or carmelized onions, for garnish

·      In a large pot over medium heat, lightly sauté onion in olive oil until tender, but not brown (about 10 minutes). 
·      Add lentils and sauté for 1 minute, so that lentils are evenly coated with the olive oil.  Add 4 cups liquid of choice and bring to a boil.
·      Reduce heat, cover and simmer for 20 minutes (25-30 minutes in the mountains).
·      Add rice, cumin, a big pinch of salt, and lots of pepper.
·      Simmer, covered, for 25 - 40 minutes until tender.
·      Serve with lemon wedges or caramelized onions. 

Monday, April 26, 2010

Chicken Fajitas


I apologize if you’re tired of hearing me gush about Tastespotting, but it truly is the best website ever.  I don’t necessarily use or even look at the recipes; the pictures are enough inspiration on their own.  As a cook, it’s easy to get boxed in by your own inherent tastes.  You develop a moderate sized repertoire of dishes that you like and you do well, and that’s about all you cook.  Tastespotting can free you of this cycle.  You browse the pictures; you drool a little; you roll your eyes at stupid captions; eventually, you see something that is outside of your repertoire, but you unconsciously always wanted to make.  Recently, it was fajitas.  I saw a picture of some lovely chicken fajitas, and I could not figure out why I never make them.  I saw the picture on Monday, with a plan to make fajitas on Friday night.  They were the light at the end of my weeklong tunnel.  I did look at the recipe accompanying the inspiring photo, but I wasn’t thrilled.  So I made one up.  Fajitas are pretty straight forward, and mine came out quite well.  If you made up a recipe for fajitas, I’m sure they would be tasty, too.  But I owe Tastespotting for planting the idea in my brain. 
My fajitas were made with thinly sliced chicken, onion, and poblano peppers.  The mixture was marinated in a kitchen-sink-type of situation:  lime juice, lemon juice, chili powder, cumin, hot pepper flakes, garlic, oregano, thyme, Frank’s red hot, and oil.  The only thing I would do differently is reduce the oil, and add some fresh jalapeno.  They were certainly tasty after bathing in all of that olive oil, but I don’t think I would have missed it.  I decided to pull out the big guns, and make my own condiments: grape tomato pico de gallo, and guacamole.  Both were simple and tasty, and basically comprised of the same ingredients, swapping tomatoes and avocados.  Next time you’re looking to have a raging Friday night, you may hear chicken fajitas calling your name. 
Chicken Fajitas

Marinade:
Juice of 2 limes
Juice of ½ lemon
3 tablespoons Frank’s Red Hot sauce
2 cloves garlic, grated
1 teaspoon hot pepper flakes
1 teaspoon chili powder
1 teaspoon cumin
½ teaspoon dried thyme
½ teaspoon dried oregano
½ teaspoon salt
½ cup oil (I used a mix of olive oil and canola.  Next time I’d try just using a ¼ cup)

1-1¼ chicken breast, sliced thin
1 poblano pepper, sliced thin
1 onion, sliced thin

Pico de Gallo:
1 pint of grape tomatoes, halved
1½ tablespoons finely diced red onion
½ large jalapeno, seeded and finely diced
1 tablespoon chopped fresh cilantro
Juice of one lime
Salt and pepper

Guacamole:
2 ripe avocados, diced
1½ tablespoons finely diced red onion
½ large jalapeno, seeded and finely diced
1 tablespoon chopped fresh cilantro
Juice of one lemon
A few splashes of Frank’s red hot sauce
Salt

Accompaniments:
Flour tortillas
Shredded cheese

·      Prep your chicken, poblano, and onion.  Add to a gallon sized Ziploc bag.
·      Make the marinade by whisking together all of the ingredients besides the oil.  When everything is well incorporated, slowly whisk in the oil.  Pour the marinade over the chicken mixture.
·      Seal the bag, and allow the marinade to evenly distribute throughout the bag.  Marinate the mixture in the refrigerator, turning the bag every 15 minutes or so.  Marinate for at least an hour. [I recommend stowing the bag in a baking dish, rather than directly on your refrigerator shelf in case there is a leak.]
·      In the meantime, prepare the pico de gallo by combining all listed ingredients.  Do this about ½ hour before you are ready to start cooking the chicken to let the flavors combine.
·      Just before you are ready to cook, prepare the guacamole by mixing all of the ingredients.  The easiest way to prepare the avocado:
o   Carefully cut the avocado in half by moving your knife slowly around the seed. 
o   Once halved, hold the avocado in your palm and give the seed a careful whack with your knife.  The knife should go into the avocado about a ¼ inch so you are able to pull out the seed from the flesh. 
o   Then carefully remove the seed from the blade (if this scares you, you can scoop it out with a big spoon, but you’ll lose some of your avocado).
o   While still in the skin, cross hatch the avocado flesh with your knife, and then scoop out the cubes with a large spoon.
·      Then add everything else to the avocado, and stir to combine, mashing the avocado slightly, until you’ve reached your desired consistency.
·      When you’re ready to cook the chicken, preheat a large skillet (preferably non-stick), dry, over high heat. 
·      When it is HOT (after about 3-5 minutes), add the chicken, peppers, and onions in an even layer (use tongs, instead of dumping the contents of the bag into the pan, so you leave the excess oil in the bag).
·      Cook, stirring frequently until the chicken is cooked through and the peppers and onions have softened.
·      When the chicken is ready, heat tortillas by wrapping them in paper towel, lightly sprinkled with water, and heat in the microwave for 20-30 seconds.
·      Serve chicken with tortillas, shredded cheese, pico de gallo, and guacamole. 


Saturday, April 17, 2010

Tomato Soup with Grilled Ham and Cheese Sandwiches

April is National Grilled Cheese Month!  I have no idea who declares these silly food holidays, or why, but I will embrace any excuse to eat a grilled cheese sandwich.  This very special month-long holiday was revealed to me via Tastespotting, and it was later confirmed by another reputable source.  Such a momentous occasion inspired me to make a grilled cheese sandwich’s perfect companion: tomato soup.  I suppose there’s nothing wrong with a little old school canned tomato soup.  Amy’s Kitchen makes a lovely chunky tomato bisque.  However, it’s entirely feasible to whip up a whole pot of your own (significantly better) tomato soup for the same cost as a dinky can of Amy’s. 
You will find that the ingredients for this soup are similar to marinara sauce.  In truth, the final product sort of resembles marinara soup.  Personally, I don’t think that this is a bad thing.  It’s lovely as soup, and when you get sick of soup, you can add it to your favorite  pasta.  May I suggest sautéed zucchini and grape tomatoes with spaghetti?  Perhaps a soup that tastes like pasta sauce doesn’t appeal to you.  That’s fine; you’re can opener awaits.  I, however, thought it was delicious, and ate it with grilled ham and cheese sandwiches.  Yes, I veered off my original grilled cheese course, but my sandwich could be considered a first cousin of grilled cheese:  crusty Italian bread, sharp provolone, Black Forest ham, and baby spinach.  In my defense, it was heavy on the cheese, and light on the ham.  I don’t think this combination should trigger too many complaints. 
Tomato Soup (adapted from Mark Bittman’s recipe)
  
2 tablespoons olive oil
1 carrot, diced
1 stalk celery, diced
½ onion, diced
1 clove garlic, minced
Salt and pepper
28 oz. can whole peeled tomatoes, with juice
½ teaspoon dried thyme, crushed
1 cup reduced-sodium chicken stock
¼ to ½ cup half and half

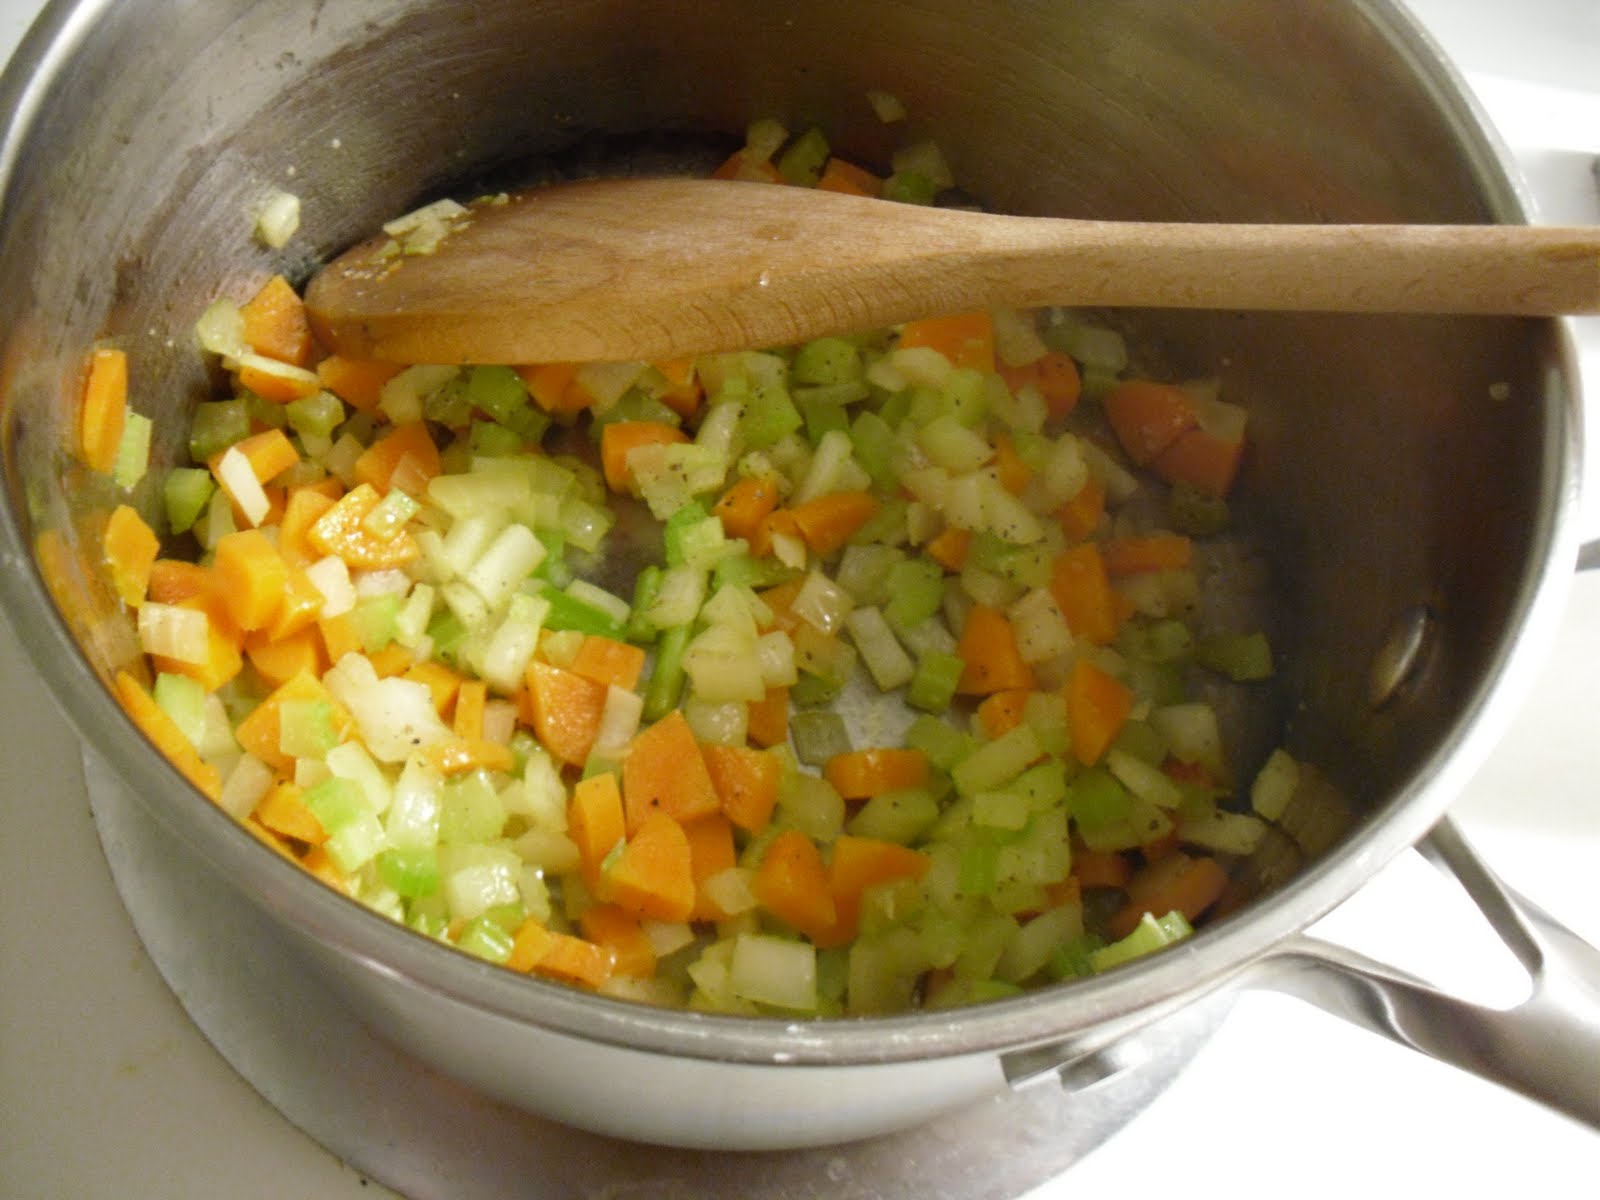
·      In a medium sized saucepan, heat the olive oil over medium heat.  Once hot, add the carrot, celery, onion, and garlic.  Season with salt and pepper, and sauté, stirring frequently, until the vegetables are tender (at least 10 minutes). 
·      Add the can of tomatoes, dried thyme, and little more salt and pepper.  Increase heat so the mixture starts to boil gently, and then reduce the heat to a simmer.  Cook for about 10 minutes, stirring with a wooden spoon, and breaking up some of the tomatoes.
·      Add the chicken stock, and simmer for another 10 minutes.  Taste for seasoning, and re-season if necessary.
·      Using an immersion blender, blend the soup until it is smooth, but leave some chunks if desired.  Then add the half and half.  Heat the soup through and serve with grilled sandwich of choice.